Nutrition Facts
Servings 1
- Amount Per Serving
- Calories 120kcal
If you're anything like me, nothing beats a fresh loaf of bread right out of the oven. There’s a magic that fills the room as it bakes, and the warm scent is enough to make anyone feel at home. I love pairing this simple bread with a warming bowl of soup or slathering it with some butter and jam. Whether you're making a hearty beef stew or a light salad, this bread is perfect. It’s simple enough for a weeknight dinner yet fancy enough to serve at a gathering.
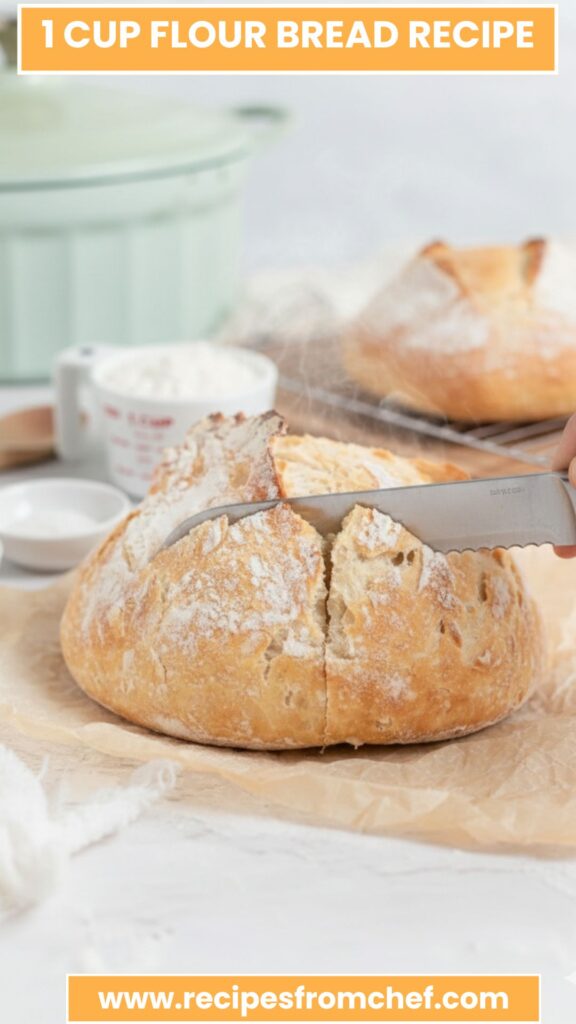
There’s something satisfying about creating bread from scratch, especially when it requires just a cup of flour. This recipe might catch you by surprise; it’s easy to make and demands minimal ingredients while yielding delightful results. With a crispy crust and chewy interior, it’s a bread you'll want to repeat.
This bread is a classic example of simplicity and flavor. It has a mildly nutty taste from the flour, enhanced by the subtle sweetness of fermentation. As it bakes, the crust develops a warm, golden hue that's both inviting and satisfying, while the inside remains soft with that quintessential bread texture. Its versatility allows it to round out both sweet and savory dishes beautifully.
What sets this bread apart is how straightforward the process is while still yielding exceptional flavor and texture. Many recipes require complex techniques or countless ingredients, but mine focuses on simplicity without sacrificing taste. The long resting time allows the dough to develop flavor naturally, resulting in unpredictably delightful bread with minimal effort. This method is perfect for those who want freshly baked bread with a fraction of the effort typically involved.
- 120 grams all-purpose flour
- 3 grams Diamond Crystal kosher salt (other salts can be used; see notes)
- 1 gram instant yeast (active dry works too)
- 100 grams cool water
- Optional flavor booster: 1 teaspoon honey (adds a subtle sweetness)
- Optional flavor booster: 1 tablespoon olive oil (enhances richness and texture)

Making this bread is straightforward and requires a bit of patience for the resting period. The process truly highlights that with just a cup of flour and a few pantry staples, you can create something extraordinary.
In a mixing bowl, stir together all-purpose flour, kosher salt, and instant yeast. Make sure the yeast and salt are evenly distributed throughout the flour to ensure consistent rising.
Create a small well in the center of the dry mixture. Pour in the cool water, and if you're adding honey or olive oil, now’s the time! Mix the ingredients thoroughly using a spatula or your hands until well combined. Don’t be alarmed if it looks shaggy and messy; that's how it should be at this stage.
Cover the bowl with plastic wrap or a clean kitchen towel. Let the dough rise at room temperature for 12-18 hours. If you're feeling ahead of the game, you can refrigerate it for up to five days. You’re aiming for the dough to double or even triple in size with a bubbled, flat surface.
About an hour before you're ready to bake, preheat your oven to 450°F. During this time, place your Dutch oven inside to preheat for 30 minutes. This ensures that your bread will develop that coveted crust.
While the Dutch oven preheats, generously flour a clean countertop. Being careful not to deflate it, release the dough from the bowl onto the floured surface. Lightly dust the top with flour so your hands won’t stick. Gently stretch it into a loose square.
Now comes the fun! Fold the corners of your dough up and over to form a round shape, pinching the seams together. Flip it over so the seam side is down. Using your hands, rotate the dough against the counter, tucking it underneath itself to create a nice tension on top.
Use a bench scraper to help lift your dough onto a piece of flattened parchment. Dust the top with flour, cover it with a kitchen towel, and let it rest until your Dutch oven is fully preheated.
Carefully remove the hot Dutch oven. Take off the lid and score the top of your loaf with a sharp knife. Grab the parchment paper, lift the dough into the pot, and put the lid back on. Bake with the lid on for 20 minutes, then remove the lid and continue baking for another 10 minutes or until the top is a beautiful golden brown.
Carefully transfer your baked bread to a cooling rack, and let it cool completely before slicing into it. Letting it rest enhances the texture and flavor further—waiting is the hardest part!
- Hydration Level: Adjust the water slightly based on the flour you use. If your dough feels too dry, add a tiny bit more water.
- Perfect Timing: Aim for a long, slow rise for the best flavor. Don’t be in a rush to bake it early!
- Flavor Experimentation: Feel free to add herbs like rosemary or garlic for a fun twist. Mix it into the dough during the initial stage.
- Proper Scoring: Scoring not only allows steam to escape but also makes for a beautiful presentation.
- Dutch Oven Alternatives: If you don’t have a Dutch oven, use a pizza stone or a cast-iron skillet with a lid, ensuring heat circulates properly.
To store your freshly baked bread, let it cool completely and place it in a paper bag or wrapped in a kitchen towel. This keeps the crust nice and crunchy while preventing moisture from making it soggy. For longer storage, slice the bread and freeze it in an airtight container or freezer bag—just take out slices as you need them!
Each slice of this bread, depending on the thickness, generally has around 120 calories, along with modest amounts of carbohydrates and small trace amounts of protein. While it's not a superfood, it's an excellent low-effort homemade option that fills the kitchen with happiness.
1. For Breakfast: Top it with butter and homemade strawberry jam for a delightful start to your day.
2. With Soups: Serve alongside a hearty vegetable or chicken soup to round out your meal.
3. Sandwich Base: Use it as a base for your favorite sandwich creations, from classic turkey to a caprese delight with fresh mozzarella and basil.
4. Garlic Bread Twist: Smother it with garlic butter and herbs to create a fabulous garlic bread side for pasta dishes.
5. Bruschetta: Toast slices with olive oil and top them with diced tomatoes, basil, and balsamic for a fresh appetizer.
1. All-Purpose Flour:Bread flour can be used instead to create a chewier texture.
2. Kosher Salt: If you have table salt, reduce it to about 2 grams since table salt is much finer.
3. Instant Yeast: You can use active dry yeast by activating it in warm water before mixing.
4. Cool Water: Use room temperature water if you don't have any cool water available.
5. Olive Oil: If olive oil is out, vegetable oil can work, but olive is preferable for flavor.

Making bread from just a cup of flour is not only feasible but also incredibly satisfying. With simple steps and accessible ingredients, you can whip up a loaf that can be transformed into any number of delightful dishes. Whether you’re enjoying slices for breakfast or pairing it with dinner, this recipe will quickly become a staple. So, roll up your sleeves and start your own baking adventure—the aroma of freshly baked bread is only a few simple steps away!
If you're anything like me, nothing beats a fresh loaf of bread right out of the oven. There’s a magic that fills the room as it bakes, and the warm scent is enough to make anyone feel at home. I love pairing this simple bread with a warming bowl of soup or slathering it with some butter and jam. Whether you're making a hearty beef stew or a light salad, this bread is perfect. It’s simple enough for a weeknight dinner yet fancy enough to serve at a gathering.
Servings 1
- Hydration Level: Adjust the water slightly based on the flour you use. If your dough feels too dry, add a tiny bit more water.
- Perfect Timing: Aim for a long, slow rise for the best flavor. Don’t be in a rush to bake it early!
- Flavor Experimentation: Feel free to add herbs like rosemary or garlic for a fun twist. Mix it into the dough during the initial stage.
- Proper Scoring: Scoring not only allows steam to escape but also makes for a beautiful presentation.
- Dutch Oven Alternatives: If you don’t have a Dutch oven, use a pizza stone or a cast-iron skillet with a lid, ensuring heat circulates properly.

I'm Rosa Crumley, a registered dietitian and food enthusiast from Pittsburgh, PA. With a love for chef-inspired recipes and a passion for creating delicious, balanced meals, I aim to bring gourmet flavors into your home kitchen. Through my blog, I share simple, flavorful dishes that anyone can cook!