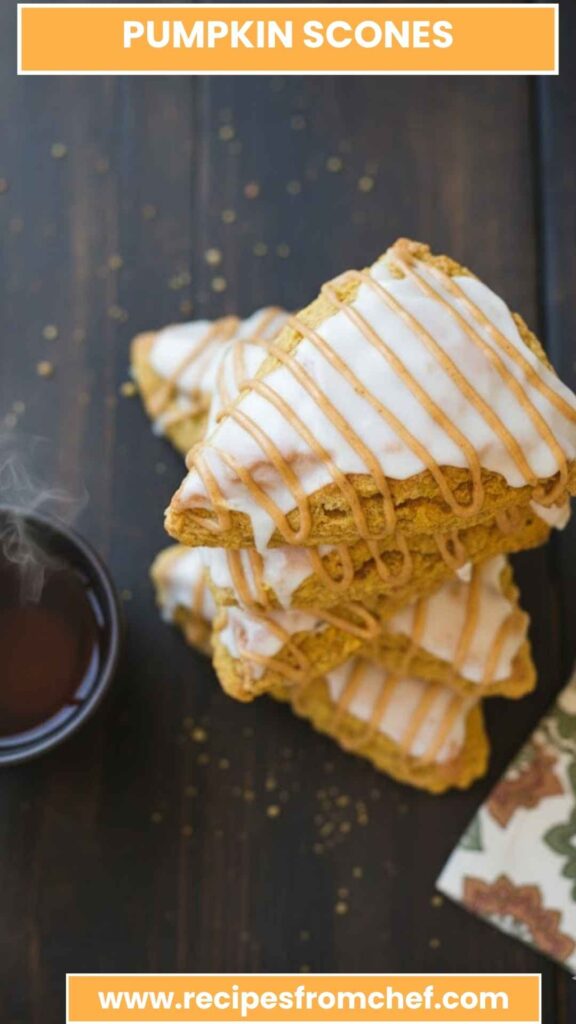
When I think of the perfect pairing for pumpkin scones, my mind drifts to a warm cup of spiced chai tea or a creamy latte. The combo of a slightly sweet pastry and a comforting beverage brings me back to cozy fall mornings. Imagine sitting on your porch, sipping a delicious chai while enjoying the fluffy texture and rich flavors of homemade pumpkin scones. It’s a lovely experience that elevates your morning routine.
Let’s dive into why making your own scones is a fantastic idea. First off, there’s the comfort of knowing exactly what’s in your food. Forget processed ingredients; these scones focus on freshness and flavor. Secondly, there’s a certain joy in whipping up baked goods from scratch. The smell wafting through your house while baking? Pure bliss.

My Pumpkin Scone Journey
I’ve always had a love-hate relationship with baking. It usually goes like this: I love the idea, but the execution can be tricky. One day, during a family brunch at Starbucks, I had one of their famous pumpkin scones. The outside was wonderfully crisp, and the inside was just the right kind of soft. I knew I had to recreate this experience at home.
The secret was all in the ingredients. I spent some time experimenting with flavors and textures to nail down the perfect recipe. I sourced high-quality spices and, of course, used real pumpkin puree (not the canned stuff directly from the can—it needs to be chilled before you mix it in). Each ingredient plays a role, and I excitedly want to share my findings with you!
Ingredients
Here’s what you’ll need for these delightful pumpkin scones:
Scones:
- 1/2 cup unsalted butter, cold, diced into 1/2-inch cubes
- 2 1/4 cups all-purpose flour, sifted
- 1/4 cup packed light brown sugar
- 3 tablespoons raw cane sugar
- 1/2 teaspoon fine sea salt
- 2 teaspoons baking powder
- 1/4 teaspoon baking soda
- 1 teaspoon ground cinnamon
- 1/8 teaspoon ground cloves
- 1/2 teaspoon freshly grated nutmeg
- 1/2 cup + 1 tablespoon canned pumpkin puree, chilled (please avoid chilling in the can)
- 3 1/2 tablespoons buttermilk
- 1 large egg, at room temperature
- 1 teaspoon pure vanilla extract
- 1 tablespoon honey
- 1 tablespoon half and half
- 1/4 teaspoon ground cardamom
Glaze:
- 2 tablespoons half and half (add more if needed)
- 1 cup powdered sugar
Pumpkin Icing:
- 1 tablespoon pumpkin puree
- 3/4 cup powdered sugar
- 1/4 teaspoon ground cinnamon
- 1/8 teaspoon freshly grated nutmeg
- 1/8 teaspoon ground cloves
- 1 tablespoon half and half
- 1/2 teaspoon maple syrup

How to Make Pumpkin Scones: Step-by-Step
Baking doesn’t have to be daunting. I’m here to break it down into uncomplicated steps.
Step 1: Prepare Your Ingredients
Start by gathering everything. Chop your cold, unsalted butter into 1/2-inch cubes. Sift your flour, and measure out the spices. Set the pumpkin puree in the fridge to chill if it’s not already. It sets the stage for a moist scone.
Step 2: Mix Dry Ingredients
In a large mixing bowl, combine the all-purpose flour, brown sugar, raw cane sugar, salt, baking powder, baking soda, and all those inviting spices—cinnamon, cloves, nutmeg, and cardamom. The fragrance is already incredible. Mix them well, ensuring that each spoonful feels balanced with sweetness and spice.
Step 3: Cut in Butter
Now, add your cold butter cubes to the flour mixture. Use a pastry cutter or your fingers to work the butter into the flour. You want to get it to a crumbly texture; think of little pea-sized pieces of butter scattered in the mixture. This step is vital for achieving that flaky texture we love in scones.
Step 4: Combine Wet Ingredients
In another bowl, whisk together the chilled pumpkin puree, egg, buttermilk, honey, vanilla, and half and half. It will look rich and creamy. Make sure your ingredients are at room temperature; this will help everything combine seamlessly.
Step 5: Bring It All Together
Pour the liquid mixture into your dry ingredients. Gently fold in, mixing just until combined. It’s easy to overwork the dough, so be gentle. It might look a bit rough, but that’s okay; this is what makes the scones unique and tender.
Step 6: Shape the Dough
Flour a clean surface and turn the dough out. Gently pat it into a round disk about 1-inch thick. Using a sharp knife, cut the disk into wedges—like a pizza. Place these on a parchment-lined baking sheet, leaving space between them.
Step 7: Bake
Preheat your oven to 425°F (220°C). Bake the scones for about 15-20 minutes until they’re lightly golden. Your kitchen will smell divine. Allow getting them out of the oven to cool slightly.
Step 8: Make the Glaze
Whisk together powdered sugar and half and half until smooth. It should have a drippy consistency. Drizzle it over the warm scones for a sweet finish.
Step 9: Make the Pumpkin Icing
For that extra pumpkin flair, mix the pumpkin puree with powdered sugar, spices, half and half, and maple syrup in a bowl. Adjust the consistency to your liking—thin enough to drizzle but thick enough to hold its shape.
Step 10: Frost and Serve
Once the scones have cooled slightly, frost them with the pumpkin icing and glaze.
Recipe Notes
- Unsalted Butter: I always opt for unsalted butter to control the saltiness in my baked goods. The cold butter helps create a tender scone.
- Pumpkin Puree: Real pumpkin purée is crucial. Please ensure it’s chilled before mixing in. It affects the moisture content significantly.
- Buttermilk: This ingredient adds acidity, which helps tenderize the scones and gives them a delightful flavor.
- Freezing Scones: If you have leftovers, freeze them before baking. Just prepare as directed, then seal them in an airtight container. When ready, bake them from frozen, adding a few extra minutes to the cooking time.
Recipe Variations
Want to mix things up? Here are a few options to consider:
1. Chocolate Chip Pumpkin Scones: Add a cup of chocolate chips to your batter for a sweet, indulgent twist.
2. Nutty Crunch: Incorporate chopped walnuts or pecans for added texture.
3. Fruit Flavors: Substitute some pumpkin with fresh cranberries or raisins for a tart pop.
4. Gluten-Free: Use a gluten-free all-purpose flour blend, and ensure all other ingredients are also gluten-free.
5. Spicy Version: Add a teaspoon of ginger for a kick or even some ground black pepper for a surprising depth of flavor.
6. Maple Glaze: Instead of a pumpkin icing, try a maple glaze by swapping pumpkin puree with pure maple syrup.

Conclusion
As we wrap this up, I hope you’re inspired to leap into the kitchen and whip up these pumpkin scones. They embody the cozy flavors of fall while being incredibly simple to prepare. The steps are straightforward, and the results are wonderfully satisfying. Whether serving them at brunch, gifting them to friends, or treating yourself with a delicious snack, these scones offer a slice of joy that’s hard to resist.
So, roll up your sleeves and bring some warmth to your kitchen. Recreate that Starbucks magic, and enjoy your homemade treats with family and friends. After all, nothing beats the comforting aroma of fresh scones baked just the way you like them. Happy baking!
You’ll also like the following Recipes!

Pumpkin Scones – Recipes From Chef
Description
When I think of the perfect pairing for pumpkin scones, my mind drifts to a warm cup of spiced chai tea or a creamy latte. The combo of a slightly sweet pastry and a comforting beverage brings me back to cozy fall mornings. Imagine sitting on your porch, sipping a delicious chai while enjoying the fluffy texture and rich flavors of homemade pumpkin scones. It’s a lovely experience that elevates your morning routine.
Ingredients
Scones:
Glaze:
Pumpkin Icing:
Instructions
Step 1: Prepare Your Ingredients
-
Start by gathering everything. Chop your cold, unsalted butter into 1/2-inch cubes. Sift your flour, and measure out the spices. Set the pumpkin puree in the fridge to chill if it’s not already. It sets the stage for a moist scone.
Step 2: Mix Dry Ingredients
-
In a large mixing bowl, combine the all-purpose flour, brown sugar, raw cane sugar, salt, baking powder, baking soda, and all those inviting spices—cinnamon, cloves, nutmeg, and cardamom. The fragrance is already incredible. Mix them well, ensuring that each spoonful feels balanced with sweetness and spice.
Step 3: Cut in Butter
-
Now, add your cold butter cubes to the flour mixture. Use a pastry cutter or your fingers to work the butter into the flour. You want to get it to a crumbly texture; think of little pea-sized pieces of butter scattered in the mixture. This step is vital for achieving that flaky texture we love in scones.
Step 4: Combine Wet Ingredients
-
In another bowl, whisk together the chilled pumpkin puree, egg, buttermilk, honey, vanilla, and half and half. It will look rich and creamy. Make sure your ingredients are at room temperature; this will help everything combine seamlessly.
Step 5: Bring It All Together
-
Pour the liquid mixture into your dry ingredients. Gently fold in, mixing just until combined. It's easy to overwork the dough, so be gentle. It might look a bit rough, but that’s okay; this is what makes the scones unique and tender.
Step 6: Shape the Dough
-
Flour a clean surface and turn the dough out. Gently pat it into a round disk about 1-inch thick. Using a sharp knife, cut the disk into wedges—like a pizza. Place these on a parchment-lined baking sheet, leaving space between them.
Step 7: Bake
-
Preheat your oven to 425°F (220°C). Bake the scones for about 15-20 minutes until they're lightly golden. Your kitchen will smell divine. Allow getting them out of the oven to cool slightly.
Step 8: Make the Glaze
-
Whisk together powdered sugar and half and half until smooth. It should have a drippy consistency. Drizzle it over the warm scones for a sweet finish.
Step 9: Make the Pumpkin Icing
-
For that extra pumpkin flair, mix the pumpkin puree with powdered sugar, spices, half and half, and maple syrup in a bowl. Adjust the consistency to your liking—thin enough to drizzle but thick enough to hold its shape.
Step 10: Frost and Serve
-
Once the scones have cooled slightly, frost them with the pumpkin icing and glaze.
Nutrition Facts
Servings 8
- Amount Per Serving
- Calories 413kcal
- % Daily Value *
- Total Fat 13.7g22%
- Saturated Fat 6.2g31%
- Cholesterol 44mg15%
- Sodium 231mg10%
- Total Carbohydrate 66g22%
- Dietary Fiber 2g8%
- Sugars 35g
- Protein 8g16%
* Percent Daily Values are based on a 2,000 calorie diet. Your daily value may be higher or lower depending on your calorie needs.
Note
- Unsalted Butter: I always opt for unsalted butter to control the saltiness in my baked goods. The cold butter helps create a tender scone.
- Pumpkin Puree: Real pumpkin purée is crucial. Please ensure it's chilled before mixing in. It affects the moisture content significantly.
- Buttermilk: This ingredient adds acidity, which helps tenderize the scones and gives them a delightful flavor.
- Freezing Scones: If you have leftovers, freeze them before baking. Just prepare as directed, then seal them in an airtight container. When ready, bake them from frozen, adding a few extra minutes to the cooking time.