Nothing says comfort like a warm slice of fresh-baked bread. Picture this: you sit down after a long day, a hearty bowl of Irish stew or a rich potato leek soup in front of you. And there it is—just waiting beside your bowl, a fluffy, golden loaf of homemade Irish soda bread, its warm aroma mingling with the savory scents of your meal.
Each bite is a taste of tradition, perfect for slathering with a bit of butter or enjoying straight up. Let’s dive into crafting this wonderful bread together!

Ah, Irish soda bread—a staple that graces tables across Ireland and beyond. This simple yet delightful bread has a rich history; it was originally crafted with just a handful of ingredients, making it a quick and accessible option for many families.
By using baking soda instead of yeast, it offers a unique and speedy alternative to traditional bread-making processes. A blend of buttermilk and flour creates a tender crumb, bringing its own unique flavor along for the ride.
You Might Like These Recipes!
What is the flavor profile of this dish?
The flavor of Irish soda bread is subtle yet comforting. For the most part, you’re looking at a slightly tangy taste from the buttermilk, complemented by the slight sweetness from the sugar. The butter lends a creamy richness, while any mix-ins, like raisins, can add a touch of natural sweetness. Overall, this bread strikes a lovely balance—it’s savory without being too overpowering, making it a fitting companion to both savory dishes and sweet spreads.
What Makes This Recipe Different From Other Authentic Irish Soda Bread Recipes?
What sets my version of Irish soda bread apart is its modern twist. Instead of sticking strictly to the basics, I incorporate more flavor through a few additional ingredients and a homemade touch. While traditional Irish soda bread might skimp on sweetness or skip the flavor enhancement altogether, my recipe includes not just raisins but also a hint of honey to round things off. Plus, the homemade aspect—no store-bought ingredients here—makes a significant difference in taste and nutrition.
The Ingredients You’ll Need

To create this delicious loaf, gather up the following essentials:
– 1 and 3/4 cups (420ml) buttermilk*
– 1 large egg (optional, as per your preference)
– 4 and 1/4 cups (531g) all-purpose flour (be sure to measure properly!)
– 3 tablespoons (38g) granulated sugar
– 1 teaspoon baking soda
– 1 teaspoon salt
– 5 tablespoons (71g) unsalted butter, cold and cubed*
– 1 cup (150g) raisins (feel free to swap these for dried cranberries or currants if you wish)
– Bonus ingredient: 1 tablespoon of honey (to enhance sweetness without losing authenticity)
– Optional: A sprinkle of caraway seeds (adds a unique flavor twist)
Ingredients From : sallysbakingaddiction.com
How to Make Authentic Irish Soda Bread Recipe with Buttermilk
Get ready for some fun in the kitchen! Making Irish soda bread is straightforward and requires no special skills. With just a few steps, you’ll have a delicious loaf ready to serve. Let’s jump into the process.
Step-by-step Directions
Step 1: Preheat the Oven

Start things off by preheating your oven to 400°F (204°C). Now, consider your baking pan options. You can choose a standard baking sheet lined with parchment paper or put a silicone mat down. If you want that authentic sear, a seasoned 10-12 inch cast iron skillet works wonders (no need to preheat it, though!). Alternatively, you could grease a 9-10 inch cake pan or pie dish for a more rounded bread. If you’re using a Dutch oven, just grease it well or line it with parchment. If you decide to use the Dutch oven, remember to bake with the lid off!
Step 2: Mix The Wet Ingredients

In a mixing bowl, whisk together the buttermilk and if you opt to use it, the egg. This concoction brings moisture and richness to the dough, so give it a good stir until fully blended. Set aside for a moment while we tackle the dry ingredients.
Step 3: Combine The Dry Ingredients
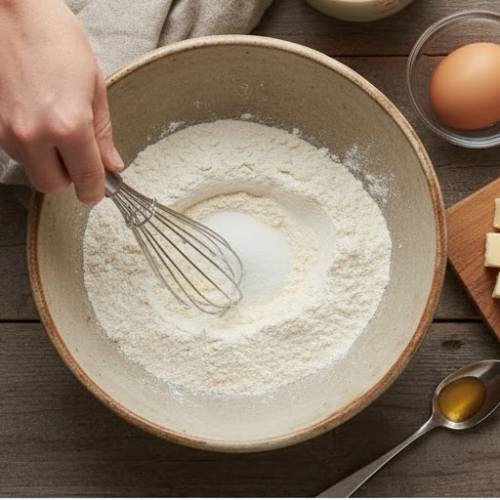
In a large bowl, whisk together the flour, granulated sugar, baking soda, and salt. Make sure everything is well combined to ensure even flavor distribution in your bread.
Step 4: Add The Cold Butter

Now comes the fun part—cutting in the butter. Using a pastry cutter, a fork, or simply your fingers, work the cold, cubed butter into the flour mixture until it resembles pea-sized crumbs. Don’t worry if it seems a bit heavy on flour; you want those little bits of butter to remain for a flakier texture in the final product.
Step 5: Fold in the Raisins

Toss in the raisins (or your preferred dried fruit) and mix them into the butter-flour mixture. This step adds sweetness and texture, making every slice a tiny surprise.
Step 6: Combine Wet And Dry

Pour the buttermilk and egg mixture into the bowl containing the dry ingredients. Gently fold the mixture together until it becomes too stiff to stir. You don’t want to overwork it—just enough to combine until you can see no more dry flour.
Step 7: Shape The Dough
Turn the crumbly dough out onto a lightly floured work surface. With floured hands, try to form it into a rough ball. You’ll want to knead it a bit, about 30 seconds should do. If you notice stickiness, feel free to add a smidge more flour until it’s manageable.
Step 8: Transfer & Score
Now, transfer your rustic-looking dough to your prepared skillet or pan. Grab your sharp knife or bread lame and score the top with a deep cross or X, about 1/2 inch deep. This helps the bread rise evenly and gives it that classic look.
Step 9: Bake The Bread
Pop your bread into the preheated oven and let it bake for about 45-55 minutes. You’ll know it’s done when the top turns a lovely golden brown, and it feels hollow when you tap on the bottom. If it browns too quickly, feel free to loosely cover it with aluminum foil. An instant-read thermometer should read 195°F (90°C) in the center to ensure it’s cooked through.
Step 10: Cool and Serve
Once baked to perfection, remove it from the oven and let it cool for about 10 minutes on a wire rack. Slice it and enjoy either warm, at room temperature, or toasted with your favorite toppings. If you happen to have leftovers, cover the bread tightly in aluminum foil; they’ll keep well at room temperature for a couple of days, or in the fridge for up to a week.
Tips On Making Authentic Irish Soda Bread
– Use fresh baking soda: Make sure your baking soda is fresh. Old baking soda won’t give you the rise you need, turning your bread dense.
– Cool Ingredients: Ensure your ingredients, especially the butter, are cold. Room temperature butter can change the texture of the bread.
– Avoid over-mixing: The key to tender bread is to mix just until combined. Over-mixing can make your bread tough.
– Experiment with flavors: This bread is highly versatile. Don’t hesitate to incorporate herbs or different dried fruits to suit your tastes.
– Check your oven: Every oven is a little different. Keep an eye on your bread as it bakes to ensure it doesn’t over-brown.
Storage Tips
Store your leftover soda bread wrapped tightly in aluminum foil at room temperature for up to 2 days. If you want it to last longer, you can refrigerate it for about a week. For extended storage, consider slicing and freezing the bread; this way, you can toast a piece whenever it strikes your fancy!
Serving Suggestions
– With butter and jam: Slather on some rich butter and your favorite fruit preserves for a delightful snack.
– As a side for soups: Pair it with a steaming bowl of Irish stew or a comforting cream soup for a complete meal.
– For breakfast: Toast it up and serve it with poached eggs and smoked salmon for a hearty morning feast.
– Sandwiches: Use slices to create a unique sandwich filled with your choice of deli meats, cheeses, and greens.
– Cheese board: Include it as part of your cheese platter alongside hard cheeses and olives for a charming appetizer spread.
If Some of the Items Are Not Available in Your Kitchen, What Are Some Substitute Options for the Ingredients?
– Buttermilk: Make your own with regular milk and a splash of vinegar or lemon juice. Let it sit for about five minutes before using.
– All-purpose flour: Whole wheat flour can be used for a heartier texture; just note the bread may be denser.
– Granulated sugar: Honey can replace sugar, just reduce the liquid in the recipe marginally to balance it out.
– Raisins: Try chopped dates, cranberries, or even nuts for a different bite.
– Cold butter: Coconut oil (preferably solid) can be swapped in; this will give a different flavor while still keeping things light and flaky.
FAQs
1. Can I make this without an egg?
Absolutely! The egg is only for extra richness and moisture. Simply skip it, and your bread will still turn out nicely.
2. Why is my soda bread dense?
Density often results from overworking the dough. Be gentle when mixing and shaping, and be mindful of your baking soda’s freshness.
3. Can I add spices or other flavors?
Definitely! A touch of cinnamon or nutmeg could add a lovely twist, or even incorporate herbs like thyme or rosemary for a more savory bread.
4. How do I know when my soda bread is done?
You can gently tap the bottom of the loaf; if it sounds hollow, it’s done. Trust your instincts, and keep an eye on that golden color!
5. What’s the best way to enjoy leftover soda bread?
Slice it up and toast it lightly, then add butter, honey, or use it for a trendy avocado toast!
Conclusion
Baking Irish soda bread with buttermilk is a delightful experience that brings tradition right into your kitchen. With just a handful of ingredients, you can create a simple yet satisfying loaf that complements almost any meal.
I hope this recipe inspires you to gather around a table, share a slice, and create some wonderful warming memories. Happy baking, and enjoy that fresh-baked goodness!
You Might Also Like These Latest Recipes!
More Recipes You Will Love
- This Homemade 20 Bread – Worth adding to your recipe collection.
