

Ingredients
Method
Step 1: Create Your Dough Base (The Smart Way to Activate Yeast)
- Pour your 1/4 cup warm water into a liquid measuring cup. Add your 1/2 cup room-temperature milk and crack in your egg. Here's where the method matters: if you've planned ahead and know you'll refrigerate overnight anyway, simply beat everything together with a fork until just combined, then set aside. The yeast doesn't need to "bloom" because time in the refrigerator will handle activation slowly and beautifully. However, if you're working on a tighter timeline and need to verify your yeast is alive and active, sprinkle your yeast over the warm water with just 1/2 teaspoon of sugar (from your 1 tablespoon total), and let it sit for 5-10 minutes. You should see foam forming on the surface—this tells you the yeast is viable. Then beat your egg separately with a fork until broken up, and combine it with the yeast mixture. Beat again until just incorporated. This extra step takes 15 minutes but gives you confidence your yeast will perform.

Step 2: Build the Dough in Your Food Processor
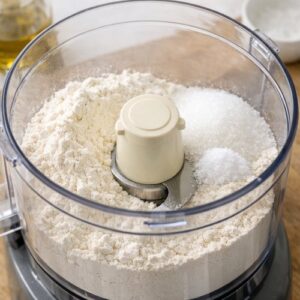
- Place your flour, salt, and remaining sugar into a food processor—if you've already bloomed your yeast, skip adding the dry yeast here. Give everything one quick pulse, just to combine. Now, this is critical: remove the lid and add your cold butter slices in an even layer across the bottom of the processor. Replace the lid and pulse 10-15 times. You're not trying to create a uniform mixture; you want visible chunks of butter at least 1/2 inch in size scattered throughout the flour. This separation is what creates those layers. Empty everything into a large mixing bowl, then pour in your milk-egg mixture. Using your hands or a rubber spatula, gently combine until you have a shaggy, gooey mess with obvious butter lumps pebbled throughout. This texture is exactly right. Don't overmix; you're not making bread dough here. Cover with plastic wrap and refrigerate overnight, or up to 4 days. If you bloomed your yeast earlier, you can get away with just 2 hours at this stage.
Step 3: The First Lamination Fold (Saturday Morning)
- Remove your dough from the refrigerator. It should feel cold and firm but still pliable. If you've got time, let it sit at room temperature for 15-20 minutes—this makes rolling easier. If you're pressed for time, skip this; cold dough works too, just requires slightly more muscle. Lightly dust your work surface with flour. Roll your dough into a large square, roughly 20 inches across—don't stress about precision here. You'll have an uneven shape; that's normal. The dough might feel dense and resist rolling; keep going. If it's truly fighting you, let it rest 5 minutes under a towel, then continue. Once you have your square, fold it into thirds like a business letter. Fold the top third down toward the center, then fold the bottom third up and over that. You've just completed one "turn." Now rotate the dough 90 degrees so the closed fold (the spine) faces left, like the spine of a book. This orientation matters for even lamination. Roll out again into a large square. Repeat: fold into thirds, rotate 90 degrees. This is your second turn. You've now done two turns; wrap the dough in plastic and refrigerate for 30 minutes.

Step 4: The Second and Third Lamination Folds (Saturday Afternoon)
- After your 30-minute rest, unwrap the dough and perform two more turns, just as you did in Step 3. Roll, fold into thirds, rotate. Roll again, fold into thirds, rotate. Wrap in plastic and refrigerate for another 30 minutes. After that final rest, you can either shape your croissants immediately, or wrap the dough and refrigerate for up to 4 days, or even freeze half for later. Professional bakers often make the dough on one day and shape on another—this gives the gluten maximum time to relax, which makes shaping easier.

Step 5: Shape Your Cheese Croissants
- Roll your dough into a large rectangle—mine is never perfectly square, and that's completely fine. You're aiming for about 1/4-inch thickness, roughly 20 inches long. Cut the dough in half lengthwise, creating two long strips. Then cut each strip in half crosswise, creating four rectangles. Finally, cut each rectangle in half diagonally, creating eight triangles total. One batch of dough makes eight croissants. Lay a triangle with the wide base closest to you. Arrange your prosciutto slice across about two-thirds of the triangle, leaving the pointed tip bare. This matters because you don't want ham flavoring just the very tip—you want it in every bite. Scatter your Gruyère matchsticks evenly over the ham. Starting at the wide base, roll toward the point. Roll tightly enough that you encapsulate the ham and cheese without compressing the dough. The final point should tuck underneath slightly. Arrange croissants on parchment-lined baking sheets, leaving 3 inches between each one.

Step 6: The Final Rise (The Hardest Part—Waiting)
- Brush each croissant with your egg wash—one egg beaten with 2 tablespoons milk. Cover the baking sheet loosely with plastic wrap or a kitchen towel, creating a warm, humid environment. Leave them to rise for about 1.5 hours. Here's the honest truth: they might not look dramatically bigger, and they might not feel like marshmallows as some recipes promise. The visual cues aren't always obvious. I typically just set my timer for 90 minutes and trust the process. The croissants will rise sufficiently if you've done everything else correctly. About 30 minutes before the rise finishes, preheat your oven to 350°F. When the 90 minutes are up, give each croissant a second egg wash for extra shine, and place them in the oven.

Step 7: Bake Until Golden
- Bake for 15-20 minutes. Your croissants will emerge puffy, golden-brown, and with a shattering crust. The Gruyère should be melted and slightly caramelized in places. The ham will have released its flavors into the pastry. This is when you'll understand why you waited two days for this moment.