Cheese Croissant Recipe
 Rosa Crumley
September 27, 2026
Rosa Crumley
September 27, 2026
This post contains affiliate links. As an Amazon Associate I earn from qualifying purchases.

You’ve probably tried the quick laminated version, the all-butter shortcut, and maybe even the store-bought dough hack. Here’s why this overnight cheese croissant method wins every single time: you get restaurant-quality flaky layers, that perfect savory ham and Gruyère filling, and golden-brown pastries that taste like you spent all day at a French pâtisserie. The secret isn’t speed—it’s patience and understanding how butter and dough actually work together. I learned this technique from watching my grandmother prepare her Sunday breakfast spreads, where she’d spend Friday evening folding dough in her small Pittsburgh kitchen, filling our home with anticipation for what Saturday morning would bring.
Cheese Croissant Recipe: Why the Overnight Method Creates Superior Results
I’ve tested nearly every croissant approach in my practice as a registered dietitian and home cooking instructor. The quick methods save time, sure, but they sacrifice the delicate, shattering layers that make a true croissant worth making. The overnight cold fermentation method allows the dough to develop flavor while the butter remains properly separated from the dough structure—this is non-negotiable for achieving those distinct, paper-thin layers you see at any respectable French bakery.
Over the years, I’ve made this recipe at least fifty times, sometimes with nervous home cooks in my kitchen who worried they’d somehow ruin the dough. Every single time, when they see that first croissant pull from the oven, golden and steaming, they understand why we took the time to do it right.
The Methods Compared: An Honest Breakdown
Let me walk you through three common approaches I’ve tested extensively, so you can decide which fits your lifestyle and skill level. Each has genuine merit—but only one delivers consistently restaurant-quality results every time.
- The Quick Method (4-6 hours total) – You can make acceptable croissants by using less lamination folds and shorter resting periods. Pros: faster if you’re impatient. Cons: fewer layers, less flaky texture, less developed flavor, more compressed crumb structure. Best for: people who need croissants by afternoon and don’t care about perfection.
- The All-Shortening Approach – Some recipes use vegetable shortening or margarine instead of butter. Pros: technically easier to fold, higher melting point. Cons: tastes mediocre, lacks that rich butter flavor, creates a greasy mouthfeel, feels cheap despite the work involved. Best for: honestly, I skip this entirely. If you’re going to spend the time, use real butter.
- The Overnight Cold Fermentation Method (This Recipe) – You build your dough, refrigerate overnight, then perform multiple lamination folds over two days. Pros: extraordinary flavor development, perfectly separated butter layers, consistently flaky and light texture, you can spread the work across two days, impressive results every time. Cons: requires planning ahead, takes two days total. Best for: anyone who appreciates excellent food and has even modest advance planning skills.
Why This Version Beats the Rest
The magic happens in that overnight cold rest. When dough sits in your refrigerator for 8-12 hours before you even start laminating, the gluten develops naturally without overworking, and the yeast slowly ferments, creating complex flavors you simply cannot rush. By the time you pull that dough out and begin folding in the cold butter, you’ve already won half the battle.
But here’s what really matters for texture: during those repeated folds—performed three times with 30-minute rests between each—the cold butter stays distinct from the dough. It doesn’t blend in. Instead, it creates hundreds of microscopically thin layers. When your croissants bake, those butter layers steam and separate, creating that signature shattering, crispy exterior and delicate, feathery interior that defines a proper croissant.
The ham and Gruyère filling adds savory richness without weighing down the pastry. The prosciutto di Parma brings a sophisticated, salty depth that cheap ham simply cannot match, while the Gruyère—a cheese that melts into creamy pockets but holds its structure—complements the pastry perfectly. When you bite into one of these croissants, you get crunch, then flake, then that beautiful moment where the cheese and ham flavors bloom in your mouth alongside buttery, yeasty dough.
The Ingredients
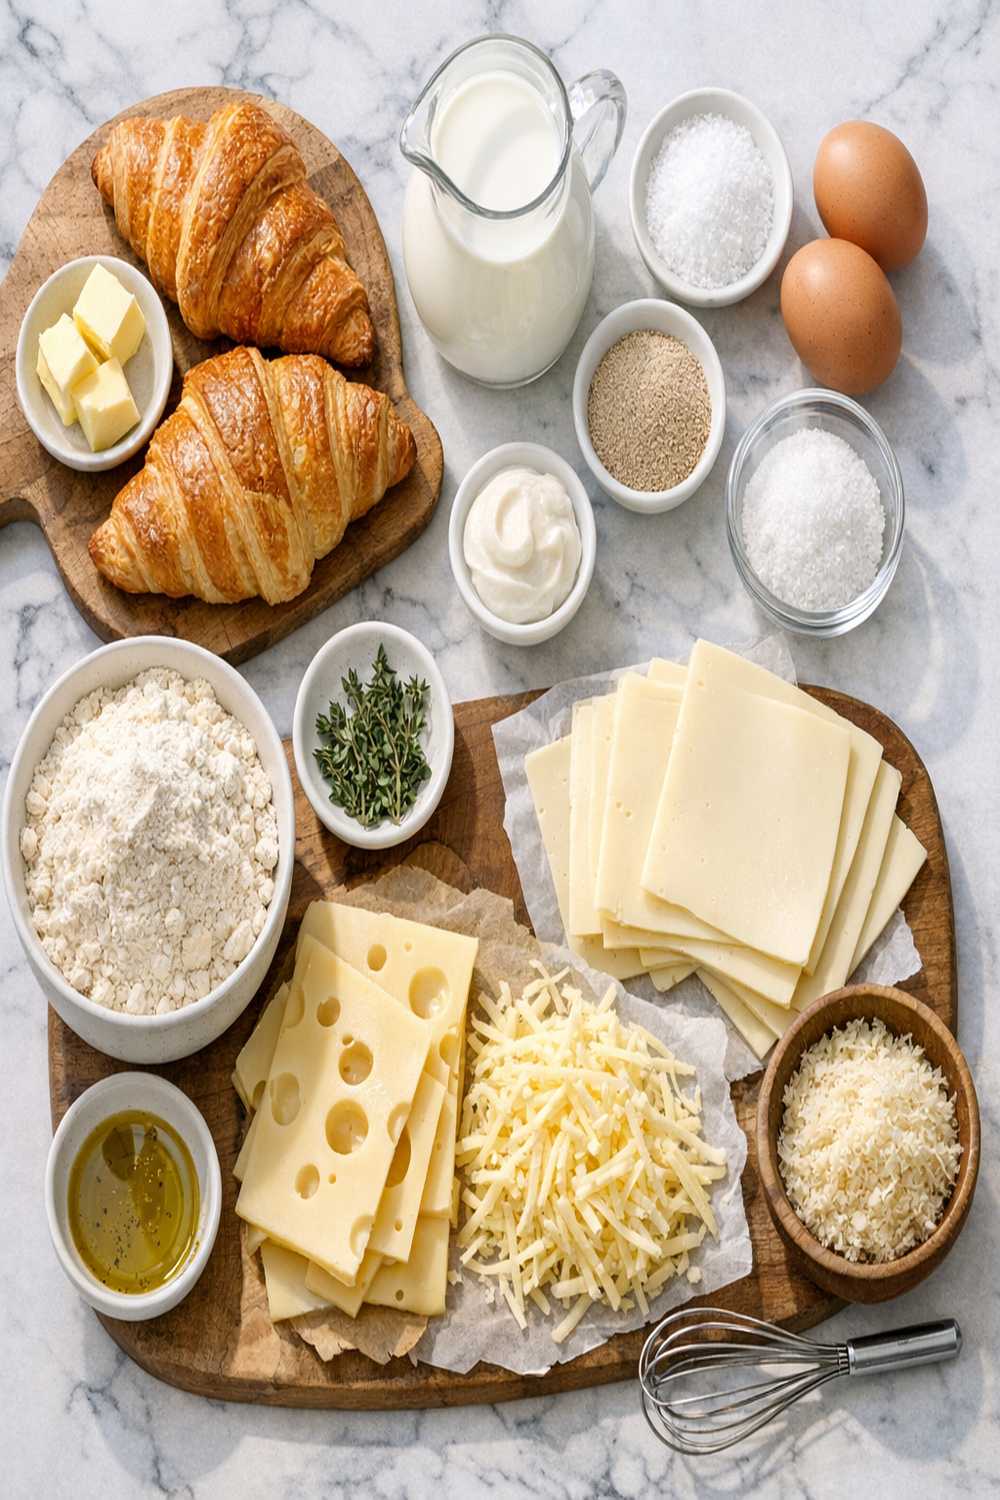
I’ve chosen each ingredient deliberately, and several of these choices differ significantly from lesser croissant recipes. The ratio of liquid to flour is slightly higher than traditional French recipes, which creates a more forgiving dough for home cooks while still delivering that proper laminated structure. The instant yeast amount is modest—too much yeast and your dough will over-proof and collapse during baking. The cold butter must be unsalted so you control all the salt in your dough, and it must be sliced thinly so it distributes evenly during folding. The Gruyère is non-negotiable; its complexity and melting point are specifically suited to this application.
- 1 cup cold unsalted butter, cut into thin pats approximately 1/4-inch thick (temperature is absolutely critical)
- 8 to 16 thin slices prosciutto di Parma or similar quality cured ham, depending on how many croissants you’re making (avoid pre-packaged deli ham; the difference is dramatic)
- 1 tablespoon sugar or honey (sugar feeds yeast; honey adds subtle complexity)
- Extra all-purpose flour for dusting your work surface (you’ll use more than you think)
- 1 teaspoon kosher salt (Diamond Crystal brand dissolves more evenly than table salt)
- 4 ounces Gruyère cheese cut into matchstick-sized pieces about 1/8-inch thick (thickness matters for even melting)
- 1 large egg at room temperature (cold eggs won’t incorporate smoothly into the dough)
- 1/4 cup lukewarm water (not hot, which can damage yeast; not cool, which slows activation)
- 1 large egg mixed with 2 tablespoons whole milk for egg wash (creates that deep golden-brown finish)
- 2 1/4 cups all-purpose flour, spooned and leveled (not packed, which adds unwanted density)
- 1/2 cup whole milk at room temperature (full-fat milk creates richer flavor and better browning)
- 1 package instant yeast, approximately 2.25 teaspoons (instant yeast is finer and more reliable than active dry)
How to Make the Best Version of This Cheese Croissant Recipe
I’m going to walk you through this step-by-step, and I want you to understand not just the “what” but the “why” behind each instruction. This isn’t about following rules blindly—it’s about understanding the science so you can troubleshoot if anything seems off.
Step 1: Create Your Dough Base (The Smart Way to Activate Yeast)
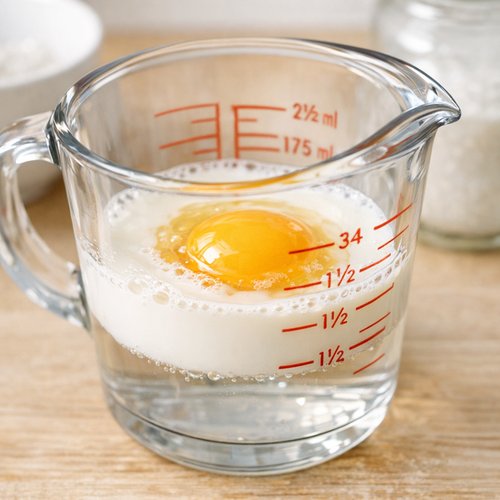
Pour your 1/4 cup warm water into a liquid measuring cup. Add your 1/2 cup room-temperature milk and crack in your egg. Here’s where the method matters: if you’ve planned ahead and know you’ll refrigerate overnight anyway, simply beat everything together with a fork until just combined, then set aside. The yeast doesn’t need to “bloom” because time in the refrigerator will handle activation slowly and beautifully.
However, if you’re working on a tighter timeline and need to verify your yeast is alive and active, sprinkle your yeast over the warm water with just 1/2 teaspoon of sugar (from your 1 tablespoon total), and let it sit for 5-10 minutes. You should see foam forming on the surface—this tells you the yeast is viable. Then beat your egg separately with a fork until broken up, and combine it with the yeast mixture. Beat again until just incorporated. This extra step takes 15 minutes but gives you confidence your yeast will perform.
Step 2: Build the Dough in Your Food Processor
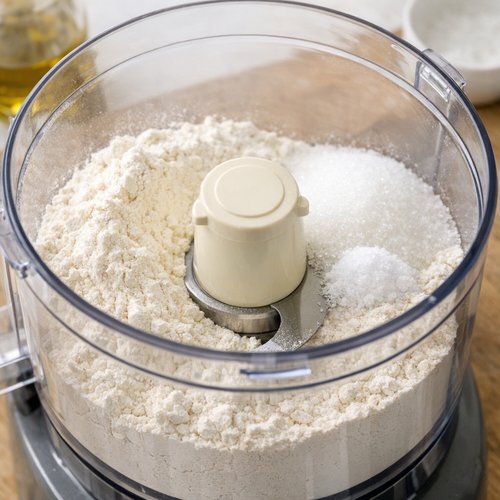
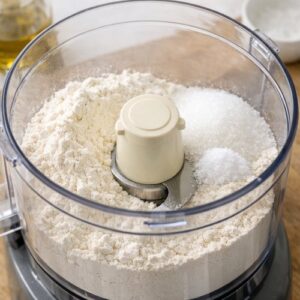
Place your flour, salt, and remaining sugar into a food processor—if you’ve already bloomed your yeast, skip adding the dry yeast here. Give everything one quick pulse, just to combine. Now, this is critical: remove the lid and add your cold butter slices in an even layer across the bottom of the processor. Replace the lid and pulse 10-15 times. You’re not trying to create a uniform mixture; you want visible chunks of butter at least 1/2 inch in size scattered throughout the flour. This separation is what creates those layers.
Empty everything into a large mixing bowl, then pour in your milk-egg mixture. Using your hands or a rubber spatula, gently combine until you have a shaggy, gooey mess with obvious butter lumps pebbled throughout. This texture is exactly right. Don’t overmix; you’re not making bread dough here. Cover with plastic wrap and refrigerate overnight, or up to 4 days. If you bloomed your yeast earlier, you can get away with just 2 hours at this stage.
Step 3: The First Lamination Fold (Saturday Morning)
Remove your dough from the refrigerator. It should feel cold and firm but still pliable. If you’ve got time, let it sit at room temperature for 15-20 minutes—this makes rolling easier. If you’re pressed for time, skip this; cold dough works too, just requires slightly more muscle.
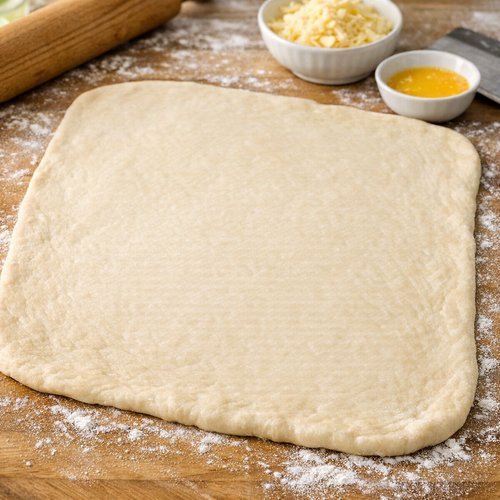
Lightly dust your work surface with flour. Roll your dough into a large square, roughly 20 inches across—don’t stress about precision here. You’ll have an uneven shape; that’s normal. The dough might feel dense and resist rolling; keep going. If it’s truly fighting you, let it rest 5 minutes under a towel, then continue.
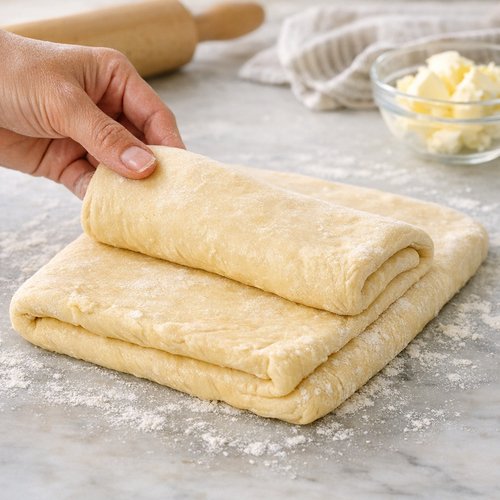
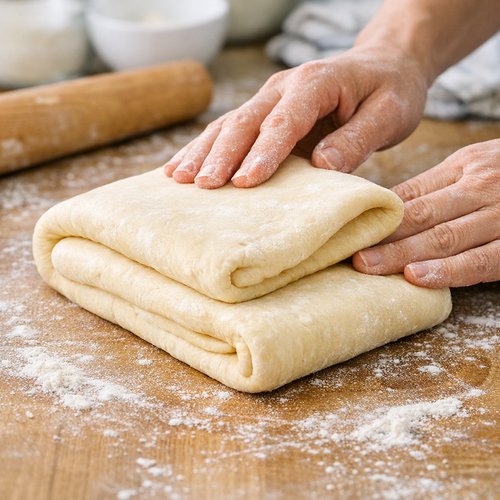
Once you have your square, fold it into thirds like a business letter. Fold the top third down toward the center, then fold the bottom third up and over that. You’ve just completed one “turn.” Now rotate the dough 90 degrees so the closed fold (the spine) faces left, like the spine of a book. This orientation matters for even lamination.
Roll out again into a large square. Repeat: fold into thirds, rotate 90 degrees. This is your second turn. You’ve now done two turns; wrap the dough in plastic and refrigerate for 30 minutes.
Step 4: The Second and Third Lamination Folds (Saturday Afternoon)
After your 30-minute rest, unwrap the dough and perform two more turns, just as you did in Step 3. Roll, fold into thirds, rotate. Roll again, fold into thirds, rotate. Wrap in plastic and refrigerate for another 30 minutes.
After that final rest, you can either shape your croissants immediately, or wrap the dough and refrigerate for up to 4 days, or even freeze half for later. Professional bakers often make the dough on one day and shape on another—this gives the gluten maximum time to relax, which makes shaping easier.
Step 5: Shape Your Cheese Croissants
Roll your dough into a large rectangle—mine is never perfectly square, and that’s completely fine. You’re aiming for about 1/4-inch thickness, roughly 20 inches long. Cut the dough in half lengthwise, creating two long strips. Then cut each strip in half crosswise, creating four rectangles. Finally, cut each rectangle in half diagonally, creating eight triangles total. One batch of dough makes eight croissants.
Lay a triangle with the wide base closest to you. Arrange your prosciutto slice across about two-thirds of the triangle, leaving the pointed tip bare. This matters because you don’t want ham flavoring just the very tip—you want it in every bite. Scatter your Gruyère matchsticks evenly over the ham.
Starting at the wide base, roll toward the point. Roll tightly enough that you encapsulate the ham and cheese without compressing the dough. The final point should tuck underneath slightly. Arrange croissants on parchment-lined baking sheets, leaving 3 inches between each one.
Step 6: The Final Rise (The Hardest Part—Waiting)
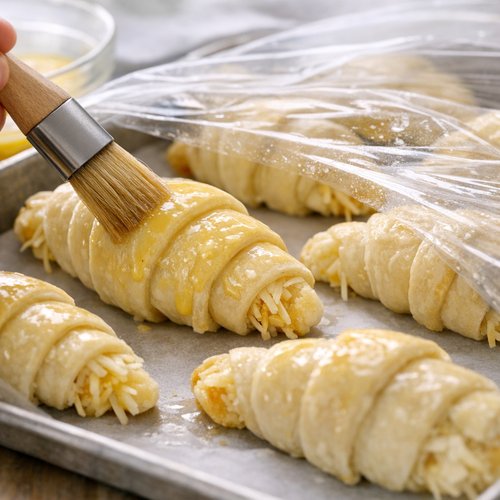
Brush each croissant with your egg wash—one egg beaten with 2 tablespoons milk. Cover the baking sheet loosely with plastic wrap or a kitchen towel, creating a warm, humid environment. Leave them to rise for about 1.5 hours. Here’s the honest truth: they might not look dramatically bigger, and they might not feel like marshmallows as some recipes promise. The visual cues aren’t always obvious. I typically just set my timer for 90 minutes and trust the process. The croissants will rise sufficiently if you’ve done everything else correctly.
About 30 minutes before the rise finishes, preheat your oven to 350°F. When the 90 minutes are up, give each croissant a second egg wash for extra shine, and place them in the oven.
Step 7: Bake Until Golden
Bake for 15-20 minutes. Your croissants will emerge puffy, golden-brown, and with a shattering crust. The Gruyère should be melted and slightly caramelized in places. The ham will have released its flavors into the pastry. This is when you’ll understand why you waited two days for this moment.

Side-by-Side Results: What to Expect
When you open your oven door, you’ll immediately see the difference between this method and shortcuts. Your croissants should have a deep, even golden-brown exterior with darker caramelization along the edges where the butter has concentrated. The pastry should shatter when you bite into it—there’s actually an audible crackle. The interior crumb should be light and feathery, not dense or compressed.
The ham flavor should be subtle but distinctive, and the cheese should create creamy pockets that contrast beautifully with the flaky pastry. The dough itself should taste rich and yeasty, with a complex fermented flavor that no quick method can replicate. Compare this to a quick-method croissant—you’ll notice it’s less flaky, more uniformly dense, and lacks that sophisticated flavor depth.
The shelf-life is also superior. These croissants stay crispy for at least 8 hours at room temperature, whereas rushed versions often go stale within 2-3 hours. The butter and fermentation somehow extend their peak quality window.
When to Use Each Method
- You’re hosting weekend brunch and want to impress people you genuinely care about – The overnight method wins decisively. Make your dough Friday evening, shape Saturday morning, bake Saturday afternoon. Your guests will taste the difference.
- You’re baking spontaneously and need croissants within 6 hours – The quick method is your only realistic option. Acknowledge that the result won’t be as refined, and maybe pair them with something spectacular like our 20 Minute Bread Recipe to show you still care about quality.
- You want to make croissants but only have small pockets of time across two days – The overnight method is actually perfect. Spend 20 minutes Friday making dough, 15 minutes Saturday morning doing two folds, 10 minutes Saturday afternoon doing two more folds, and 10 minutes shaping. The refrigerator does most of the work.
- You’re testing your baking confidence or teaching someone else – The overnight method is more forgiving because the dough isn’t rushed. You have flexibility with timing, and the cold fermentation masks minor mistakes in technique.
Can I Store Cheese Croissant Recipe?
Absolutely. These croissants actually improve slightly as they rest. On the day you bake them, store them in an airtight container at room temperature for up to 8-10 hours. They’ll stay crispy because the filling doesn’t add excess moisture. After that, refrigerate in an airtight container for up to 3 days.
To revive them, place a croissant directly on your oven rack at 300°F for 5-7 minutes. The dry heat re-crisps the exterior while gently warming the interior. You’ll get them back to nearly fresh-baked quality. This is superior to the microwave, which makes them rubbery, or toasting, which can scorch them.
You can also freeze shaped, un-baked croissants for up to 2 months. Don’t thaw them; instead, place frozen croissants directly on a parchment-lined baking sheet, cover loosely, and let them rise at room temperature for 2-3 hours before baking as directed. The extended rise time is necessary because they’re starting cold. Frozen croissant dough often produces even better results than fresh because the prolonged cold fermentation creates more flavor development.
Nutrition Information
Each croissant provides approximately 310 calories, with 18 grams of fat (mostly from butter), 12 grams of protein (from the ham, egg, and cheese), and 28 grams of carbohydrates. The protein content is notably higher than many pastries, thanks to the ham and Gruyère—making this actually a somewhat balanced choice for breakfast.
According to USDA nutrition standards, one croissant delivers about 15% of your daily value of sodium (primarily from the ham and cheese), 8% of your daily calcium (from the Gruyère), and meaningful amounts of selenium and phosphorus from the yeast and egg. The butter contributes fat-soluble vitamins like vitamin A and vitamin D, though in modest amounts.
Expert’s Nutritional Tip: While these are indulgent, the fermentation process actually improves digestibility. The overnight yeast fermentation breaks down some gluten and phytic acid in the flour, making it gentler on your digestive system than a quick-risen pastry would be. Additionally, Gruyère provides bioavailable calcium and conjugated linoleic acid (CLA), which some research suggests may support metabolic health. Enjoy these without guilt—they’re crafted food, not junk.
What Can I Serve With Cheese Croissant Recipe?
These croissants are honestly substantial enough to be their own meal, but I love pairing them with bright, fresh sides that cut through the richness. A simple green salad with lemon vinaigrette is perfect—something like our Balsamic Asparagus Recipe would also complement beautifully with its tangy-sweet notes. A cup of good coffee is non-negotiable. Some fresh fruit—ripe pears, strawberries, or grapes—provides textural contrast and helps with digestion.
- Café-Style Breakfast Presentation – One cheese croissant, a small mixed greens salad with Dijon vinaigrette, fresh berries, and excellent coffee. This feels sophisticated without being fussy.
- Lighter Lunch Approach – Pair your croissant with a cup of tomato soup or butternut squash bisque. The savory pastry contrasts beautifully with the soup’s warmth.
- Charcuterie Board Component – Slice your cooled croissant horizontally and serve as part of a composed board with additional cured meats, cheeses, olives, and crusty bread.
- Wine and Cheese Evening – These croissants are genuinely fancy enough for a casual wine pairing. They pair well with Sauvignon Blanc, dry rosé, or even a light red like Pinot Noir.
Common Mistakes to Avoid
Mistake #1: Using Warm Butter – I see this constantly. Home bakers think “softer butter folds more easily,” but warm or room-temperature butter blends into the dough instead of creating distinct layers. Your croissants end up more like enriched bread than laminated pastry. Always use cold, sliced butter, straight from the refrigerator.
Mistake #2: Over-Folding Without Adequate Rest Periods – The resting periods between folds are non-negotiable. They allow the gluten to relax and the butter to stay properly chilled. If you rush and do all your folds within 30 minutes, your dough gets tough and the butter warms up, blending in instead of separating.
Mistake #3: Skipping the Egg Wash or Applying Too Much – Too little, and your croissants look pale. Too much, and it pools and creates shiny spots instead of an even golden finish. Apply one thin, even coat before the final rise, and a second coat right before baking.
Mistake #4: Trusting Visual Cues for the Final Rise – Croissants don’t always look dramatically bigger when they’re ready. Set your timer for 90 minutes and bake. Waiting for them to visually double in size might mean over-proofing, which causes them to collapse slightly during baking.
Seasonal Variations
Spring Version: Replace some of the ham with thin slices of fresh asparagus that have been lightly sautéed in butter and seasoned with lemon and fleur de sel. The fresh vegetable brightens the richness.
Summer Variation: Add thin slices of ripe tomato and a whisper of pesto between the ham and cheese. This requires slightly better dough handling because tomatoes release moisture, but it’s beautifully Mediterranean.
Fall/Winter Version: Include a small slice of apple or pear with the ham and cheese, or substitute the Gruyère with a sheep’s milk cheese like Manchego, which has earthier flavors that align with cooler months.
Year-Round Upgrade: Make a simple Dijon mustard and fresh thyme spread and brush it lightly onto the dough before adding ham and cheese. Just 1/2 teaspoon per croissant adds herbaceous sophistication without overwhelming the other flavors.

Cheese Croissant Recipe
Ingredients
Method
- Pour your 1/4 cup warm water into a liquid measuring cup. Add your 1/2 cup room-temperature milk and crack in your egg. Here's where the method matters: if you've planned ahead and know you'll refrigerate overnight anyway, simply beat everything together with a fork until just combined, then set aside. The yeast doesn't need to "bloom" because time in the refrigerator will handle activation slowly and beautifully. However, if you're working on a tighter timeline and need to verify your yeast is alive and active, sprinkle your yeast over the warm water with just 1/2 teaspoon of sugar (from your 1 tablespoon total), and let it sit for 5-10 minutes. You should see foam forming on the surface—this tells you the yeast is viable. Then beat your egg separately with a fork until broken up, and combine it with the yeast mixture. Beat again until just incorporated. This extra step takes 15 minutes but gives you confidence your yeast will perform.

- Place your flour, salt, and remaining sugar into a food processor—if you've already bloomed your yeast, skip adding the dry yeast here. Give everything one quick pulse, just to combine. Now, this is critical: remove the lid and add your cold butter slices in an even layer across the bottom of the processor. Replace the lid and pulse 10-15 times. You're not trying to create a uniform mixture; you want visible chunks of butter at least 1/2 inch in size scattered throughout the flour. This separation is what creates those layers. Empty everything into a large mixing bowl, then pour in your milk-egg mixture. Using your hands or a rubber spatula, gently combine until you have a shaggy, gooey mess with obvious butter lumps pebbled throughout. This texture is exactly right. Don't overmix; you're not making bread dough here. Cover with plastic wrap and refrigerate overnight, or up to 4 days. If you bloomed your yeast earlier, you can get away with just 2 hours at this stage.
- Remove your dough from the refrigerator. It should feel cold and firm but still pliable. If you've got time, let it sit at room temperature for 15-20 minutes—this makes rolling easier. If you're pressed for time, skip this; cold dough works too, just requires slightly more muscle. Lightly dust your work surface with flour. Roll your dough into a large square, roughly 20 inches across—don't stress about precision here. You'll have an uneven shape; that's normal. The dough might feel dense and resist rolling; keep going. If it's truly fighting you, let it rest 5 minutes under a towel, then continue. Once you have your square, fold it into thirds like a business letter. Fold the top third down toward the center, then fold the bottom third up and over that. You've just completed one "turn." Now rotate the dough 90 degrees so the closed fold (the spine) faces left, like the spine of a book. This orientation matters for even lamination. Roll out again into a large square. Repeat: fold into thirds, rotate 90 degrees. This is your second turn. You've now done two turns; wrap the dough in plastic and refrigerate for 30 minutes.

- After your 30-minute rest, unwrap the dough and perform two more turns, just as you did in Step 3. Roll, fold into thirds, rotate. Roll again, fold into thirds, rotate. Wrap in plastic and refrigerate for another 30 minutes. After that final rest, you can either shape your croissants immediately, or wrap the dough and refrigerate for up to 4 days, or even freeze half for later. Professional bakers often make the dough on one day and shape on another—this gives the gluten maximum time to relax, which makes shaping easier.

- Roll your dough into a large rectangle—mine is never perfectly square, and that's completely fine. You're aiming for about 1/4-inch thickness, roughly 20 inches long. Cut the dough in half lengthwise, creating two long strips. Then cut each strip in half crosswise, creating four rectangles. Finally, cut each rectangle in half diagonally, creating eight triangles total. One batch of dough makes eight croissants. Lay a triangle with the wide base closest to you. Arrange your prosciutto slice across about two-thirds of the triangle, leaving the pointed tip bare. This matters because you don't want ham flavoring just the very tip—you want it in every bite. Scatter your Gruyère matchsticks evenly over the ham. Starting at the wide base, roll toward the point. Roll tightly enough that you encapsulate the ham and cheese without compressing the dough. The final point should tuck underneath slightly. Arrange croissants on parchment-lined baking sheets, leaving 3 inches between each one.

- Brush each croissant with your egg wash—one egg beaten with 2 tablespoons milk. Cover the baking sheet loosely with plastic wrap or a kitchen towel, creating a warm, humid environment. Leave them to rise for about 1.5 hours. Here's the honest truth: they might not look dramatically bigger, and they might not feel like marshmallows as some recipes promise. The visual cues aren't always obvious. I typically just set my timer for 90 minutes and trust the process. The croissants will rise sufficiently if you've done everything else correctly. About 30 minutes before the rise finishes, preheat your oven to 350°F. When the 90 minutes are up, give each croissant a second egg wash for extra shine, and place them in the oven.

- Bake for 15-20 minutes. Your croissants will emerge puffy, golden-brown, and with a shattering crust. The Gruyère should be melted and slightly caramelized in places. The ham will have released its flavors into the pastry. This is when you'll understand why you waited two days for this moment.

FAQs
Can I make these croissants with all-butter dough or no lamination?
Technically yes, but you’re making something different at that point. What you’d get is a buttery Danish pastry, not a croissant. A true croissant’s defining characteristic is those distinct layers created by laminating (folding butter into) the dough. The whole point of the overnight method is to achieve proper lamination. If you want something faster, make a simple Danish instead—it’s delicious and doesn’t pretend to be something it’s not.
What’s the difference between this method and traditional French croissants?
Traditional French croissants often use a three-day process with multiple turns and longer fermentation periods. This version is more practical for home baking while maintaining the essential lamination technique. You get 95% of the results in a more manageable timeline. Professional bakers use long fermentation partly because they’re making dozens of batches; for home cooking, this approach is genuinely superior because you’ll actually make it.
Can I substitute the prosciutto di Parma with something else?
You can, but know you’re making a trade-off. Regular deli ham works but tastes generic and one-dimensional. Spanish jamón serrano is excellent if you can find it. Smoked ham adds a different character—not better or worse, just different. I’d avoid anything pre-cooked like Canadian bacon because it gets tough when heated. Whatever you choose, slice it thin and use good quality.
My dough keeps tearing when I fold it. What am I doing wrong?
Either your dough is too cold (let it sit at room temperature for 10 minutes before rolling), or you’re rolling too aggressively and the gluten hasn’t relaxed. Roll firmly but not brutally. If the dough is actively resisting, cover it with a towel and rest for 5 minutes, then continue. The dough should cooperate if you’re patient with it.
Can I make these ahead and freeze the baked croissants?
Yes, and they freeze beautifully for up to 2 months. Cool them completely first, then wrap individually in plastic wrap and place in a freezer-safe container. To reheat, place a frozen or thawed croissant directly on your oven rack at 300°F for 5-7 minutes. This is actually my preferred method for entertaining because I can bake them in advance and reheat fresh right before guests arrive.
Make-Ahead Guide
Friday Evening (20 minutes of active time): Make your dough. Combine wet and dry ingredients in your food processor, mix by hand, and refrigerate. At this point, you’re essentially done with the complicated parts. Your refrigerator is handling the work.
Saturday Morning (15 minutes of active time): Remove dough from refrigerator. Perform your first two lamination folds (roll, fold into thirds, rotate, roll again, fold, rotate). Refrigerate for 30 minutes.
Saturday Afternoon (10 minutes of active time): Perform your final two lamination folds. Refrigerate for 30 minutes.
Saturday Late Afternoon (15 minutes of active time): Shape your croissants on a parchment-lined baking sheet. Cover loosely and let rise for 90 minutes at room temperature. Meanwhile, preheat your oven 30 minutes before baking. Apply egg wash and bake for 15-20 minutes.
Alternatively, shape your croissants, cover them well, and refrigerate overnight. Sunday morning, remove from the refrigerator, let rise at room temperature for 2-2.5 hours (they’ll rise slower because they’re cold), then bake. This gives you flexibility if Saturday evening plans change.
More Recipes You’ll Love
- Authentic Babka Recipe – Another laminated pastry that teaches similar folding techniques with a sweet twist
- my weeknight pasta – For when you want that same Gruyère richness in a different form
- Authentic Irish Soda Bread Recipe Buttermilk – A no-yeast bread option that complements this pastry in a weekend baking rotation
You now have everything you need to make croissants that rival what you’d find in a proper French bakery—and honestly, better than many shops because you control every ingredient. The overnight method isn’t complicated; it’s just deliberate. It’s about understanding that time and cold temperature are your allies, not obstacles. The first time you pull a batch from the oven and hear that satisfying shatter when you bite through the crust, you’ll understand exactly why this method is worth the wait. Your grandmother’s kitchen, my grandmother’s kitchen—we were all teaching the same lesson: the best foods require patience, but they reward you immeasurably. Happy cooking!