Charred Carrot Recipe
 Rosa Crumley
September 23, 2026
This post contains affiliate links. As an Amazon Associate I earn from qualifying purchases.
I can still picture myself standing at my grandmother’s kitchen counter on a humid August evening, watching her pull a cast iron skillet from the oven with bare hands—she never used mitts—and slide charred vegetables onto a white platter. The kitchen filled with smoke and the smell of caramelized sweetness. That moment taught me something I carry into my practice as a registered dietitian: the most memorable meals aren’t complicated. They’re about technique, respect for ingredients, and the confidence to let heat do the transformative work. This charred carrot recipe, paired with a vibrant fresh herb oil, captures that same magic and works beautifully whether you’re hosting an intimate dinner or planning a larger celebration. When I pair these with sides like lemon orzo, they steal the show every single time.
Charred Carrot Recipe That Will Steal the Show at Your Next Dinner Party
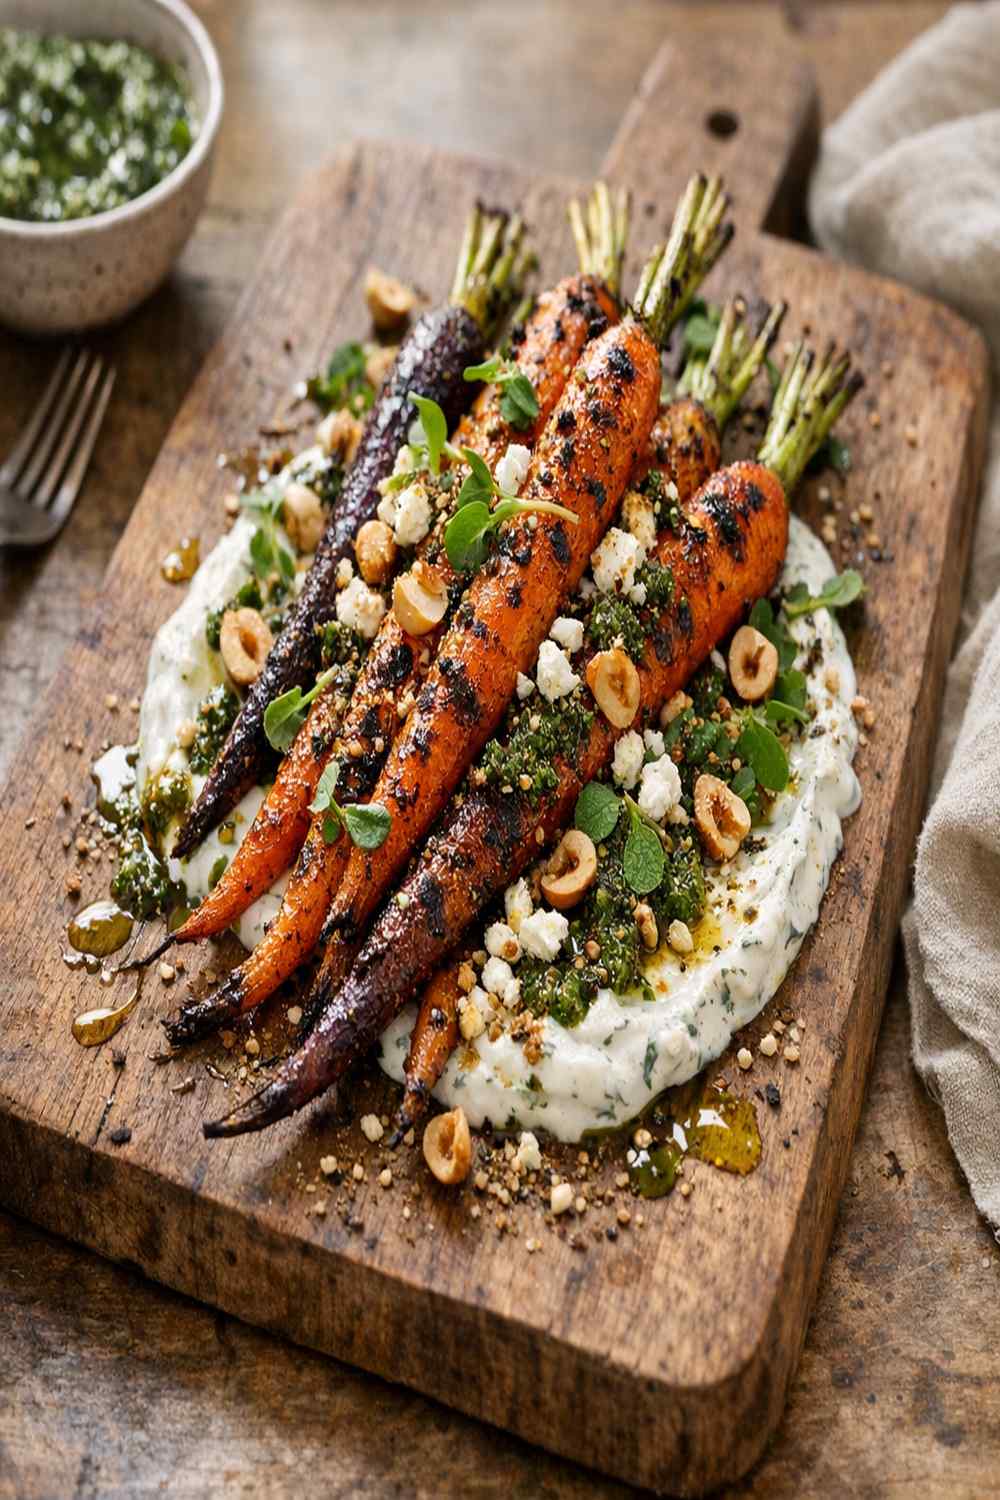
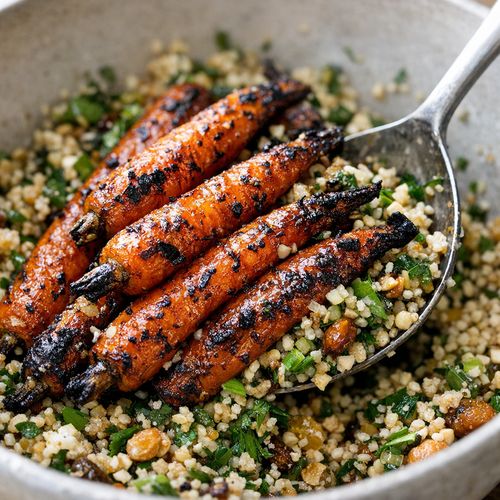
I developed this charred carrot recipe years ago when I realized that vegetables shouldn’t play supporting roles on the plate. My grandmother understood that instinctively. She roasted them until their natural sugars caramelized into something almost candy-like, then finished them with fresh herbs and good oil. There’s no cream sauce, no complexity—just honest cooking technique that honors the ingredient. The carrots emerge from high heat with blackened edges and a tender, sweet interior. The fresh herb oil—made with basil and mint—adds brightness and a professional restaurant touch that makes guests lean in and ask for your secrets. This is the recipe I teach when someone tells me they want to impress without spending all day in the kitchen.
When to Make Charred Carrot Recipe
This dish transforms carrots into something so elegant and flavorful that it works across seasons and occasions. Think about these perfect moments for bringing this to your table:
- Summer garden gatherings and outdoor entertaining – The charred edges echo the taste of grilled food, and the bright herb oil feels light and fresh alongside grilled proteins or Hawaiian chicken kebabs
- Fall and winter holiday dinners – Carrots are in peak season in autumn and winter, and this preparation feels elegant enough for Thanksgiving or Christmas alongside your traditional sides
- Weeknight dinners when you want restaurant quality without the effort – Start the herb oil in the morning, roast the carrots while your protein cooks, and plate everything in under 30 minutes
- Meal prep for the week ahead – Prepare the herb oil and charred carrots separately, then combine just before serving for maximum freshness throughout the week
- When you need an impressive vegetable side for a potluck or shared meal – This travels beautifully and actually tastes better at room temperature, making it ideal for gatherings
What Makes This Charred Carrot Recipe Special
What elevates this from a simple roasted vegetable to something memorable is the contrast between technique and simplicity. High heat creates a Maillard reaction—that deep browning that develops complex, savory flavors you can’t replicate any other way. Then the fresh herb oil, made with fresh basil and mint blended with garlic and red wine vinegar, provides brightness and acidity that cuts through the richness of the charred sweetness. I’ve learned from working with clients that the most satisfying meals balance flavors and textures. Here, you get caramelized sweetness, smoky depth, herbaceous freshness, and the slight heat from red pepper flakes. It’s sophisticated enough for a refined dinner party but accessible enough that anyone can execute it successfully. The best part? The carrots themselves are loaded with beta-carotene and fiber—you’re creating something that tastes indulgent but genuinely nourishes your body.
Scaling for Your Crowd
One of the beauties of this recipe is its flexibility. Whether you’re cooking for two or twenty, the technique remains the same—only the quantities and oven space change. Here’s how I scale this in my kitchen:
- For 2 people (intimate dinner) – Use 1 bunch rainbow carrots, 1 tablespoon olive oil, and reduce the herb oil recipe to ¼ cup. Roast in a small cast iron skillet at 425°F for 18-20 minutes, stirring once halfway through
- For 4-6 people (family dinner) – Use 2 bunches rainbow carrots, 2 tablespoons olive oil, and make the full herb oil recipe. Roast on a standard sheet pan at 425°F for 22-25 minutes
- For 8-10 people (dinner party) – Use 3 bunches rainbow carrots, 3 tablespoons olive oil, and double the herb oil batch. Use two sheet pans and roast at 425°F for 23-28 minutes, rotating pans halfway
- For 15-20 people (gathering or potluck) – Use 4-5 bunches, 4-5 tablespoons olive oil, and triple the herb oil. Roast in batches if needed, keeping finished carrots warm in a low oven while completing subsequent batches
The Ingredients
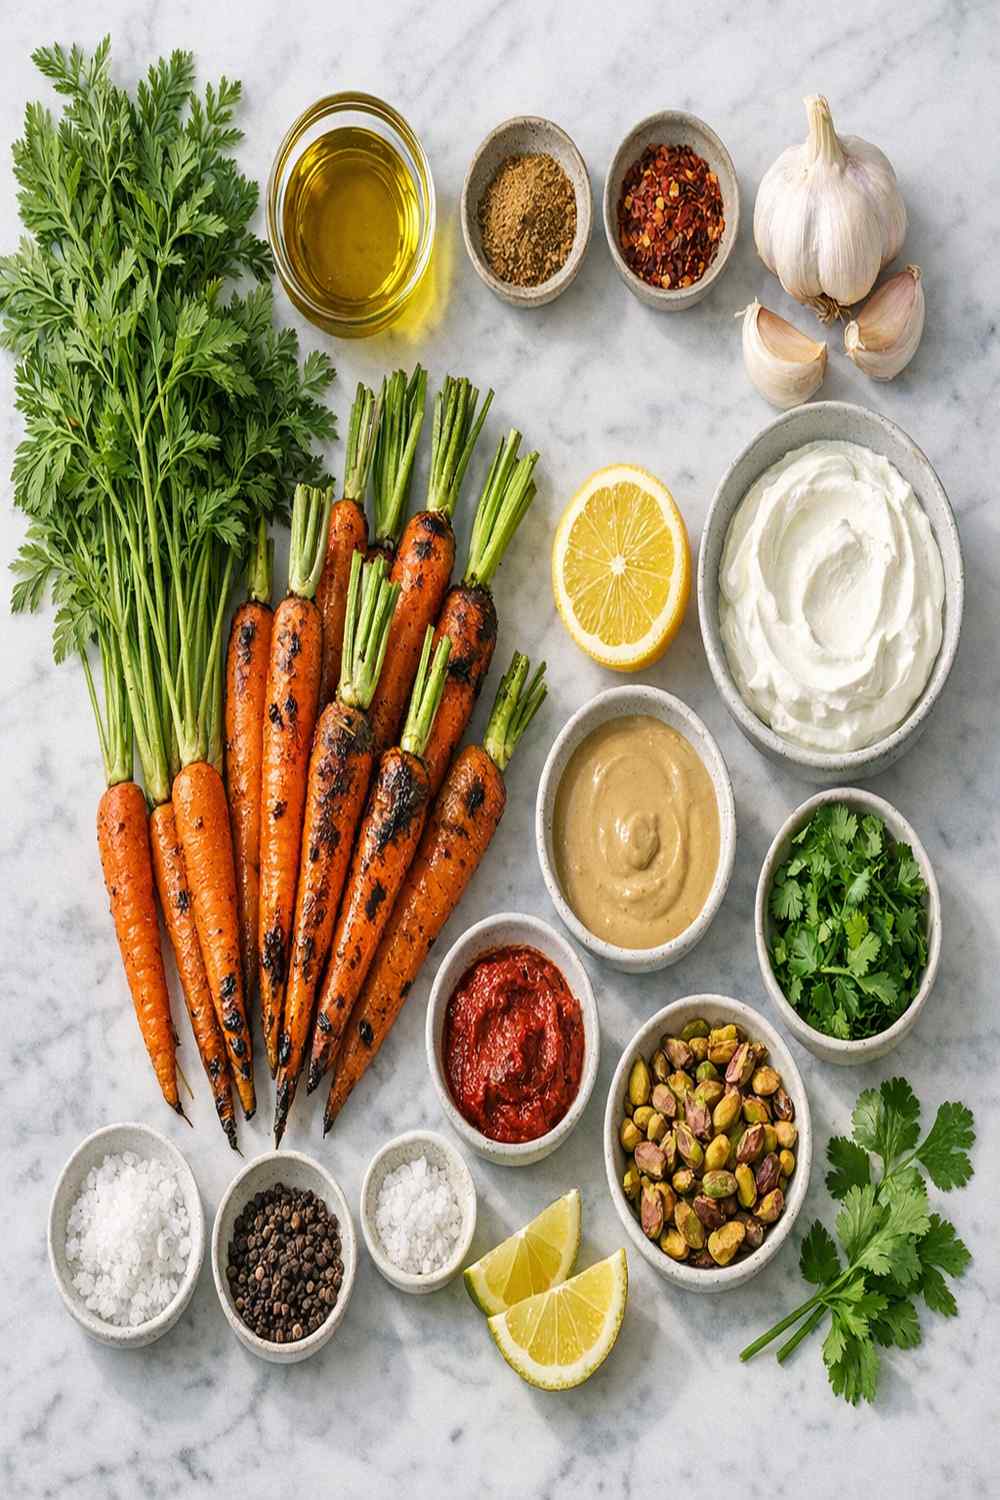
Here’s everything you need to create this restaurant-quality showstopper. I’ve organized these by component so you can see the charred carrots and herb oil separately—they’re equally important to the final dish:
For the Charred Carrots
- 3 bunches rainbow carrots in assorted colors—orange, yellow, and purple (cleaned well, with 1-2 inches of green tops remaining for visual appeal)
- ½ teaspoon red pepper flakes (adjust to your heat preference)
- 3 tablespoons extra virgin olive oil (divided between coating the carrots and finishing)
- 1 teaspoon kosher salt (or sea salt, for even seasoning throughout)
- ½ teaspoon freshly cracked black pepper (freshly ground provides better flavor than pre-ground)
For the Fresh Herb Oil
- Zest of 1 lemon (adds brightness without liquid; optional but recommended)
- ½ cup extra virgin olive oil (use quality oil; you’ll taste it directly)
- 1 clove garlic, minced (use fresh, never jarred, for clean flavor)
- 2 tablespoons red wine vinegar (provides acidity that brightens everything)
- 1 teaspoon kosher salt (brings all flavors into focus)
- 1 cup fresh mint leaves, stems removed and tightly packed (about 4 ounces; provides brightness and coolness)
- 1 medium shallot, roughly chopped (adds mild onion flavor without overpowering)
- ½ teaspoon red pepper flakes (brings gentle heat that complements the herbs)
- 1 cup fresh basil leaves, stems removed and tightly packed (about 4 ounces; use sweet basil for best flavor)
How to Make Charred Carrot Recipe for Your Occasion
This is genuinely one of those recipes where confidence matters as much as technique. The high heat might seem intimidating, but it’s actually your secret weapon. Let me walk you through each step so you feel prepared to execute this beautifully:
Step 1: Prepare Your Carrots for Maximum Char
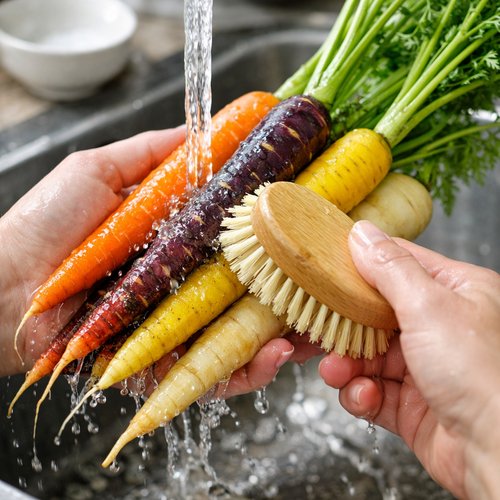
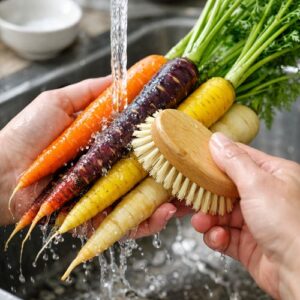
Start by thoroughly rinsing your rainbow carrots under cool running water, using a soft vegetable brush to remove any soil. Don’t peel them—the thin skin holds nutrients and adds beautiful color contrast. Pat them completely dry with paper towels; any moisture will create steam instead of char. Leave about 1-2 inches of the green tops attached (they’ll darken beautifully in the oven and look rustic-elegant). If you have particularly thick carrots, cut them in half lengthwise so they cook evenly. You’re aiming for pieces that are roughly uniform in thickness—about ½ inch thick—so they’ll char simultaneously without some pieces burning while others remain undercooked. This is something I learned from watching professional chefs: uniformity in size is what separates restaurant-quality results from home cooking.
Step 2: Toss Carrots With Oil and Seasonings
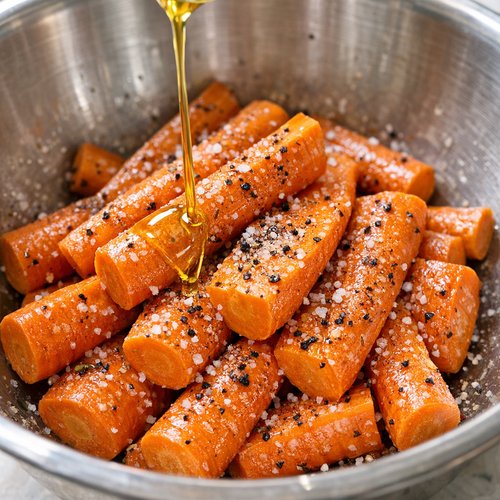
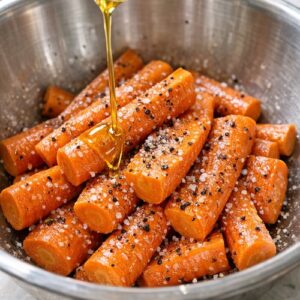
Place your prepared carrots in a large mixing bowl. Drizzle with 2 tablespoons of your olive oil and sprinkle with kosher salt, freshly cracked black pepper, and red pepper flakes. Use your hands to toss everything together thoroughly, making sure every carrot is evenly coated with oil and seasoning. This is crucial—uncoated spots won’t char properly, and you want maximum contact with heat. Taste a tiny piece of raw carrot; it should taste lightly seasoned but not salty. The carrots will concentrate as they roast, so hold back if you’re unsure.
Step 3: Get Your Pan Screaming Hot
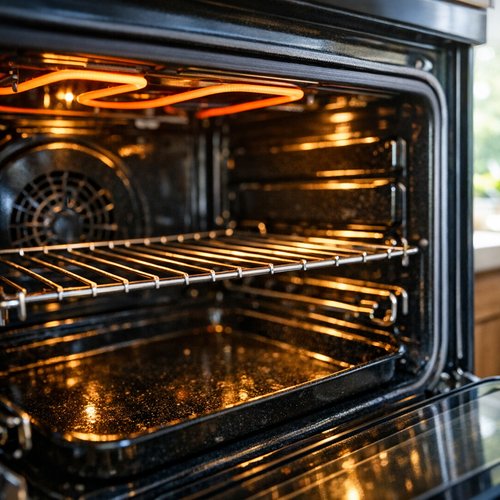
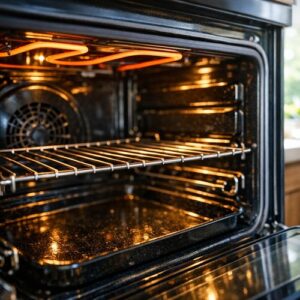
Arrange your oven racks so you have clear space in the middle, then preheat your oven to 425°F. Allow at least 15 minutes for full preheating—this matters tremendously. While the oven heats, place a large sheet pan or cast iron skillet (if you have one) directly on the oven rack. Yes, put the pan in the oven while it preheats. This is the secret to achieving real char. The superhot pan is what creates those beautiful caramelized, slightly blackened edges that taste almost burnt but in the best possible way. When you’re ready to roast (about 3 minutes before the oven finishes preheating), carefully remove the hot pan and arrange your oiled carrots in a single layer, cut-side down if you’ve halved any pieces. They should make a dramatic sizzling sound as they hit the hot pan. That sizzle is your confirmation that charring is about to happen.
Step 4: Roast Until Deep Caramelization Develops
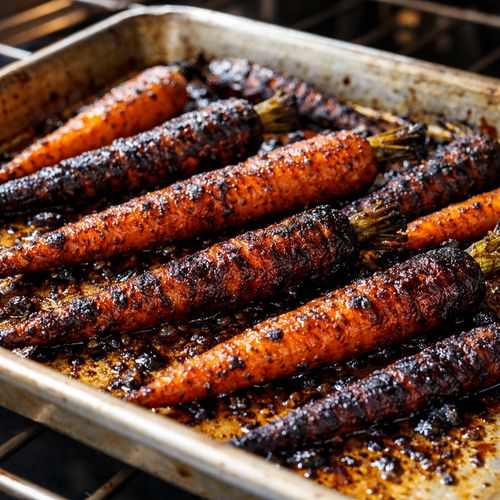
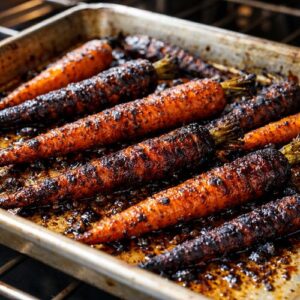
Return the pan to the oven immediately. Roast for 20-25 minutes without stirring. I know this goes against every instinct to fuss with food, but don’t open the oven door or stir the carrots during the first 15 minutes. The undisturbed heat is what creates the char. After 15 minutes, stir the carrots to ensure even cooking on all sides, then continue roasting for another 5-10 minutes until the carrots are deeply browned and tender when pierced with a fork. The thinner parts should have nearly black edges while the larger sections develop rich brown caramelization. This is exactly what you want—that contrast between sweetness and slight bitterness from the char is where the complexity lives.
Step 5: Make Your Fresh Herb Oil While Carrots Roast
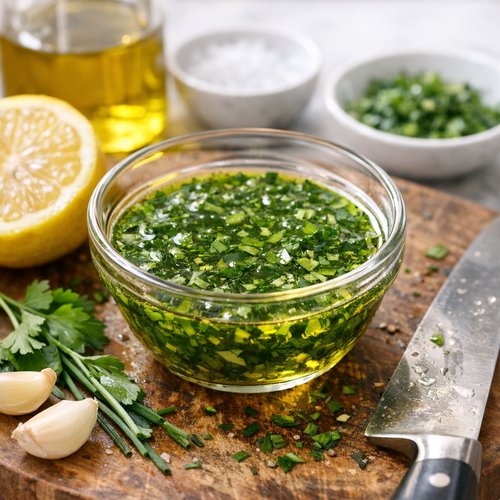
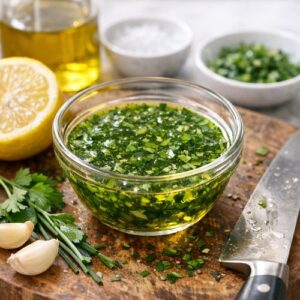
About 10 minutes into the carrot roasting, prepare your herb oil so everything finishes around the same time. This is where you can work ahead beautifully. Add your basil, mint, shallot, garlic, and red pepper flakes to a food processor. Pulse until everything is finely chopped but not completely smooth—you want some texture. Don’t over-process; you’re looking for a rough pesto-like consistency. Pour in your olive oil and red wine vinegar, add salt and lemon zest if using, then pulse to combine. The oil should be bright green with flecks of herb throughout. Taste it and adjust: needs more salt? Needs more vinegar for brightness? This is your moment to balance it to your preference. Transfer to a bowl and set aside. The herb oil can be made up to 24 hours ahead; just store it covered in the refrigerator and let it come to room temperature before serving.
Step 6: Finish the Carrots and Combine
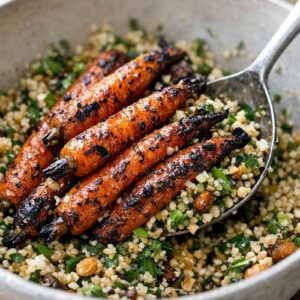
When the carrots emerge from the oven, they should be absolutely gorgeous—deeply caramelized, slightly charred at the edges, and completely tender. Transfer them to a serving platter, arranging them so the green tops and varied colors are visible. The carrots will be hot, so work carefully. Drizzle the fresh herb oil over the top, using about 3-4 tablespoons per serving (you likely won’t use all the oil, which is fine—it keeps for a week refrigerated and is wonderful on grilled vegetables, fish, or pasta). Do this plating step just before serving, not ahead of time, so the herb oil stays vibrant and the carrots don’t become overly saturated. Alternatively, you can serve the herb oil on the side in a small bowl so guests can control how much they want. This actually works beautifully for buffet-style entertaining.
Expert’s Nutritional Tip
As a registered dietitian, I want you to understand why these carrots are so valuable nutritionally. The heat actually increases the bioavailability of beta-carotene—the compound your body converts to vitamin A—meaning your body can access and use it more effectively than if you ate the carrots raw. Roasting carrots to the point of charring also triggers additional beneficial compounds. The olive oil is crucial here; fat-soluble vitamins like beta-carotene need fat for absorption. One serving of charred carrots provides roughly 300% of your daily vitamin A needs plus fiber for digestive health, and the fresh herbs add antioxidants and phytonutrients. The herb oil’s lemon provides vitamin C, which enhances iron absorption. This is sophisticated nutrition dressed up as simple, delicious food.
Make-Ahead Timeline
Since I work with clients who need realistic meal prep strategies, here’s exactly how to plan this dish:
- Up to 3 days before – Make the herb oil completely and store it covered in the refrigerator. The flavors actually meld beautifully over a day, making it taste even better. Wash and dry your carrots; store them in the vegetable drawer of your refrigerator
- Day before – Bring the herb oil to room temperature about 30 minutes before serving. You can roast the carrots completely and store them in an airtight container in the refrigerator, then gently reheat them in a 350°F oven for 8-10 minutes just before serving to restore warmth
- Day of, 30 minutes before serving – Remove herb oil from refrigerator to come to room temperature. Preheat your oven and position your sheet pan as directed
- Day of, 20-25 minutes before serving – Toss your prepared carrots with oil and seasonings and get them roasting on the hot pan
- Just before plating – Arrange charred carrots on your serving platter and drizzle with herb oil. This maintains the vibrant color and fresh herb flavor
How to Present and Plate Charred Carrot Recipe
Presentation is where good food becomes memorable food. I learned this truth in my grandmother’s kitchen—she understood that we eat with our eyes first. Here’s how to plate these carrots so they look as professional as they taste:
- Arrange vertically or in a loose line – Rather than piling carrots chaotically, arrange them so the colorful green tops are visible and the carrots lean slightly for a natural, garden-fresh appearance. This shows you’ve made an effort and celebrates the natural beauty of your ingredients
- Leave some of the char visible – Don’t cover those gorgeous caramelized, slightly blackened edges with herb oil. Drizzle the oil over and around them so the char shows through. Those dark edges are visual proof of the technique you’ve executed
- Use an odd number for visual impact – Whether you’re plating 3, 5, or 7 carrots per person, odd numbers are more visually appealing than even numbers in plating
- Finish with herb oil and a sprinkle of fleur de sel – A tiny pinch of fleur de sel (finishing salt) on top adds sparkle and elevates the visual presentation. The contrast of the salt crystals against the dark char is striking
- Serve on a neutral or dark plate – Let the rainbow colors of the carrots pop. A white, grey, or black plate makes the orange, yellow, and purple shine
Seasonal Variations
One of my favorite things about this recipe is how easily it adapts across seasons. Here’s how I modify it depending on what’s available and what flavors I’m craving:
- Spring and early summer version – Swap fresh tarragon and chervil for some of the basil and mint in the herb oil. Add the zest of a lime instead of lemon. The anise note from tarragon feels lighter and more spring-like. You can also include thinner, smaller spring carrots if available, reducing roasting time to 15-18 minutes
- Mid to late summer version – Keep the basil and mint but add fresh dill to the herb oil. Substitute white wine vinegar for the red wine vinegar to keep everything bright and light. Consider adding a tiny pinch of sumac for a tart, almost lemony quality that feels summery
- Fall version – Add fresh sage or thyme to the herb mix, and substitute balsamic vinegar for red wine vinegar. The earthier herbs feel right alongside autumn vegetables. You can also add a tiny pinch of smoked paprika to the carrot coating for deeper, smokier flavor
- Winter version – Keep robust herbs like rosemary and thyme in the oil, and use sherry vinegar instead of red wine vinegar. Add a small pinch of cinnamon or nutmeg to the carrot seasoning—just enough to hint at warmth without reading as sweet. This version pairs beautifully alongside roasted root vegetables and winter squash
What to Serve Alongside Charred Carrot Recipe
Because these carrots are elegant yet earthy, they pair beautifully with a wide range of proteins and sides. Here’s how I build a complete menu around them in my own kitchen:
- Grilled or roasted fish – The freshness of the herb oil cuts through rich fish beautifully. Pair with grilled branzino, roasted halibut, or pan-seared salmon. The herb oil becomes a natural sauce
- Herb-roasted chicken – A simple 3-ingredient chicken recipe lets the charred carrots shine as the flavorful supporting player
- Grilled lamb chops – Lamb’s richness meets the char and brightness of these carrots perfectly. The mint in the herb oil is a traditional lamb pairing
- Creamy polenta or risotto – The bright herb oil provides needed acidity against rich, creamy starches
- Warm grain salads – Toss charred carrots into farro, freekeh, or quinoa salads with the herb oil as part of the dressing. They’re equally beautiful warm or at room temperature
- Alongside fresh bread – A rustic sourdough or focaccia with these carrots and perhaps a soft cheese becomes a complete, elegant meal
Can I Store Charred Carrot Recipe?
Yes, and I’ve built strategies around this for my clients who batch-cook. The herb oil and charred carrots should be stored separately for maximum freshness:
Charred carrots: Store in an airtight container in the refrigerator for up to 4 days. Gently reheat in a 350°F oven for 8-10 minutes if serving warm, or serve at room temperature directly from the refrigerator for a different but equally delicious preparation.
Fresh herb oil: Store in a covered glass container in the refrigerator for up to 1 week. The flavor actually deepens the first day as ingredients meld. Let come to room temperature about 30 minutes before serving so it drizzles easily and flavors are at their brightest.
Combined and dressed: If you’ve already combined the carrots with the herb oil, eat within 2 hours for optimal flavor and texture. The oil will saturate the carrots, which is delicious but changes the texture slightly.
Pro tip for entertaining: This is actually wonderful served at room temperature, which means you can complete the entire recipe 4-6 hours ahead, refrigerate everything separately, then assemble just 30 minutes before guests arrive. This is my favorite strategy for dinner parties because the carrots require zero reheating just before service.
Nutrition Information
Based on USDA nutritional data, here’s what you’re getting in one serving (approximately 4-5 charred carrots with 2-3 tablespoons herb oil, serves 6):
Per serving: 165 calories | 12g fat | 14g carbohydrates | 3g fiber | 2g protein | 850mg potassium | 330% daily value vitamin A | 8mg vitamin C
This is genuinely nutrient-dense food. The beta-carotene from the carrots is stabilized by the fat in the olive oil, making it highly bioavailable. The fiber supports digestive health and blood sugar stability. The antioxidants from the fresh herbs—including quercetin from the shallot and powerful polyphenols from basil and mint—provide anti-inflammatory benefits. This isn’t diet food or “health food” that tastes like sacrifice. It’s food that happens to be excellent for your body.

Charred Carrot Recipe
Ingredients
Method
- Start by thoroughly rinsing your rainbow carrots under cool running water, using a soft vegetable brush to remove any soil. Don't peel them—the thin skin holds nutrients and adds beautiful color contrast. Pat them completely dry with paper towels; any moisture will create steam instead of char. Leave about 1-2 inches of the green tops attached (they'll darken beautifully in the oven and look rustic-elegant). If you have particularly thick carrots, cut them in half lengthwise so they cook evenly. You're aiming for pieces that are roughly uniform in thickness—about ½ inch thick—so they'll char simultaneously without some pieces burning while others remain undercooked. This is something I learned from watching professional chefs: uniformity in size is what separates restaurant-quality results from home cooking.
- Place your prepared carrots in a large mixing bowl. Drizzle with 2 tablespoons of your olive oil and sprinkle with kosher salt, freshly cracked black pepper, and red pepper flakes. Use your hands to toss everything together thoroughly, making sure every carrot is evenly coated with oil and seasoning. This is crucial—uncoated spots won't char properly, and you want maximum contact with heat. Taste a tiny piece of raw carrot; it should taste lightly seasoned but not salty. The carrots will concentrate as they roast, so hold back if you're unsure.
- Arrange your oven racks so you have clear space in the middle, then preheat your oven to 425°F. Allow at least 15 minutes for full preheating—this matters tremendously. While the oven heats, place a large sheet pan or cast iron skillet (if you have one) directly on the oven rack. Yes, put the pan in the oven while it preheats. This is the secret to achieving real char. The superhot pan is what creates those beautiful caramelized, slightly blackened edges that taste almost burnt but in the best possible way. When you're ready to roast (about 3 minutes before the oven finishes preheating), carefully remove the hot pan and arrange your oiled carrots in a single layer, cut-side down if you've halved any pieces. They should make a dramatic sizzling sound as they hit the hot pan. That sizzle is your confirmation that charring is about to happen.
- Return the pan to the oven immediately. Roast for 20-25 minutes without stirring. I know this goes against every instinct to fuss with food, but don't open the oven door or stir the carrots during the first 15 minutes. The undisturbed heat is what creates the char. After 15 minutes, stir the carrots to ensure even cooking on all sides, then continue roasting for another 5-10 minutes until the carrots are deeply browned and tender when pierced with a fork. The thinner parts should have nearly black edges while the larger sections develop rich brown caramelization. This is exactly what you want—that contrast between sweetness and slight bitterness from the char is where the complexity lives.
- About 10 minutes into the carrot roasting, prepare your herb oil so everything finishes around the same time. This is where you can work ahead beautifully. Add your basil, mint, shallot, garlic, and red pepper flakes to a food processor. Pulse until everything is finely chopped but not completely smooth—you want some texture. Don't over-process; you're looking for a rough pesto-like consistency. Pour in your olive oil and red wine vinegar, add salt and lemon zest if using, then pulse to combine. The oil should be bright green with flecks of herb throughout. Taste it and adjust: needs more salt? Needs more vinegar for brightness? This is your moment to balance it to your preference. Transfer to a bowl and set aside. The herb oil can be made up to 24 hours ahead; just store it covered in the refrigerator and let it come to room temperature before serving.
- When the carrots emerge from the oven, they should be absolutely gorgeous—deeply caramelized, slightly charred at the edges, and completely tender. Transfer them to a serving platter, arranging them so the green tops and varied colors are visible. The carrots will be hot, so work carefully. Drizzle the fresh herb oil over the top, using about 3-4 tablespoons per serving (you likely won't use all the oil, which is fine—it keeps for a week refrigerated and is wonderful on grilled vegetables, fish, or pasta). Do this plating step just before serving, not ahead of time, so the herb oil stays vibrant and the carrots don't become overly saturated. Alternatively, you can serve the herb oil on the side in a small bowl so guests can control how much they want. This actually works beautifully for buffet-style entertaining.
FAQs
Can I make this recipe with regular orange carrots instead of rainbow carrots?
Absolutely. Rainbow carrots are beautiful and taste slightly different (yellow and purple varieties have different sugar content and subtle flavor variations), but regular carrots work equally well. The technique is identical. You’ll lose the visual impact of multiple colors, but you gain simplicity in sourcing. Regular carrots are often fresher and more affordable. Choose carrots that feel firm and have bright, unblemished skin.
What if I can’t find fresh mint or basil?
Fresh herbs are really important here because they provide brightness that dried herbs can’t replicate. That said, if you’re in a season or location where fresh herbs aren’t available, you can substitute with fresh parsley and fresh dill, or even fresh cilantro if you enjoy its flavor. You could also use fresh tarragon or chervil. I’d recommend always having at least fresh parsley available—it’s the most versatile and widely available year-round. Frozen herbs are better than dried for this application.
Can I prepare the charred carrots completely in advance without the herb oil?
Yes, and this is exactly how I manage entertaining. Roast the carrots completely up to 2 days ahead and store them in an airtight container in the refrigerator. Prepare the herb oil separately (it keeps even longer). On the day of serving, gently reheat the carrots in a 350°F oven for 8-10 minutes until warmed through, then arrange them and drizzle with fresh herb oil just before guests arrive. This approach gives you a completely finished dish with minimal last-minute effort.
My carrots turned mushy instead of charred—what went wrong?
This usually means one of three things: your oven temperature was too low, your pan wasn’t preheated sufficiently, or you stirred too early in the roasting process. Charring requires high, consistent heat. Invest in an oven thermometer if you’re unsure about your oven’s accuracy—many home ovens run 25-50°F cooler than the set temperature. Second, don’t skip preheating the pan in the oven—this step is non-negotiable for achieving char. Finally, resist the urge to stir the carrots for the first 15 minutes. The stationary contact with the hot pan is what creates caramelization.
Can I roast these carrots on the stovetop in a skillet?
You can sear them in a hot cast iron skillet on the stovetop for 4-5 minutes per side to develop color, but you won’t get the same deep, even caramelization that oven roasting provides. Stovetop cooking works if you’re in a hurry or want a quick alternative, but the final texture and flavor will be noticeably different. For the full charred carrot experience this recipe is designed to deliver, use the oven method.
Common Mistakes to Avoid
Mistake 1: Peeling the carrots. The thin skin is edible, nutritious, and adds visual appeal. Wash them thoroughly but don’t peel them unless you’re working with very old, thick-skinned carrots.
Mistake 2: Cutting pieces to different sizes. Uniformity matters tremendously for even cooking. Spend an extra minute ensuring all carrot pieces are roughly the same thickness so they finish cooking simultaneously.
Mistake 3: Using pre-made pesto instead of making fresh herb oil. Commercial pesto is delicious but has a completely different flavor profile—it’s often heavier and less bright. The herb oil in this recipe is specifically designed with the shallot, garlic, and vinegar balance to complement charred carrots.
Mistake 4: Dressing the carrots too far in advance. The oil saturates the carrots and dilutes the brightness you’ve worked to achieve. Always combine the herb oil and charred carrots just before serving for maximum impact.
More Recipes for Your Table
- Lemon Orzo Recipe – A light, lemony pasta that provides creamy richness alongside charred vegetables
- Hawaiian Chicken Kebabs – Grilled chicken with sweet and savory flavors that pairs beautifully with these charred carrots
- Salsa Verde – Another herb-forward sauce with similar brightness to the herb oil; use it interchangeably with these carrots
- Steak Kebabs Recipe – Robust grilled beef that stands up beautifully to the earthy char and fresh herbs of this carrot preparation
I hope you’ll make this charred carrot recipe and discover what my grandmother knew all those years ago: that the simplest preparations, executed with technique and respect for ingredients, create the most memorable meals. These aren’t just vegetables on a plate. They’re a moment of confidence in the kitchen, a dish that shows you understand flavor, and memories being created around your table. Every time you smell that char and see those jewel-toned carrots, you’re honoring that tradition of transformative home cooking. The beauty of this recipe is that it works for your everyday table and your most special occasions—it’s elegant without being pretentious, approachable without sacrificing sophistication. Make it for the people you love. Serve it with intention. Share it with generosity. Happy cooking!