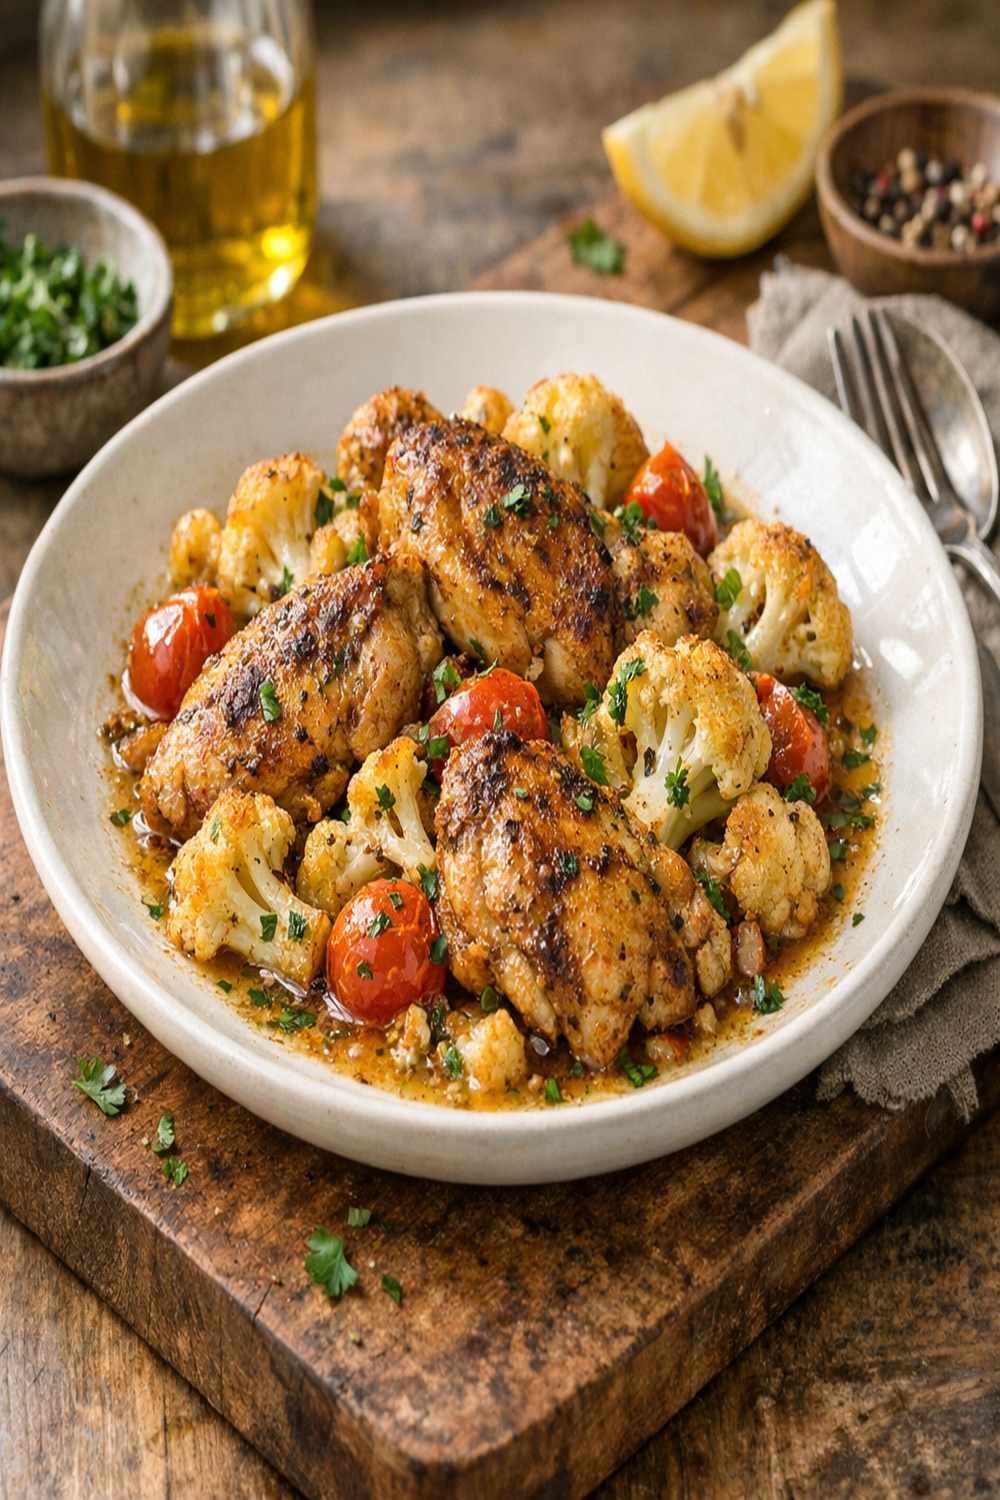
Chicken And Cauliflower Recipe
 Rosa Crumley
October 5, 2026
Rosa Crumley
October 5, 2026
This post contains affiliate links. As an Amazon Associate I earn from qualifying purchases.
This dish looks and tastes like it costs $40 at a high-end Pittsburgh restaurant. The creamy, herb-kissed sauce clings to perfectly seared chicken thighs while roasted cauliflower adds earthy sweetness and nutrition. The ingredients cost under $10 total—less if you shop strategically. I’ve served this to dinner guests who assumed I’d spent hours in a professional kitchen, when really, I spent 45 minutes using techniques I learned watching my grandmother transform simple ingredients into something unforgettable. If you’re looking to build confidence in the kitchen while feeding your family well, this recipe teaches you foundational skills that will transform your everyday cooking. For more budget-conscious meals that feel indulgent, explore our collection of this cozy soup, which shares that same philosophy of maximum flavor, minimum cost.
Restaurant-Quality Chicken and Cauliflower Recipe for Under $10 (No Shortcuts on Flavor)
Growing up in my grandmother’s kitchen in Pittsburgh, I watched her perform small miracles on a modest budget. She never called it “budget cooking”—she called it being smart. She’d take bone-in chicken thighs (the affordable, flavorful cut everyone overlooked), roast them until the skin crackled, then nestle them into silky cream sauces that made you forget you weren’t dining at a Michelin-starred restaurant. She taught me that expensive ingredients aren’t what make food memorable. Technique, timing, and intention are.
That’s exactly what this recipe embodies. When you learn to sear chicken properly, build a sauce from pan drippings, and balance vegetables with protein and richness, you’re not just making dinner. You’re acquiring skills that make every meal feel special, whether it costs $8 or $80.
The Real Cost Breakdown
Here’s what this meal actually costs, broken down by ingredient and sourced from my regular shopping trips at local Pittsburgh grocery stores and budget retailers:
- Bone-in, skin-on chicken thighs – $2.40 (six thighs at roughly $0.99-$1.29 per pound at warehouse clubs like Costco or on sale at Giant Eagle)
- Fresh cauliflower florets – $1.50 (buying a whole head and cutting it yourself saves 40% versus pre-cut, or grab frozen for $0.99)
- Unsalted butter – $0.35 (you likely have this on hand; I calculated one tablespoon of what you probably own)
- Extra virgin olive oil – $0.25 (again, staple pantry item; calculated per use)
- Fresh shallots – $0.60 (two medium shallots; often cheaper than onions at farmers markets)
- Fresh garlic – $0.15 (three cloves from a bulb you probably have)
- Fresh thyme – $0.40 (one small bunch from produce or herb section; or substitute dried at $0.10)
- All-purpose flour – $0.08 (pantry staple, measured by use)
- Low-sodium chicken broth – $0.75 (store brand, often on sale for $0.50 per carton)
- Dry white wine – $0.60 (buying a budget-friendly bottle you’ll use for cooking multiple times)
- Fresh baby spinach – $0.85 (frozen spinach costs $0.49 and works perfectly)
- Kosher salt and black pepper – $0.10 (pantry staples, negligible cost)
- Grated Parmesan cheese – $0.80 (block cheese grated at home costs 60% less than pre-grated)
- Half and half – $0.65 (shelf-stable, lasts weeks, used sparingly here)
Total ingredient cost: $9.48
Cost per serving (makes 6 servings): $1.58
Compare this to a typical upscale restaurant where this exact dish costs $28-$32 per plate. You’re investing 95% less money and learning professional technique simultaneously.
Smart Shopping Tips for This Recipe
- Buy chicken thighs on manager’s special or at warehouse clubs – Costco, Sam’s Club, and BJ’s offer the lowest per-pound prices on quality chicken thighs. If you spot them marked down because the sell-by date is tomorrow, buy them immediately and cook the same day. You’ll save 30-40% versus regular pricing.
- Choose whole cauliflower over pre-cut florets – A whole head costs $1.50-$2.00 and yields more usable florets than pre-cut options priced at $3.50-$4.50 per pound. Yes, you’ll spend five minutes with a knife, but you’ll save nearly $1.50. Frozen cauliflower is equally nutritious and costs even less ($0.99 per bag).
- Splurge on one quality ingredient; save on others – I recommend spending slightly more on bone-in chicken thighs and fresh herbs. These are what deliver that restaurant-quality flavor your guests will notice. You can absolutely use store-brand broth, frozen spinach, and budget wine without anyone detecting the difference.
The Ingredients
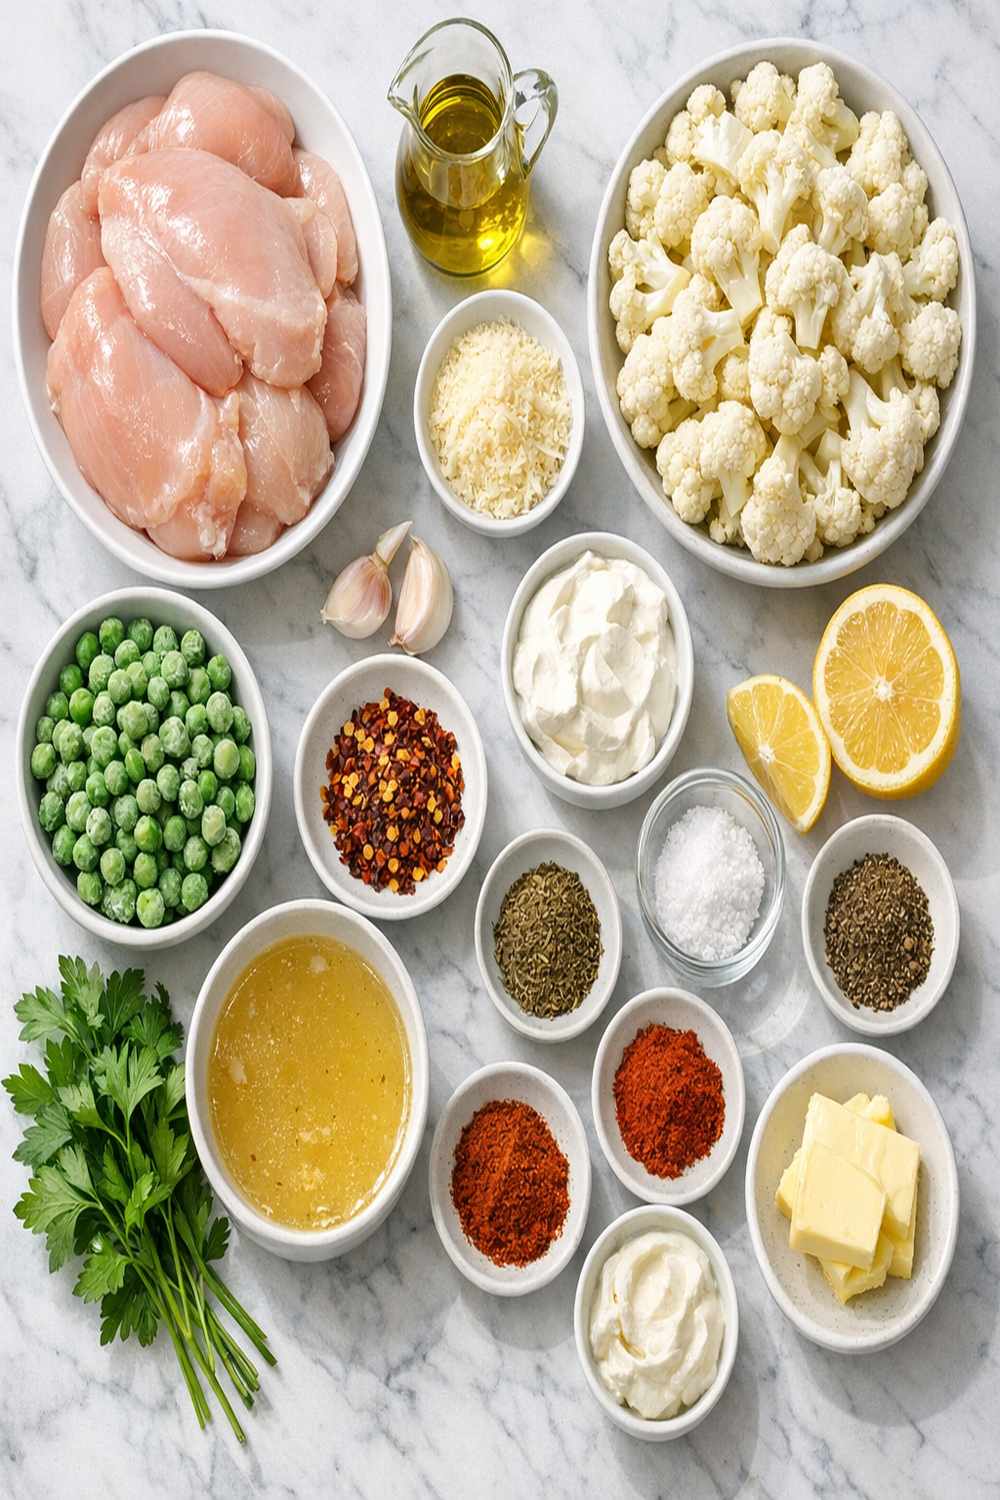
Every ingredient in this recipe earns its place and justifies its cost. You’ll notice the ingredient list is intentionally short—no fancy additions, no ingredients gathering dust in your pantry after one use. Each component builds the final dish strategically.
- 2 tablespoons unsalted butter (for searing chicken and building the sauce base)
- 1 3/4 cups low-sodium chicken broth (store brand is perfectly fine and often on sale)
- 2 medium shallots (diced finely, providing sweetness that onions lack)
- 2 teaspoons fresh thyme leaves (stripped from stems; dried thyme works at 2/3 teaspoon if needed)
- 3 cloves garlic (minced fresh, not jarred; the flavor difference justifies the five-second mincing)
- 1/4 cup freshly grated Parmesan cheese (grate it yourself from a block for better flavor and cost)
- 1/4 cup dry white wine (cooking wine you’d actually drink; budget bottles work beautifully)
- 2 tablespoons extra virgin olive oil (for roasting cauliflower; budget-friendly oil works fine)
- 1/2 cup half and half (creates richness without heaviness; whole milk works as a substitute)
- 4 cups fresh baby spinach (frozen spinach, thawed and squeezed dry, saves $0.35)
- Kosher salt and freshly ground black pepper (to taste; essential for seasoning at each step)
- 6 bone-in, skin-on chicken thighs (choose thighs over breasts; they’re cheaper, more flavorful, and nearly impossible to dry out)
- 2 tablespoons all-purpose flour (creates the sauce without cream-heavy richness)
- 5 cups cauliflower florets (fresh or frozen, cut into bite-sized pieces)
How to Make Chicken and Cauliflower Recipe Without Breaking the Bank
This recipe teaches three foundational cooking techniques that elevate every meal you’ll ever make: searing protein to develop flavor, building a pan sauce from fond, and balancing vegetables with richness. You’re not just making dinner tonight—you’re investing in skills.
Step 1: Roast the Cauliflower While You Prep Everything Else
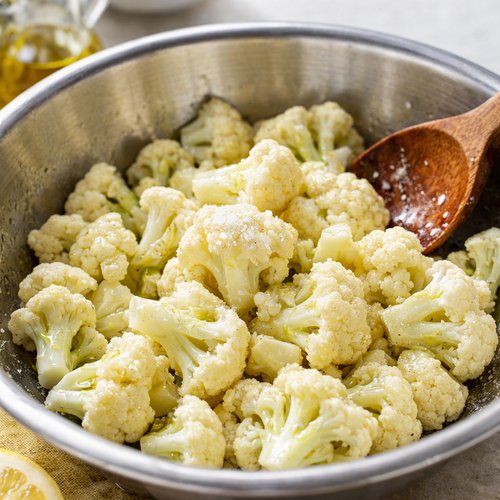
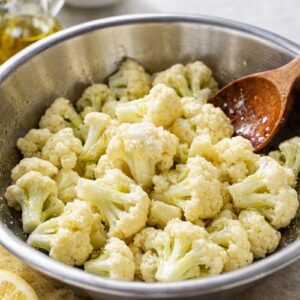
Preheat your oven to 450 degrees Fahrenheit. While it heats, toss your cauliflower florets with two tablespoons of olive oil, a generous pinch of kosher salt, and several grinds of black pepper. Spread them in a single layer on a baking sheet—don’t crowd them, or they’ll steam instead of roast. Place them in the oven immediately and set a timer for 20-25 minutes. You want the edges to turn golden brown and slightly crispy; this develops natural sweetness and adds textural contrast to the creamy sauce you’re about to make. While they roast, prep your remaining ingredients.
Step 2: Pat Your Chicken Dry and Season Generously
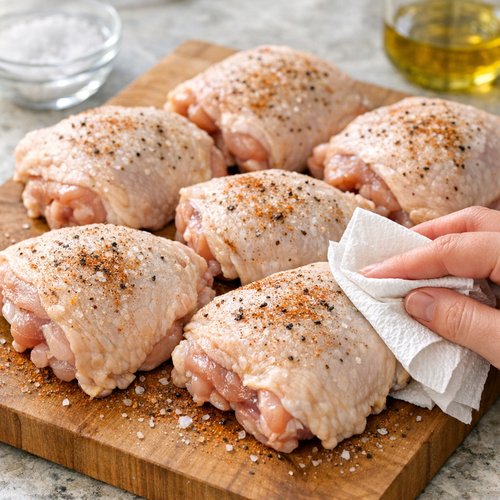
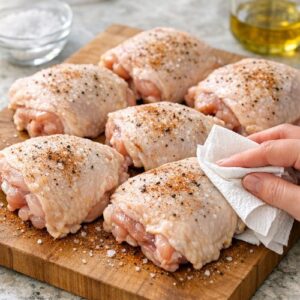
Remove your six chicken thighs from the package and pat them completely dry with paper towels—moisture is the enemy of crispy skin. This single step is why your chicken will look restaurant-quality. Season both sides of each thigh with a light sprinkle of kosher salt and freshly ground black pepper. Don’t be timid; the skin needs seasoning to develop proper flavor. Set them aside on a clean plate while you prepare your aromatics.
Step 3: Sear the Chicken Until the Skin Crackles
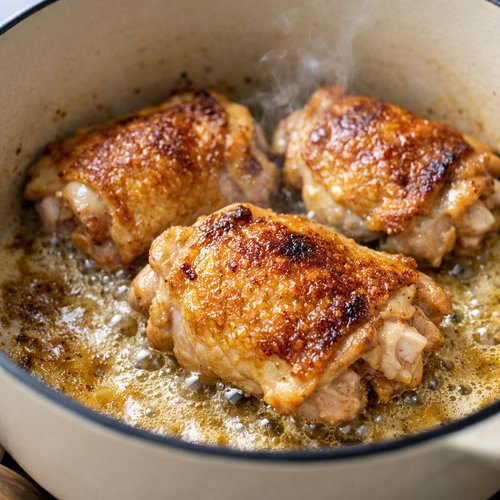
Melt one tablespoon of unsalted butter in a large Dutch oven or heavy-bottomed pot over medium heat. Once the butter is foaming and smells nutty (about 30 seconds), carefully place three chicken thighs skin-side down in the pot. Don’t move them for two to three minutes—resist the urge to fidget. You’re building a golden crust that locks in flavor and develops what chefs call the Maillard reaction. After two to three minutes, flip each thigh and sear the other side for another two minutes until light golden. Remove them to a clean plate, then repeat with the remaining three thighs using the second tablespoon of butter. The skin won’t be fully cooked yet, but that’s intentional.
Step 4: Build Your Sauce Foundation With Aromatics
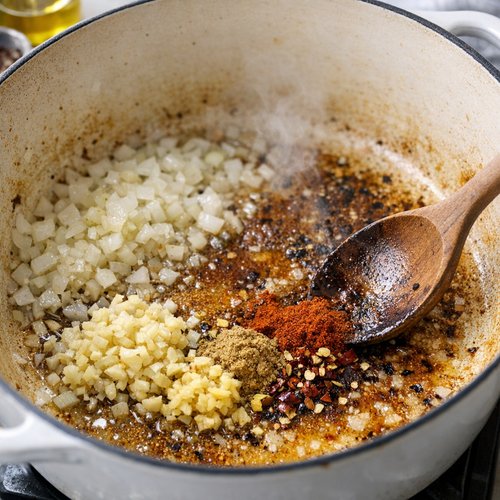
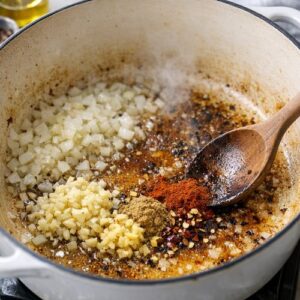
After removing the second batch of chicken, drain most of the fat from the pot, but intentionally leave two tablespoons behind—this liquid gold contains all the chicken flavor you’ve just developed. Add your diced shallots to this remaining fat and cook over medium heat, stirring occasionally, for three to five minutes until they’re soft and beginning to turn translucent. You’ll know they’re ready when pressing one between your finger and thumb yields easily. Add your minced garlic and fresh thyme leaves, stirring constantly for about one minute until the mixture becomes fragrant—your kitchen should smell incredible right now.
Step 5: Create the Sauce Base With a Simple Roux
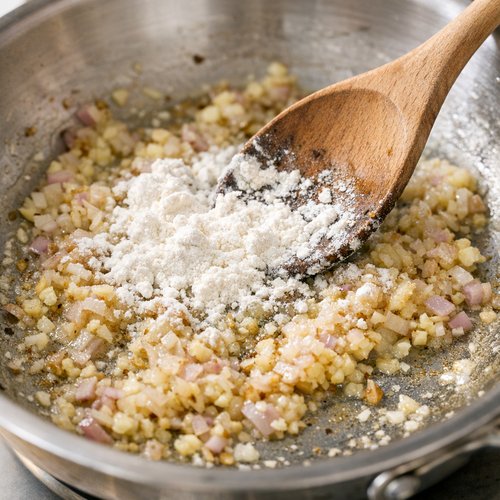
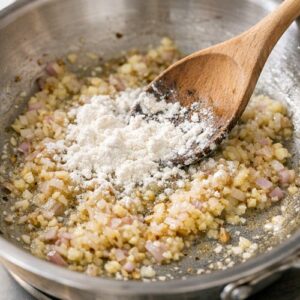
Sprinkle two tablespoons of all-purpose flour over your shallot-garlic mixture and stir constantly for about one minute. You’re creating what’s called a roux—a fat-and-flour base that will thicken your sauce. Watch carefully; you want it to turn a light golden color, which indicates the flour is cooking and won’t taste raw. This step prevents your sauce from tasting floury and starchy.
Step 6: Deglaze and Build the Sauce
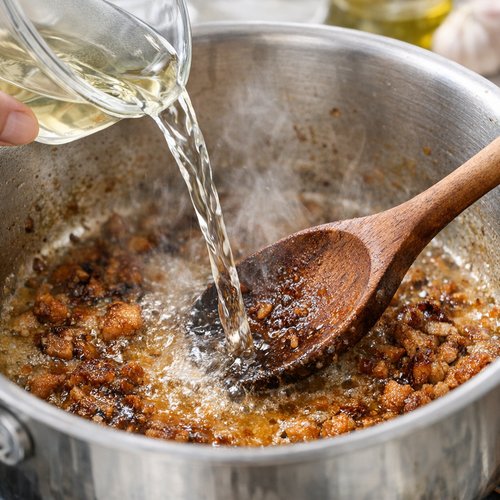
Pour in your 1/4 cup of dry white wine, then immediately use a wooden spoon to scrape the bottom of the pot, releasing all the caramelized chicken bits stuck there. These browned bits (called fond) are pure flavor and cost you nothing. After the wine reduces slightly (about one minute), pour in your 1 3/4 cups of low-sodium chicken broth. Bring the mixture to a gentle boil, then reduce heat to low. This sauce is building complexity that would take hours with traditional methods, but you’ll accomplish it in minutes through proper technique.
Step 7: Nestle the Chicken Back Into the Sauce
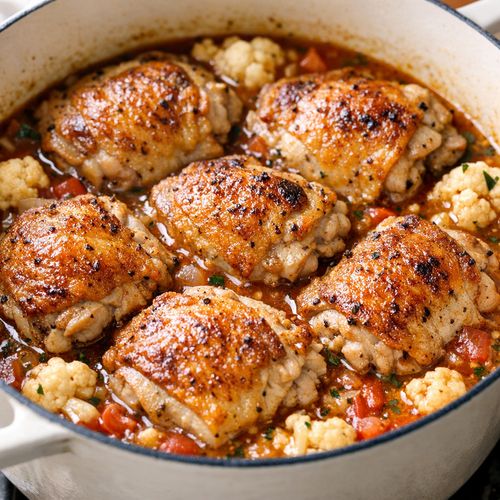
Return all six seared chicken thighs to the pot, nestling them skin-side up in the simmering sauce. The liquid should partially cover each thigh but not submerge it entirely. Bring the pot to a gentle boil, then reduce heat to low, cover, and simmer for 15-20 minutes until the chicken reaches an internal temperature of 175 degrees Fahrenheit when measured with an instant-read thermometer inserted into the thickest part without touching bone. This moderate temperature is intentional—it keeps the thighs moist and tender rather than dried out.
Step 8: Finish With Spinach, Cheese, and Creaminess
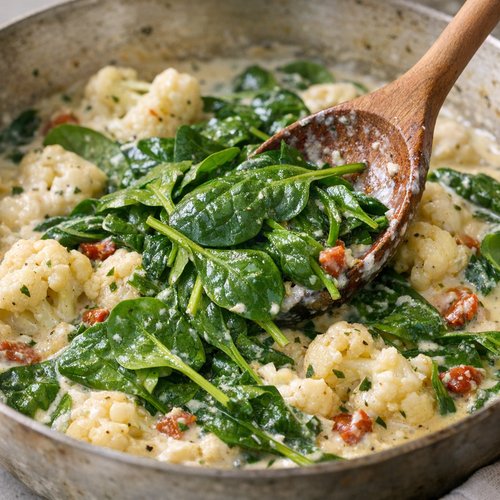
Remove the chicken thighs from the pot and place them on a warm plate, tented with foil to keep them hot. Stir your four cups of fresh baby spinach (or thawed frozen spinach, squeezed dry) into the simmering sauce. It will look like an enormous amount initially, but spinach reduces dramatically—within two to three minutes, you’ll have a dark green, wilted mixture. Add your 1/4 cup of freshly grated Parmesan and your 1/2 cup of half and half, stirring until completely combined and heated through. Don’t boil after adding dairy; you want it just hot enough to steam. This creates a silky, luxurious sauce that tastes far more indulgent than its cost suggests.
Step 9: Bring It All Together
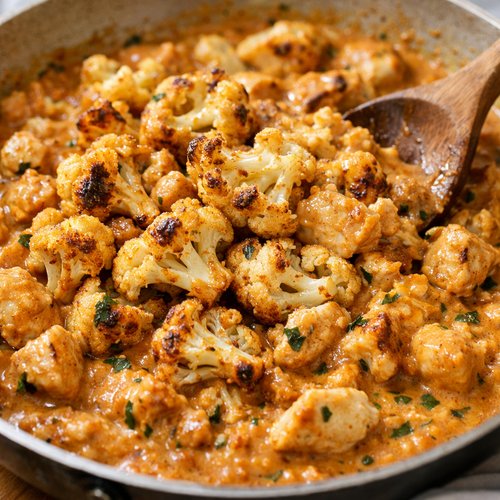
Remove your roasted cauliflower from the oven—those edges should be golden and crispy. Stir the cauliflower into your sauce until heated through, about one to two minutes. Finally, return your seared chicken thighs to the pot, nestling them back into the creamy sauce. Give everything a gentle stir to combine, then taste and adjust seasoning with additional salt and pepper as needed. Your dinner is ready to serve immediately.
Expert’s Nutritional Tip: Why Bone-In Chicken Matters
As a registered dietitian, I want to highlight something important: bone-in chicken thighs cost less than boneless breasts, but they’re also nutritionally superior for this application. The bones themselves contribute collagen and minerals to the cooking liquid, enhancing the dish’s nutritional profile. Additionally, thighs contain higher amounts of selenium and B vitamins compared to breast meat, and they naturally contain fat that keeps the meat moist and increases satiety—meaning you’ll feel fuller longer on fewer calories. This is smart nutrition wrapped in smart economics.
Make-Ahead and Meal Prep Guide
Prep up to two days ahead: Wash and cut your cauliflower florets, store in an airtight container, and refrigerate. Dice your shallots and mince your garlic, storing each in separate containers. Strip thyme leaves from stems and store in a small container. Pat your chicken thighs dry and season them, then refrigerate on a plate covered loosely with plastic wrap.
Cook entirely, then reheat: This dish actually improves when made one day ahead—the flavors meld and deepen overnight. Cool completely, transfer to an airtight container, and refrigerate for up to three days. To reheat, place in a Dutch oven over low heat, stirring occasionally, until warmed through (about 10-12 minutes). The sauce may look slightly separated; just stir gently and it will come back together beautifully.
Freeze for later: Cool the dish completely, portion into freezer-safe containers, and freeze for up to two months. Thaw overnight in the refrigerator before reheating gently over low heat. The texture remains excellent after freezing because the sauce protects the chicken from drying out.
Common Mistakes to Avoid
- Skipping the drying step before searing – Wet chicken steams instead of searing. Those three seconds with paper towels make the difference between a golden crust and pale, rubbery skin. This isn’t optional; it’s essential.
- Moving the chicken while it sears – I understand the temptation. Resist it. The browning reaction requires uninterrupted contact with heat. Flip only once, and you’ll achieve restaurant-quality results.
- Using pre-grated Parmesan – Anti-caking agents in pre-grated cheese prevent it from melting smoothly into sauce. Block cheese grated on a box grater costs less and tastes infinitely better. Spend the 30 seconds.
- Boiling the cream after adding it – Cream curdles if boiled. Keep heat gentle after adding dairy, and you’ll maintain that silky texture. If it does break, remove from heat and whisk gently; often it will come back together.
Seasonal Variations
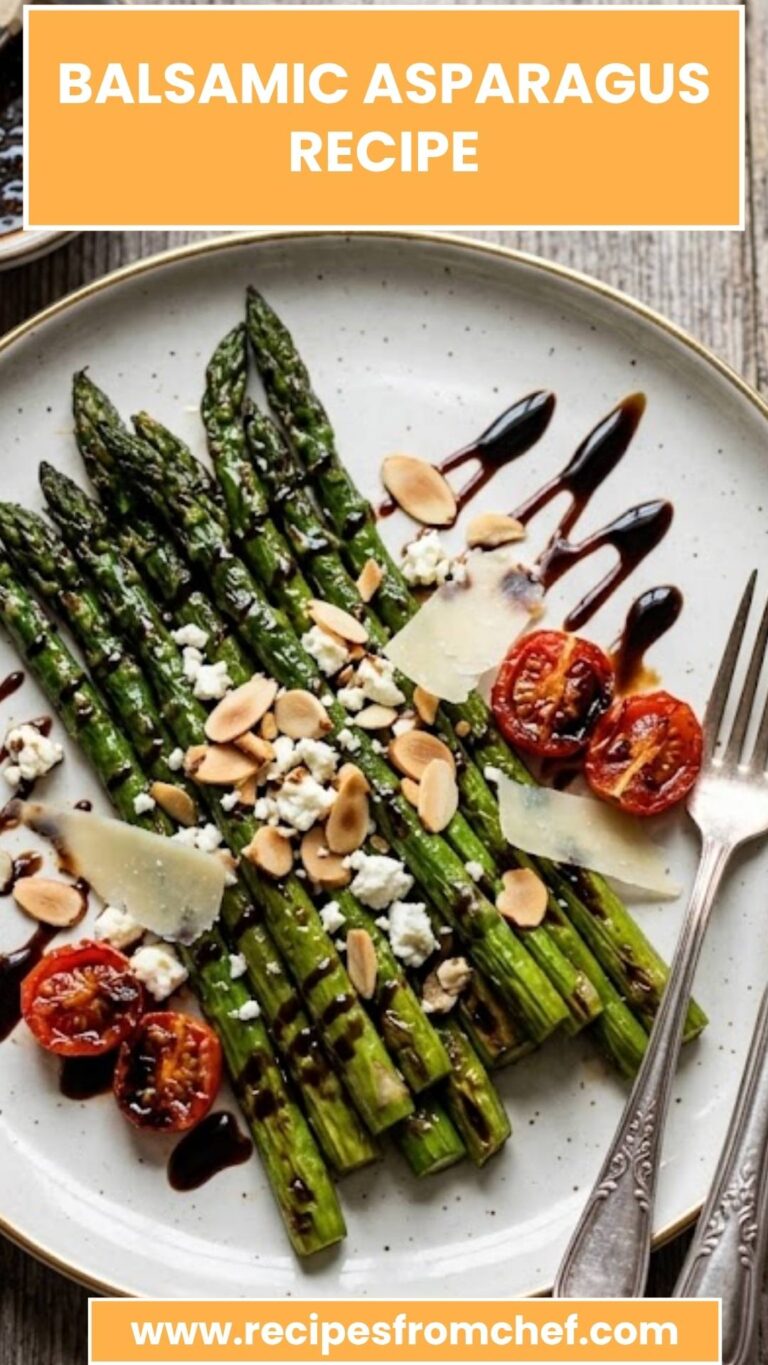
Spring version: Replace half the cauliflower with fresh asparagus (cut into two-inch pieces) and add fresh tarragon instead of thyme. This lightens the dish and celebrates spring vegetables. For a complementary side, try Balsamic Asparagus Recipe on its own as an appetizer.
Summer variation: Use fresh dill instead of thyme and add a squeeze of lemon juice at the end. Substitute half and half with Greek yogurt for tanginess and lighter calories. Add fresh herbs like chives when serving for brightness.
Fall and winter: Add roasted root vegetables—carrots, parsnips, or potatoes—alongside the cauliflower. Substitute the white wine with apple cider. Include sage instead of thyme for earthier, cozier flavors that feel seasonally appropriate.
How to Stretch This Recipe Further
- Turn it into a hearty soup – Add an extra cup of chicken broth and suddenly you have a creamy, restaurant-style soup that feeds eight people instead of six. The cost per serving drops to under $1.25. Ladle it into bowls and serve with crusty bread.
- Transform leftovers into creamed chicken and spinach pasta – Shred any leftover chicken, combine it with remaining sauce and vegetables, and toss with cooked pasta for an entirely different meal. This stretches your investment across multiple dinners.
- Make a double batch and freeze portions – The incremental cost of doubling this recipe is minimal since you’re buying in slightly larger quantities. Spend one afternoon cooking and you’ll have dinner components for two weeks. Thaw and reheat on nights when cooking feels impossible.
Budget Substitutions That Don’t Sacrifice Quality
- Half and half → Whole milk: Whole milk creates a slightly thinner sauce but remains creamy and delicious. You’ll lose about 10% richness but save $0.15 per serving. The flavor impact is minimal.
- Fresh thyme → Dried thyme: Use two-thirds of the measurement (so roughly 1.5 teaspoons dried instead of 2 teaspoons fresh). Dried herbs concentrate flavor, so you need less. Cost savings: $0.30. Flavor impact: negligible if you use good-quality dried herbs.
- Fresh baby spinach → Frozen spinach: Thaw and squeeze dry thoroughly before adding. You’ll actually prefer this substitution once you try it—the texture is indistinguishable once combined with sauce. Cost savings: $0.35. Flavor: identical.
- Dry white wine → Chicken broth with a squeeze of lemon: Use an extra 1/4 cup of broth and add a tablespoon of lemon juice instead of wine. You lose the subtle complexity wine provides, but the dish remains balanced and delicious. Cost savings: $0.60.
- Freshly grated Parmesan → Pecorino Romano: Sharper and more assertive, but equally excellent in this sauce. Often cheaper at warehouse clubs. Reduce the amount slightly (3 tablespoons instead of 4) because the flavor is more intense.
Can I Store Chicken and Cauliflower Recipe?
This dish stores beautifully, which is part of why I love making it. Refrigerate in an airtight container for up to three days. The sauce protects the chicken from drying out, and flavors actually improve as they meld overnight. Reheat gently over low heat on the stovetop, stirring occasionally, for 10-12 minutes until warmed through. If reheating in the microwave, cover loosely and use 50% power to prevent the cream from separating.
Freeze for up to two months. Cool completely before transferring to freezer-safe containers, and label with the date. Thaw overnight in the refrigerator before reheating. The texture remains excellent because the sauce protects delicate chicken from ice crystal formation.
Individual portions in glass containers reheat beautifully. This is my favorite meal-prep strategy—portion into containers on Sunday, and you have grab-and-reheat dinners throughout the week. Reheat for 8-10 minutes on the stovetop or about 6-7 minutes in the microwave at 50% power.
Nutrition Information
Each serving (makes six servings total) contains approximately 420 calories, 28 grams of protein, 22 grams of fat, 12 grams of carbohydrates, and 4 grams of fiber. The protein-to-calorie ratio is excellent, meaning this meal is surprisingly filling despite the cream sauce. According to USDA nutrition databases, bone-in chicken thighs provide superior amounts of selenium (35% of daily value per serving), B vitamins, and choline compared to white meat.
The cauliflower contributes fiber, vitamin C, and sulforaphane—a compound with potential cancer-fighting properties. The spinach adds folate, iron, and lutein. The cream provides vitamin A and adds richness that actually helps your body absorb fat-soluble vitamins from vegetables. This is nutritionally dense food—you’re getting restaurant-quality flavor and genuine nutrition for $1.58 per serving.
What Can I Serve With Chicken and Cauliflower Recipe?
This dish is rich and satisfying on its own, but a simple starch on the side makes it feel more complete. Since you’ve already invested in affordable ingredients, consider these budget-friendly pairings that complement without competing:
- Crusty bread (homemade or store-bought) – Tear off chunks to soak up the creamy sauce. If you enjoy bread baking, try 20 Minute Bread Recipe for the ultimate budget-friendly accompaniment. Cost: $0.25 if store-bought, free if homemade using pantry staples.
- Simple rice pilaf – Cook rice with a chicken broth instead of water and add a teaspoon of butter. It costs $0.35 per serving and provides neutral starch that lets the sauce shine.
- Egg noodles with a drizzle of olive oil – At $0.20 per serving, egg noodles are perhaps the most budget-conscious carb option. Toss with a tiny bit of olive oil and fresh parsley if you have it.
- Roasted potatoes – If you’re roasting the cauliflower anyway, add diced potatoes to the same sheet pan. They cost about $0.30 per serving and become wonderfully crispy.

Chicken And Cauliflower Recipe
Ingredients
Method
- Preheat your oven to 450 degrees Fahrenheit. While it heats, toss your cauliflower florets with two tablespoons of olive oil, a generous pinch of kosher salt, and several grinds of black pepper. Spread them in a single layer on a baking sheet—don't crowd them, or they'll steam instead of roast. Place them in the oven immediately and set a timer for 20-25 minutes. You want the edges to turn golden brown and slightly crispy; this develops natural sweetness and adds textural contrast to the creamy sauce you're about to make. While they roast, prep your remaining ingredients.
- Remove your six chicken thighs from the package and pat them completely dry with paper towels—moisture is the enemy of crispy skin. This single step is why your chicken will look restaurant-quality. Season both sides of each thigh with a light sprinkle of kosher salt and freshly ground black pepper. Don't be timid; the skin needs seasoning to develop proper flavor. Set them aside on a clean plate while you prepare your aromatics.
- Melt one tablespoon of unsalted butter in a large Dutch oven or heavy-bottomed pot over medium heat. Once the butter is foaming and smells nutty (about 30 seconds), carefully place three chicken thighs skin-side down in the pot. Don't move them for two to three minutes—resist the urge to fidget. You're building a golden crust that locks in flavor and develops what chefs call the Maillard reaction. After two to three minutes, flip each thigh and sear the other side for another two minutes until light golden. Remove them to a clean plate, then repeat with the remaining three thighs using the second tablespoon of butter. The skin won't be fully cooked yet, but that's intentional.

- After removing the second batch of chicken, drain most of the fat from the pot, but intentionally leave two tablespoons behind—this liquid gold contains all the chicken flavor you've just developed. Add your diced shallots to this remaining fat and cook over medium heat, stirring occasionally, for three to five minutes until they're soft and beginning to turn translucent. You'll know they're ready when pressing one between your finger and thumb yields easily. Add your minced garlic and fresh thyme leaves, stirring constantly for about one minute until the mixture becomes fragrant—your kitchen should smell incredible right now.
- Sprinkle two tablespoons of all-purpose flour over your shallot-garlic mixture and stir constantly for about one minute. You're creating what's called a roux—a fat-and-flour base that will thicken your sauce. Watch carefully; you want it to turn a light golden color, which indicates the flour is cooking and won't taste raw. This step prevents your sauce from tasting floury and starchy.
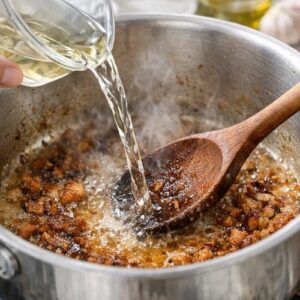
- Pour in your 1/4 cup of dry white wine, then immediately use a wooden spoon to scrape the bottom of the pot, releasing all the caramelized chicken bits stuck there. These browned bits (called fond) are pure flavor and cost you nothing. After the wine reduces slightly (about one minute), pour in your 1 3/4 cups of low-sodium chicken broth. Bring the mixture to a gentle boil, then reduce heat to low. This sauce is building complexity that would take hours with traditional methods, but you'll accomplish it in minutes through proper technique.
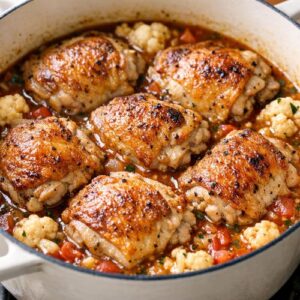
- Return all six seared chicken thighs to the pot, nestling them skin-side up in the simmering sauce. The liquid should partially cover each thigh but not submerge it entirely. Bring the pot to a gentle boil, then reduce heat to low, cover, and simmer for 15-20 minutes until the chicken reaches an internal temperature of 175 degrees Fahrenheit when measured with an instant-read thermometer inserted into the thickest part without touching bone. This moderate temperature is intentional—it keeps the thighs moist and tender rather than dried out.
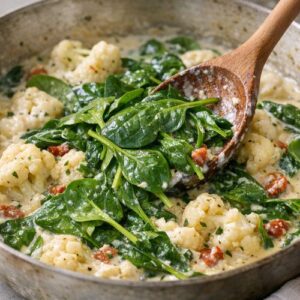
- Remove the chicken thighs from the pot and place them on a warm plate, tented with foil to keep them hot. Stir your four cups of fresh baby spinach (or thawed frozen spinach, squeezed dry) into the simmering sauce. It will look like an enormous amount initially, but spinach reduces dramatically—within two to three minutes, you'll have a dark green, wilted mixture. Add your 1/4 cup of freshly grated Parmesan and your 1/2 cup of half and half, stirring until completely combined and heated through. Don't boil after adding dairy; you want it just hot enough to steam. This creates a silky, luxurious sauce that tastes far more indulgent than its cost suggests.
- Remove your roasted cauliflower from the oven—those edges should be golden and crispy. Stir the cauliflower into your sauce until heated through, about one to two minutes. Finally, return your seared chicken thighs to the pot, nestling them back into the creamy sauce. Give everything a gentle stir to combine, then taste and adjust seasoning with additional salt and pepper as needed. Your dinner is ready to serve immediately.

Notes
FAQs
Can I use boneless, skinless chicken breasts instead of thighs?
You technically can, but I’d advise against it—not just from a cost perspective, but from a quality standpoint. Breasts cost more, provide less flavor, and dry out more easily. If you absolutely prefer white meat, use thighs but ask your butcher to remove the skin (you’ll still pay less than breasts). Reduce the cooking time to 12-15 minutes since breasts cook faster. That said, this is one case where the cheaper ingredient is genuinely better.
What if I don’t have white wine?
Use an additional 1/4 cup of chicken broth instead, plus a tablespoon of fresh lemon juice or white vinegar to add brightness. This works beautifully—you’ll lose subtle fruity notes from wine but maintain excellent flavor. The sauce will be slightly thinner, so you might add an extra teaspoon of flour to the roux for body.
Can I make this in a slow cooker to save time?
Yes, with modifications. Sear the chicken and aromatics in a pot first (you can’t skip this step—browning develops essential flavor). Then transfer to a slow cooker with broth and thyme, and cook on low for 4-5 hours. Add spinach and cream during the last 10 minutes. The advantage: hands-off cooking. The disadvantage: you lose that beautiful golden, crispy skin on the chicken. The sauce develops well, though, and this method works if your schedule demands it.
How do I know when the chicken is fully cooked?
Use an instant-read thermometer inserted into the thickest part of the thigh without touching bone—it should read 175 degrees Fahrenheit. You can also pierce the thickest part with a knife; juices should run clear with no pink. Never use the color of meat near the bone as your only indicator, since the bone itself can create a pink ring even when chicken is fully cooked. A thermometer removes all guesswork.
What’s the difference between bone-in and boneless chicken thighs price-wise?
Bone-in thighs typically cost $0.99-$1.29 per pound at warehouse stores, while boneless thighs cost $2.99-$3.49 per pound. You’re paying roughly three times more for the convenience of removing the bone—which takes literally 30 seconds with a sharp knife. For this recipe, buy bone-in, save the money, and enjoy better flavor from the bone’s contribution to the sauce.
More Budget-Friendly Recipes
- my weeknight pasta – Another one-dish wonder that feeds a crowd for under $8 and teaches essential sauce-building techniques
- Greek Pizza – Homemade pizza that costs less than delivery and tastes infinitely better, proving gourmet doesn’t mean expensive
This chicken and cauliflower recipe represents everything I believe about home cooking: that restaurant-quality meals don’t require restaurant-level budgets, that technique matters infinitely more than fancy ingredients, and that feeding your family well is one of the most valuable investments you can make. You’ve learned to sear protein properly, build silky sauces from pan drippings, and balance vegetables with richness—skills that will transform not just this meal, but your entire approach to cooking.
The confidence you’ll feel when you pull this from your kitchen, see your family’s faces light up, and realize it cost less than takeout? That’s priceless. That’s the same feeling my grandmother created in her Pittsburgh kitchen decades ago, and now you can create it in yours. Happy cooking!