Cherry Tomato Salsa Recipe
 Rosa Crumley
October 1, 2026
Rosa Crumley
October 1, 2026
This post contains affiliate links. As an Amazon Associate I earn from qualifying purchases.
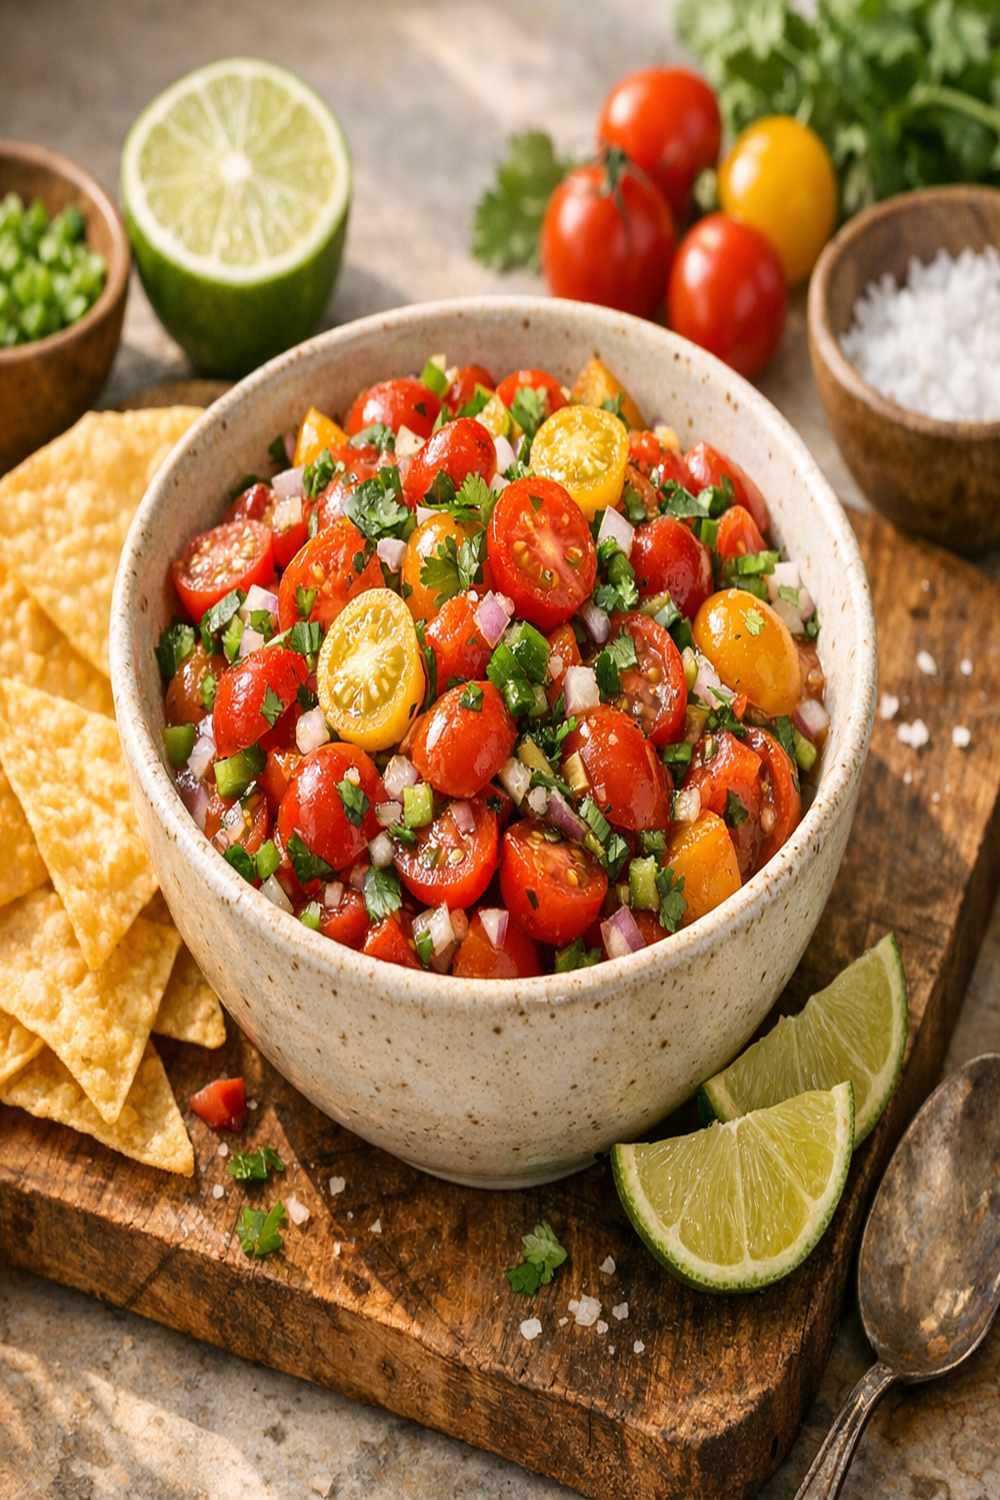
If you’ve always wanted to make cherry tomato salsa but felt intimidated by recipes that seem too casual or too complicated, this is your starting point. I’m going to walk you through every single step, from selecting your tomatoes at the market to that first spoonful of bright, smoky perfection. This recipe teaches you a professional broiling technique that transforms humble ingredients into something you’d order at a upscale restaurant—and it’s genuinely easier than you think.
Whether you’re planning to serve this with grilled fish, pair it with tacos, or simply dip warm chips into it while entertaining friends, you’re about to create something that tastes like you spent hours in the kitchen. The truth? You’ll spend maybe twenty minutes, and most of that is just waiting for your broiler to do the work.
How to Make Cherry Tomato Salsa Recipe for the First Time (You’ve Got This)
I still remember the afternoon in my grandmother’s kitchen when I first understood what “char” really meant. She was making a similar sauce for a family dinner, and I watched those small red tomatoes blister and darken under intense heat. I was terrified they were burning. When I said something, she smiled and said, “That’s exactly what we want. The heat brings out sweetness you didn’t know was there.”
That lesson changed how I cooked. For years afterward, I was nervous about high-heat cooking—broiling especially seemed risky. But once I made this salsa and tasted the difference that charring makes, I became a believer. Now it’s one of my most-requested recipes, and I’m thrilled to share it with you.
What to Expect Before You Start
Let me set realistic expectations so you feel completely confident moving forward. This recipe is genuinely beginner-friendly, but understanding what success looks like will help you avoid second-guessing yourself.
Time commitment: About 25 minutes total, with most of that being passive broiler time. You’re looking at about 5 minutes of active prep work, 10 minutes waiting for broiling, and 5 minutes of finishing touches.
Difficulty level: This is an easy recipe with one moderate skill—using a broiler effectively. Don’t worry. I’ll explain exactly what to watch for so you get that perfect char without burning anything.
- The broiler is friendlier than you think – People fear broilers, but it’s just an upside-down oven. You’re applying concentrated heat from above instead of below. The key is staying in the kitchen while it runs (which takes just 10 minutes), and checking at the 7-minute mark to see how things are progressing. You’re looking for blistered, darkened skin on the tomatoes and the onion and garlic showing some golden-brown color.
- You might worry about making it “wrong” – There’s genuine flexibility here. If your tomatoes char more deeply than mine, that’s actually beautiful—darker char means deeper flavor. If your salsa is slightly thinner or thicker based on how much you purée it, that’s your preference taking shape. This recipe is a framework, not a prison.
Equipment You’ll Need (And What You Can Skip)
I’ve designed this recipe to work in most home kitchens without requiring specialty tools. Everything here is probably already in your cabinet, and I’ll give you real alternatives for anything that’s not standard.
- Sheet pan (also called a baking sheet) – You need this for broiling. Any standard rectangular metal pan works perfectly. If you only have ceramic, that’s okay too, though it heats less evenly. Budget alternative: you don’t have one? A cast-iron skillet works beautifully and actually distributes heat more evenly.
- Food processor – This is where your vegetables become silky salsa. A standard home food processor (the kind that costs $30-60) is perfect. Budget alternative: an immersion blender with a small bowl works, though it takes longer. Last resort: a blender works fine if you process in smaller batches.
- Small sharp knife – For chopping your onion, garlic, and jalapeño before broiling. This doesn’t need to be fancy—just something that holds an edge reasonably well.
- Cutting board – Any cutting board works. Plastic, wood, bamboo—choose whatever you have and what feels comfortable in your hands.
- Measuring spoons – For the salt and lime juice. This is helpful for accuracy, but honestly, once you make this once, you’ll know what looks right and can eyeball it.
- Wooden spoon or rubber spatula – Optional but nice for tossing vegetables with oil before broiling. Your hands work just fine, though.
The Ingredients—A Beginner’s Shopping Guide
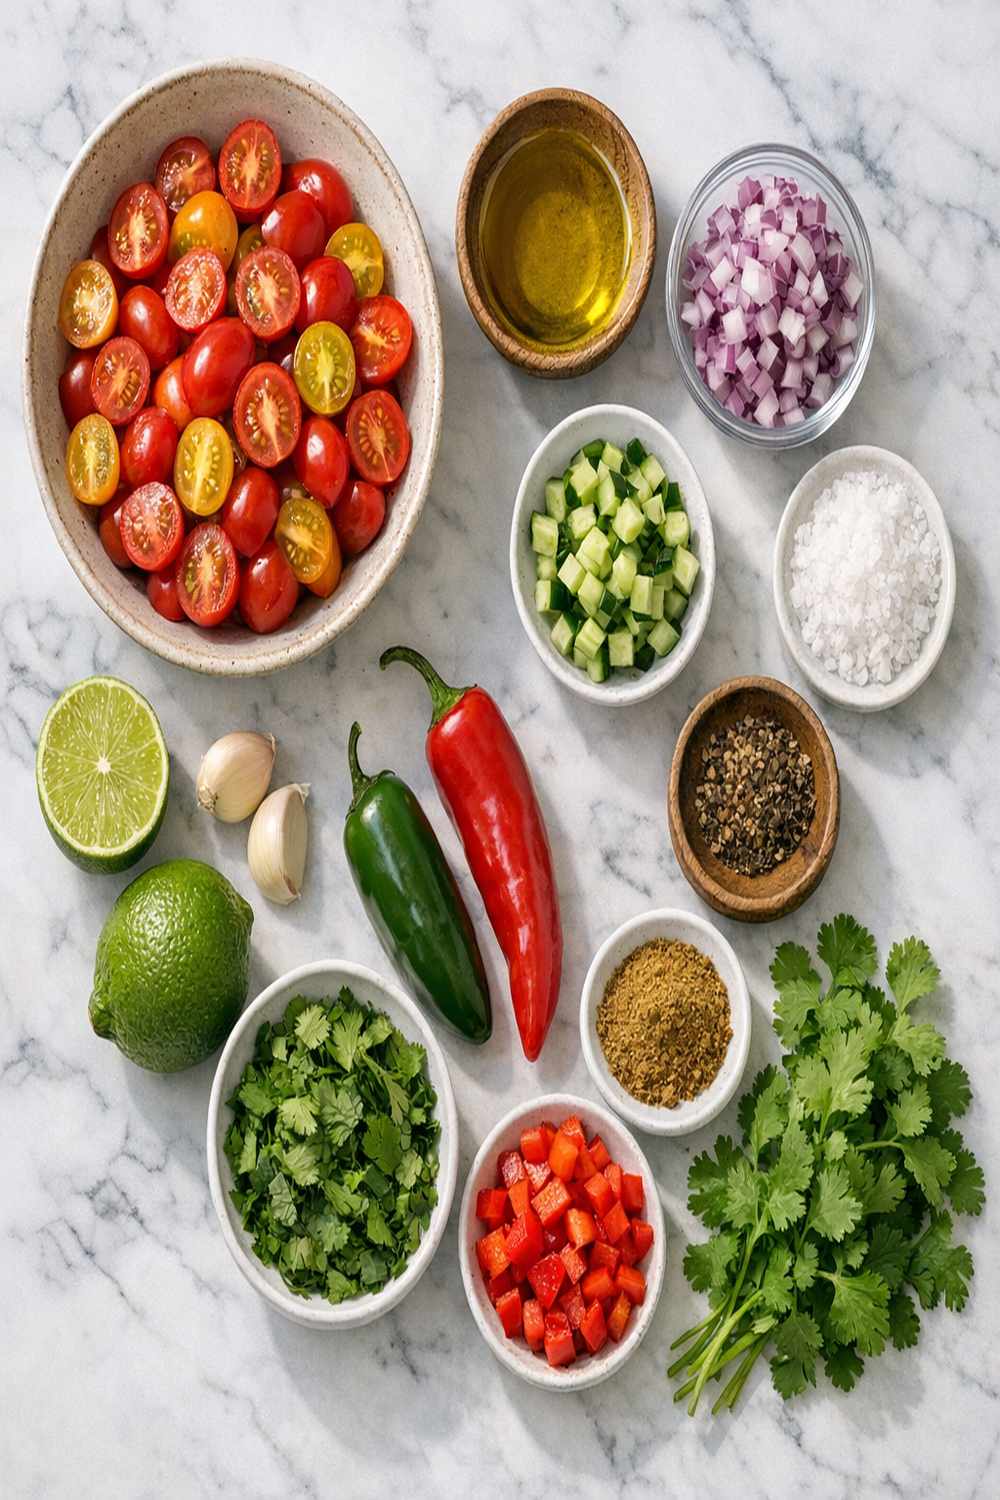
Shopping for this recipe is straightforward, and I want to help you understand what to look for at every stage. I’ll tell you exactly where to find each ingredient and what quality markers matter most. These are the components that create that restaurant-quality flavor profile.
- 1½ tablespoons extra-virgin olive oil (quality matters here—look for bottles labeled “first cold-pressed” or “extra-virgin”; these have more flavor and antioxidants; the price difference is minimal)
- 2 cups cherry tomatoes, preferably a mix of red and orange varieties (look for tomatoes that feel slightly soft to the touch—this means they’re ripe and full of natural sugars; find these in the produce section, often sold in plastic containers, though farmers markets have beautiful loose ones too)
- 1 medium onion, peeled (any yellow or white onion works beautifully; avoid onions with soft spots or sprouting; these are in the produce section year-round)
- 2 to 3 tablespoons fresh lime juice (buy fresh limes, not bottled juice; one medium lime gives about 2 tablespoons of juice; look for limes that feel slightly soft when you gently squeeze them)
- 1 teaspoon fresh lime zest, optional but recommended (the colored part of the lime skin adds brightness; a microplane grater or box grater works for this; find these tools in your kitchen gadget area)
- 1 jalapeño pepper, roughly chopped (find these in the fresh pepper section; look for firm peppers with bright, unblemished skin; they’re usually next to bell peppers)
- ¼ teaspoon red pepper flakes, optional (this is for extra heat beyond the jalapeño; find it in the spice aisle if you want to boost the smokiness)
- 1 teaspoon kosher salt, divided into two applications (Diamond Crystal brand is milder and measures differently than Morton’s—if using Morton’s, use half the amount; kosher salt is in your grocery store’s baking aisle, not the table salt section)
- 5 cloves fresh garlic, peeled (buy whole heads of garlic, never pre-peeled garlic in jars—fresh garlic delivers dramatically better flavor; garlic keeps for weeks in a cool, dark cabinet)
- ½ cup fresh cilantro leaves, roughly chopped, optional (find this in the fresh herbs section of your produce department; it looks like flat-leaf parsley but has a more distinctive smell and taste; if you can’t find it or don’t enjoy cilantro, skip it entirely—this salsa is delicious without it)
Makes approximately 1½ cups of finished salsa, serving about 6-8 people as an appetizer or sauce.
Step-by-Step: Your First Cherry Tomato Salsa Recipe
I’m going to take you through this process with extreme detail because I want you to feel completely supported. You’re about to create something beautiful, and every step matters. Let’s do this together.
Step 1: Prepare Your Broiler and Vegetables
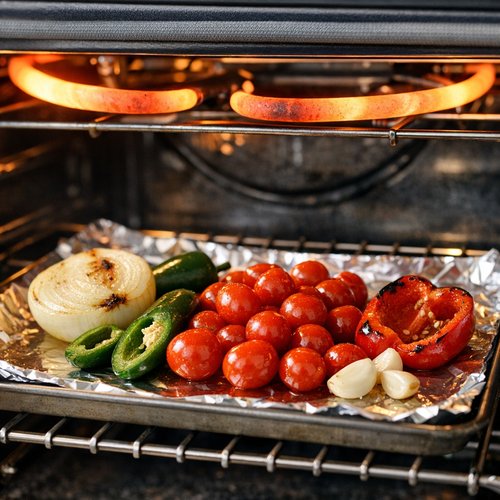
First, position your oven rack to the highest level—typically 4-6 inches from your broiler element. This matters because you want concentrated, intense heat on your vegetables. Turn your broiler to high and let it preheat for at least 10 minutes. Some broilers take longer to fully heat, so give it this full time. You’ll know it’s ready when you hear it humming consistently and the element inside is glowing orange-red.
While your broiler heats, prepare your vegetables. Peel your onion by slicing off the root and stem ends, then peeling away the papery skin. Roughly chop the onion into chunks about the size of a grape—you’re not aiming for precise pieces here. The food processor will finish the job. Peel your garlic cloves and cut them roughly in half. Cut your jalapeño in half lengthwise and remove the seeds if you’re sensitive to heat (the seeds carry most of the capsaicin, the compound that creates heat). Chop the jalapeño into rough pieces similar in size to your onion chunks.
Pat your cherry tomatoes dry with a clean kitchen towel. This matters more than you’d think—excess moisture creates steam instead of char. Don’t worry about bruising them; these tomatoes are tougher than they look, and we’re about to blast them with serious heat anyway.
Step 2: Combine and Season Everything
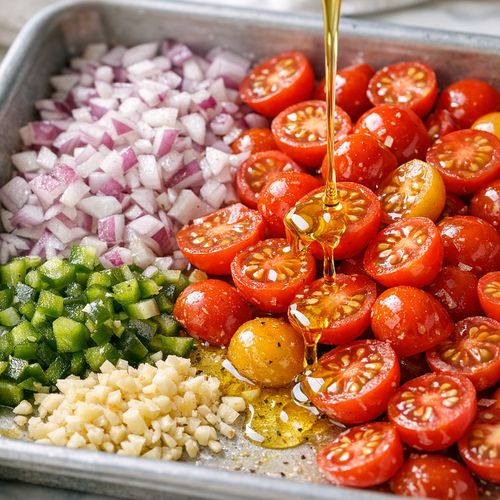
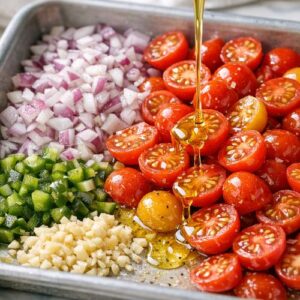
Place your chopped onion, garlic pieces, jalapeño, and cherry tomatoes on a sheet pan. Drizzle the extra-virgin olive oil over everything. This is important: use your hands or a wooden spoon to toss everything together until every vegetable piece is lightly coated with oil. The oil creates a protective barrier and helps transfer heat evenly during broiling.
Sprinkle with your kosher salt—remember, if you’re using Diamond Crystal brand, use the full teaspoon I’ve suggested; if you’re using Morton’s or fine sea salt, use only half a teaspoon. Toss again until the salt is distributed throughout. You should see salt crystals clinging to the oil-coated vegetables. This is exactly what you want.
Spread everything in a single layer on your sheet pan. Don’t pile vegetables on top of each other. They need exposure to direct heat from above. If they’re stacked, the bottom pieces won’t char, and you’ll lose that smoky depth of flavor we’re chasing.
Step 3: Broil Until Beautifully Charred
Carefully place your sheet pan under the broiler. Set a timer for 7 minutes. Don’t leave the kitchen—stay nearby. You want to check progress at the 7-minute mark.
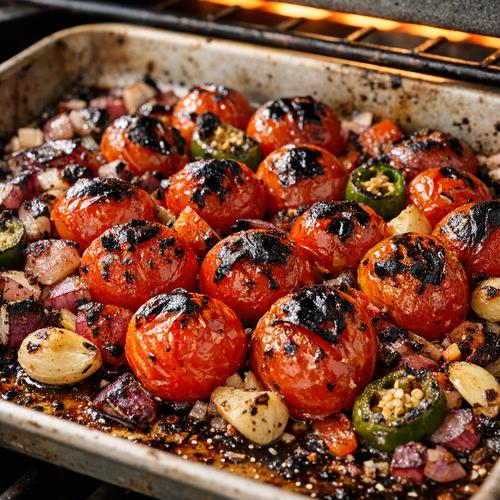
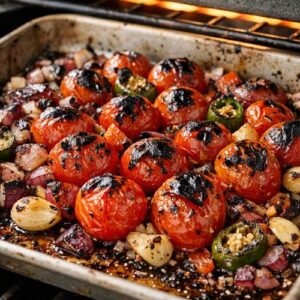
What you’re looking for: The cherry tomatoes should have blistered skin that’s darkened in spots. Some pieces will look almost blackened—this is perfect. The onion and garlic should show golden-brown caramelization. If everything looks like it’s done at 7 minutes, remove the pan. If it needs more time, check again every minute or two.
Don’t panic if some pieces look quite dark or even a bit charred. This is the goal. Char creates that complex, smoky, restaurant-quality flavor that makes this salsa special. The slight bitterness from char balances beautifully with the brightness we’ll add later with lime juice.
When everything looks properly blistered and darkened (this typically takes 10-12 minutes total), carefully remove the pan from the broiler. It will be extremely hot. Set it on a trivet or heat-safe surface and let it cool for 5 minutes. This cooling period makes the vegetables easier to handle and allows the flavors to set.
Step 4: Transfer to Your Food Processor and Begin Puréeing
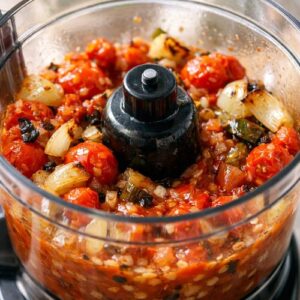
Once the vegetables have cooled enough to handle safely, carefully transfer everything from the sheet pan into your food processor. Include all the juices and oil that have accumulated on the pan—this is liquid gold, full of concentrated flavor.
Add 2 tablespoons of fresh lime juice. Squeeze this from a real lime, not from a bottle. The difference in flavor is dramatic. If you’re using bottled juice, it’s noticeably flatter and more chemical-tasting. Fresh lime brings brightness and complexity that bottled versions can’t match.
Add an additional ½ teaspoon of kosher salt (remember the Diamond Crystal vs. Morton’s conversion if needed). This second salting ensures even seasoning throughout, since you’re now combining concentrated charred vegetables with liquid ingredients.
Pulse the food processor until the mixture becomes smooth and salsa-like. This typically takes 20-30 pulses. You’re looking for a texture that’s mostly smooth with just tiny flecks of vegetable visible—not completely liquid, not chunky. If it’s too thick, add a tablespoon of water. If it’s too thin, you’ve pureed it too much.
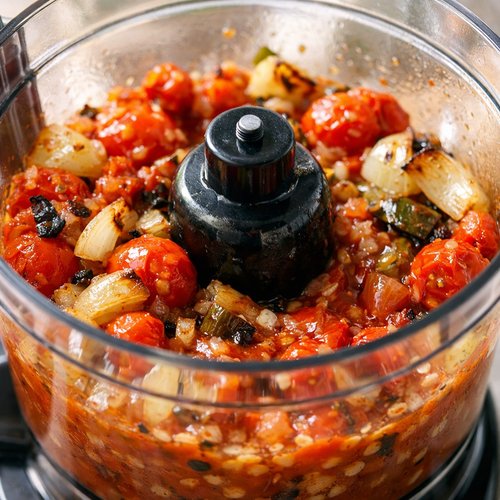
Step 5: Taste and Balance the Flavors
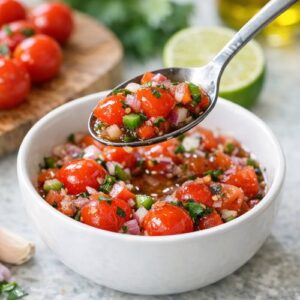
This is the most important step for becoming a confident cook. Transfer a spoonful into a small bowl and taste it. Your salsa should taste both sweet (from the caramelized tomatoes and onion) and spicy (from the jalapeño), with bright acidity (from the lime). These three qualities should be in balance.
If it tastes flat or one-dimensional, you likely need more lime juice. Add another ½ tablespoon, pulse briefly to combine, and taste again. I typically add the full 3 tablespoons of lime juice total—the brightness is what elevates this from “okay” to “incredible.” If it tastes too spicy, add another tablespoon of water to temper the heat slightly. If it lacks salt, add a tiny pinch more and pulse to combine.
This tasting and adjusting step is where real cooking skill develops. You’re training your palate to recognize balance, and you’re taking ownership of the recipe instead of blindly following instructions. This is beautiful.
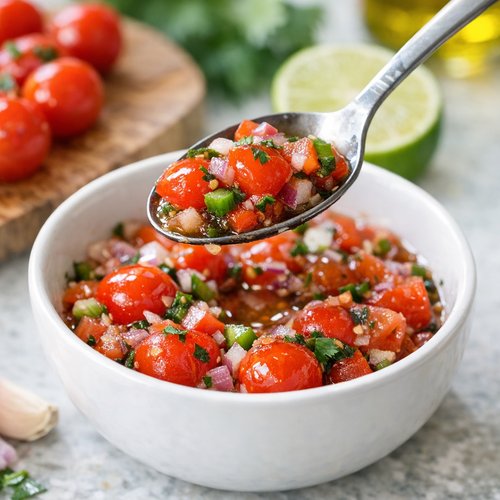
Step 6: Finish With Fresh Cilantro (Optional But Recommended)
If you’re using fresh cilantro, roughly chop about ½ cup of cilantro leaves (you’re using the leafy parts, not the thick stems). Add these to your food processor and pulse just 3-4 times. You want to incorporate the cilantro without completely grinding it into invisibility. A few visible cilantro specks create better texture and visual appeal than making it a uniform green paste.
Taste one final time. The cilantro adds a fresh, slightly citrusy note that makes everything brighter. If cilantro isn’t your thing—and I know some people actively dislike it—skip it entirely. This salsa is absolutely complete without it.
If you’re adding the optional red pepper flakes for extra smokiness, add them now and pulse to distribute them throughout.
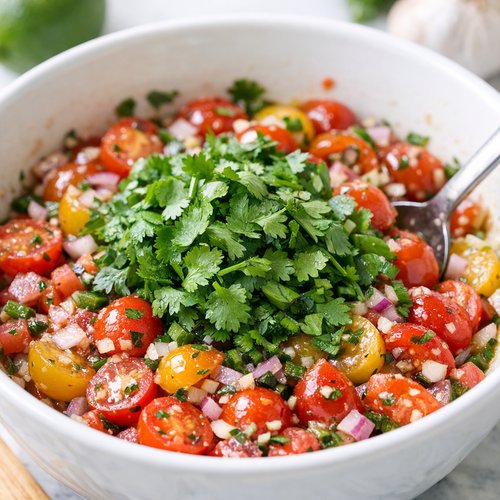
How to Tell If You Did It Right
Success leaves unmistakable signs. Here’s exactly what you should observe at each stage if everything is going perfectly.
- After broiling: Your vegetables should smell intensely aromatic—smoky, slightly sweet, definitely not burned. The tomatoes should show obvious darkening and blistering. If you pick up a tomato skin, it should come off easily. The onion should look caramelized, ranging from golden to deep brown in spots. The garlic should be softened and smell powerfully garlicky, not raw and sharp.
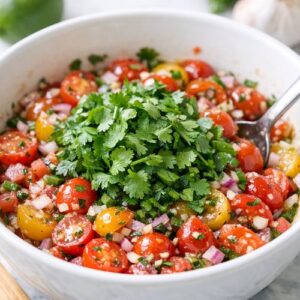
- After puréeing: Your salsa should smell bright and complex—you should detect sweetness, smokiness, garlic, and citrus all at once. The texture should be mostly smooth but with tiny vegetable pieces visible; it should fall slowly off a spoon rather than running like water. The color should be a gorgeous deep red-orange with specks of darker char visible, and if you added cilantro, you’ll see green flecks throughout.
- After tasting: The first thing you should notice is brightness and depth simultaneously. Your palate should register: smoky sweetness first, then the pleasant heat from the jalapeño, then a citrus brightness that makes you salivate slightly. If it’s one-note (only spicy, only sweet, or only salty), you need to adjust the balance with more lime juice or water.
- Visual cue for doneness: When you dip a chip into your finished salsa, it should cling nicely without being so thin it drips off immediately, and without being so thick it’s difficult to scoop. The salsa should leave a faint red coating on the chip.
What Went Wrong? Beginner Fixes
I want you to feel empowered to troubleshoot if something isn’t quite right. Here are the mistakes I see beginners make, why they happen, and exactly how to fix them.
- Vegetables didn’t char—they just steamed and softened – This happens when your broiler wasn’t fully preheated, or when vegetables were piled too densely on the pan. The fix: next time, let your broiler preheat for the full 10 minutes with the door cracked slightly open if your broiler has a door. Spread vegetables in a single layer with space between pieces. If this happened to you already, your salsa will taste good but less smoky. You can still use it—it just won’t have that restaurant-quality depth. Next time will be better, and you’ll know what to look for.
- Salsa tastes too spicy—the jalapeño heat is overwhelming – This means you either didn’t remove the seeds, or you used a particularly hot jalapeño. The fix: add another tablespoon of lime juice and a tablespoon of water to temper the heat by diluting it. Alternatively, pulse in a roasted red pepper if you have one—sweetness balances heat beautifully. Next time, remove the seeds entirely if heat sensitivity is a concern.
- Salsa is watery instead of thick – This typically means you over-pureed the mixture or your tomatoes were especially juicy. The fix: pour it into a fine-mesh strainer set over a bowl and let it drain for 30 minutes in the refrigerator. The liquid drains out while the vegetable solids stay behind, creating a thicker consistency. If you need it immediately, pulse in an extra tablespoon of tomato paste (this adds body without adding liquid), though this changes the flavor slightly.
- Salsa lacks depth—it tastes one-dimensional or flat – This means your broiler heat didn’t create enough caramelization, or you’re not using enough lime juice. The fix: add the full 3 tablespoons of lime juice, which I always recommend anyway. Lime juice is the bridge ingredient that ties everything together. You can also add a tiny pinch of cumin (¼ teaspoon), which adds warmth and depth without being obvious—it just makes everything taste “more.”
Your Next Steps After Mastering This
Once you’ve made this salsa once, you’ve learned several transferable skills that open doors to other recipes. You now understand how broiling concentrates and sweetens flavors—this technique works beautifully with peppers for Chicken in White Wine Sauce that’s topped with charred peppers, or with eggplant for baba ganoush.
You’ve practiced balancing sweet, spicy, salty, and acidic flavors—this is the foundation of all good cooking. Apply this same logic to any sauce or salad dressing, and you’ll instantly improve your cooking.
You’ve learned to use a food processor to transform cooked ingredients into smooth preparations—the exact same skill applies to hummus, pesto, or creamy soups. Try making a roasted garlic and white bean dip using this same broiler-charring technique.
For your next challenge, try making a my weeknight pasta where you serve this salsa alongside fresh pasta and mozzarella for a simple Italian-inspired dish. Or use this salsa as a topping for grilled fish—the brightness cuts through rich seafood beautifully.
Can I Store Cherry Tomato Salsa Recipe?
One of the best things about this salsa is how well it keeps. Understanding proper storage extends its life and helps you make it ahead for entertaining.
Refrigerator storage: Transfer your finished salsa to a clean glass jar or airtight container. It will keep for up to 7 days refrigerated. The flavor actually deepens as it sits—if you have time, make this a day before serving it. The spice mellows slightly and all the flavors marry together beautifully.
Freezer storage: If you’ve made a big batch, this salsa freezes exceptionally well for up to 3 months. Pour it into an airtight container, leaving about an inch of headspace for expansion. When you thaw it, you might notice it’s slightly thinner than fresh (some liquid separates)—just stir it well. The flavor remains excellent.
Make-ahead strategy: I often make this salsa on Sunday and use it throughout the week with different proteins. Monday with grilled fish, Tuesday with chicken tacos, Wednesday with scrambled eggs for breakfast, Thursday with black beans and rice, Friday with whatever leftover protein needs brightening. Since it keeps well, you can batch-prepare it.
Pro tip from my dietitian experience: Fresh salsa stored this way maintains its nutritional integrity better than canned varieties because there’s no added sodium or preservatives. The vibrant red color you see comes from lycopene, a powerful antioxidant that’s actually more bioavailable after cooking—so your broiled salsa delivers more nutritional benefit than raw tomato sauce.
Nutrition Information
Based on USDA nutritional data, one serving of this cherry tomato salsa (¼ cup, which is a typical serving size as a topping or dip) contains approximately 35 calories, with 3 grams of carbohydrates, 1 gram of fiber, and virtually no fat or protein—though the olive oil you’ll consume with it adds beneficial monounsaturated fats.
What makes this salsa nutritionally impressive: The lycopene content is substantial. Lycopene is a carotenoid antioxidant found in tomatoes that research links to heart health and reduced inflammation. Cooking actually increases lycopene bioavailability, making broiled tomato salsa more nutritionally dense than raw salsa. You’re getting approximately 3 milligrams of lycopene per serving.
The fresh cilantro adds virtually no calories but delivers compounds with documented anti-inflammatory properties. The jalapeño contributes capsaicin, which research suggests may have metabolism-supporting properties and pain-relieving effects.
Sodium consideration: Each ¼-cup serving contains approximately 180 milligrams of sodium (assuming Diamond Crystal kosher salt). If you’re monitoring sodium intake, you can reduce the salt by half and it will still taste excellent—the lime juice’s brightness compensates.
This salsa serves beautifully as part of a balanced meal. Pair it with lean protein like grilled fish, and you’ve created a meal with excellent nutrient density and virtually no added sugar.
What Can I Serve With Cherry Tomato Salsa Recipe?
This salsa is remarkably versatile, which is part of why I love it. Here are my favorite pairings, though once you understand how this salsa works, you’ll start creating your own combinations.
- With warm tortilla chips – The simplest pleasure. Serve it at room temperature or chilled in a small bowl with quality tortilla chips. This is perfect for entertaining because everything can be prepared ahead.
- As a topping for grilled fish – The bright acidity and smokiness complement delicate white fish beautifully. Try it with grilled halibut, mahi-mahi, or striped bass. The salsa should be at room temperature while the fish is warm—the temperature contrast is part of the appeal.
- With tacos – Use this instead of traditional red salsa. It’s excellent with slow-roasted pork, grilled chicken, or even black beans for a vegetarian option. The salsa should be at room temperature, and I like to add fresh cilantro and diced avocado alongside it.
- With scrambled eggs for breakfast – This might sound unconventional, but warm eggs with a dollop of this salsa and fresh cilantro creates something special. The smokiness plays beautifully with eggs.
- As a topping for rice and beans – A simple bowl of cilantro lime rice and black beans becomes restaurant-quality with a generous scoop of this salsa on top.
- With grilled chicken – Make Healthy Lemon Parmesan Chicken and Veggies and top it with this salsa for a flavor-packed meal. The smokiness complements the brightness of lemon.
- As a component of nachos – Layer tortilla chips with cooked shredded chicken, cheese, black beans, and this salsa. Broil briefly until the cheese melts, then finish with fresh cilantro, jalapeño slices, and avocado.
- With fresh mozzarella and tomato – Create a composed salad with fresh mozzarella, sliced avocado, this salsa, and fresh basil. Drizzle with excellent olive oil and a balsamic reduction for an elegant starter.
Expert’s Nutritional Insight: Why Broiling Creates Better Nutrition
As a registered dietitian, I want you to understand something important about this cooking method. When you broil tomatoes instead of eating them raw, you’re actually increasing the nutritional value in a measurable way.
Raw tomatoes contain lycopene, yes—but much of it is bound in cellular structures that your body struggles to access efficiently. Heat breaks down these cell walls, making lycopene significantly more bioavailable. Studies show cooked tomato products deliver 2-3 times more accessible lycopene than raw tomatoes.
Additionally, broiling causes mild maillard reaction (browning at high heat) that creates new compounds with antioxidant activity. You’re not just softening the tomatoes—you’re chemically transforming them into something your body can utilize more effectively. This is why tomato sauce is considered more nutritious than raw tomato juice, and why this broiled salsa is an excellent choice nutritionally.
The olive oil you use isn’t just for flavor—it’s essential for nutrient absorption. Lycopene is fat-soluble, meaning your body needs fat present to absorb it properly. The oil coating ensures you’re getting the full nutritional benefit of the tomatoes. This is real nutritional science, not food industry marketing.
Make-Ahead Guide: The Dietitian’s Approach
From my professional kitchen experience, I’ve developed a batch-cooking strategy that saves time while maintaining quality.
Three days ahead: You can broil your vegetables completely, then store them in an airtight container in the refrigerator for up to 3 days. Don’t purée them yet. When you’re ready to use them, simply transfer to your food processor with the lime juice, salt, and cilantro, and purée. This gives you fresh salsa flavor with all the prep work already done.
One day ahead: Make the complete salsa recipe as written. Store in an airtight glass jar. The flavor deepens considerably overnight as ingredients meld. I actually prefer day-old salsa to freshly made.
For entertaining: Make the salsa two days before your event. On the day of entertaining, transfer it to a beautiful serving bowl about 20 minutes before guests arrive, so it reaches room temperature. If you’d like to refresh the cilantro flavor, add a small handful of fresh cilantro just before serving.
For meal prep: Make a double or triple batch on Sunday. Divide into ¼-cup portions and freeze in ice cube trays. Once frozen, pop the cubes into a freezer bag. You’ll have perfect portions ready to thaw throughout the week. This approach is especially useful if you’re planning to add salsa to different meals—you control portion sizes from the start.
Seasonal Variations: How to Adapt This Recipe
While cherry tomatoes are available year-round in most markets, you can adjust this recipe to embrace seasonal ingredients.
Summer (peak tomato season): Use locally-grown heirloom cherry tomatoes in a mix of varieties—yellow, orange, red, and even purple. The flavor difference is dramatic. You might need less broiling time (8-9 minutes instead of 10-12) because summer tomatoes are already more flavorful. Consider adding corn kernels to your salsa for a summery twist—broil them alongside your other vegetables.
Fall: Tomatoes are still good but less flavorful. Compensate by adding roasted red peppers (about ½ cup) when you purée. This adds sweetness and body. You might also add a pinch of smoked paprika (¼ teaspoon) to enhance the smokiness that high-summer tomatoes naturally have.
Winter: Cherry tomatoes are imported and less flavorful. Add a tablespoon of tomato paste when you purée—this concentrates tomato flavor and darkens your salsa beautifully. Don’t skip broiling; that char becomes even more important for creating depth in winter tomatoes.
Spring: Young spring tomatoes are developing flavor but aren’t yet at peak. Add fresh spring herbs like tarragon or chives alongside cilantro for brightness. A tiny pinch of sugar (¼ teaspoon) balances acidity in spring tomatoes without being obvious.

Cherry Tomato Salsa Recipe
Ingredients
Method
- First, position your oven rack to the highest level—typically 4-6 inches from your broiler element. This matters because you want concentrated, intense heat on your vegetables. Turn your broiler to high and let it preheat for at least 10 minutes. Some broilers take longer to fully heat, so give it this full time. You'll know it's ready when you hear it humming consistently and the element inside is glowing orange-red. While your broiler heats, prepare your vegetables. Peel your onion by slicing off the root and stem ends, then peeling away the papery skin. Roughly chop the onion into chunks about the size of a grape—you're not aiming for precise pieces here. The food processor will finish the job. Peel your garlic cloves and cut them roughly in half. Cut your jalapeño in half lengthwise and remove the seeds if you're sensitive to heat (the seeds carry most of the capsaicin, the compound that creates heat). Chop the jalapeño into rough pieces similar in size to your onion chunks. Pat your cherry tomatoes dry with a clean kitchen towel. This matters more than you'd think—excess moisture creates steam instead of char. Don't worry about bruising them; these tomatoes are tougher than they look, and we're about to blast them with serious heat anyway.
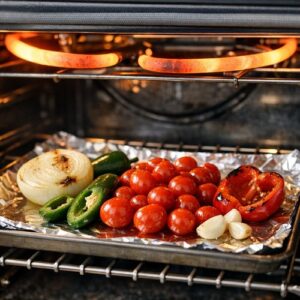
- Place your chopped onion, garlic pieces, jalapeño, and cherry tomatoes on a sheet pan. Drizzle the extra-virgin olive oil over everything. This is important: use your hands or a wooden spoon to toss everything together until every vegetable piece is lightly coated with oil. The oil creates a protective barrier and helps transfer heat evenly during broiling. Sprinkle with your kosher salt—remember, if you're using Diamond Crystal brand, use the full teaspoon I've suggested; if you're using Morton's or fine sea salt, use only half a teaspoon. Toss again until the salt is distributed throughout. You should see salt crystals clinging to the oil-coated vegetables. This is exactly what you want. Spread everything in a single layer on your sheet pan. Don't pile vegetables on top of each other. They need exposure to direct heat from above. If they're stacked, the bottom pieces won't char, and you'll lose that smoky depth of flavor we're chasing.
- Carefully place your sheet pan under the broiler. Set a timer for 7 minutes. Don't leave the kitchen—stay nearby. You want to check progress at the 7-minute mark. What you're looking for: The cherry tomatoes should have blistered skin that's darkened in spots. Some pieces will look almost blackened—this is perfect. The onion and garlic should show golden-brown caramelization. If everything looks like it's done at 7 minutes, remove the pan. If it needs more time, check again every minute or two. Don't panic if some pieces look quite dark or even a bit charred. This is the goal. Char creates that complex, smoky, restaurant-quality flavor that makes this salsa special. The slight bitterness from char balances beautifully with the brightness we'll add later with lime juice. When everything looks properly blistered and darkened (this typically takes 10-12 minutes total), carefully remove the pan from the broiler. It will be extremely hot. Set it on a trivet or heat-safe surface and let it cool for 5 minutes. This cooling period makes the vegetables easier to handle and allows the flavors to set.
- Once the vegetables have cooled enough to handle safely, carefully transfer everything from the sheet pan into your food processor. Include all the juices and oil that have accumulated on the pan—this is liquid gold, full of concentrated flavor. Add 2 tablespoons of fresh lime juice. Squeeze this from a real lime, not from a bottle. The difference in flavor is dramatic. If you're using bottled juice, it's noticeably flatter and more chemical-tasting. Fresh lime brings brightness and complexity that bottled versions can't match. Add an additional ½ teaspoon of kosher salt (remember the Diamond Crystal vs. Morton's conversion if needed). This second salting ensures even seasoning throughout, since you're now combining concentrated charred vegetables with liquid ingredients. Pulse the food processor until the mixture becomes smooth and salsa-like. This typically takes 20-30 pulses. You're looking for a texture that's mostly smooth with just tiny flecks of vegetable visible—not completely liquid, not chunky. If it's too thick, add a tablespoon of water. If it's too thin, you've pureed it too much.
- This is the most important step for becoming a confident cook. Transfer a spoonful into a small bowl and taste it. Your salsa should taste both sweet (from the caramelized tomatoes and onion) and spicy (from the jalapeño), with bright acidity (from the lime). These three qualities should be in balance. If it tastes flat or one-dimensional, you likely need more lime juice. Add another ½ tablespoon, pulse briefly to combine, and taste again. I typically add the full 3 tablespoons of lime juice total—the brightness is what elevates this from "okay" to "incredible." If it tastes too spicy, add another tablespoon of water to temper the heat slightly. If it lacks salt, add a tiny pinch more and pulse to combine. This tasting and adjusting step is where real cooking skill develops. You're training your palate to recognize balance, and you're taking ownership of the recipe instead of blindly following instructions. This is beautiful.
- If you're using fresh cilantro, roughly chop about ½ cup of cilantro leaves (you're using the leafy parts, not the thick stems). Add these to your food processor and pulse just 3-4 times. You want to incorporate the cilantro without completely grinding it into invisibility. A few visible cilantro specks create better texture and visual appeal than making it a uniform green paste. Taste one final time. The cilantro adds a fresh, slightly citrusy note that makes everything brighter. If cilantro isn't your thing—and I know some people actively dislike it—skip it entirely. This salsa is absolutely complete without it. If you're adding the optional red pepper flakes for extra smokiness, add them now and pulse to distribute them throughout.
Notes
FAQs
Can I make this salsa if I don’t have a broiler?
Yes, with alternatives. Your oven’s broiler is ideal, but you have options. A grill works beautifully—place your vegetable mixture in a grill basket or on a piece of aluminum foil on your grill grates, and cook over high heat for about 10 minutes, stirring occasionally, until well-charred. You’ll get similar results. A cast-iron skillet on your stovetop over medium-high heat works too, though you won’t get as much char (char requires concentrated heat from one direction). If you use a skillet, cook for 12-15 minutes, stirring frequently, until the tomatoes blister and the onion caramelizes. The flavor will be slightly less smoky but still delicious.
What if I can’t find fresh cilantro?
This salsa is completely delicious without cilantro. Many people actively dislike cilantro (there’s a genetic component to whether it tastes fresh or soapy to you), and this recipe doesn’t depend on it. If you want to add a fresh herb, parsley works beautifully—use the same amount. Or skip herbs entirely. The salsa stands perfectly on its own with just the tomatoes, garlic, onion, jalapeño, and lime.
Can I make this less spicy?
Absolutely. Use half a jalapeño instead of a whole one, and remove all the seeds from that half. Or skip the jalapeño entirely and add ¼ teaspoon of red pepper flakes for a gentler, more distributed heat. Some people