Babka Recipe
 Rosa Crumley
July 5, 2026
Rosa Crumley
July 5, 2026
This post contains affiliate links. As an Amazon Associate I earn from qualifying purchases.
Whether you’re following keto, embracing a vegan lifestyle, or navigating gluten-free living, you don’t have to miss out on the luxurious, swirled chocolate indulgence of homemade babka. I’ve spent years adapting classic recipes to meet the dietary needs of my clients and loved ones, and I’m thrilled to share how this Eastern European treasure can work beautifully across every dietary preference. This isn’t about compromise—it’s about creating restaurant-quality results that honor your health goals. When you pair this with sides like balsamic asparagus, you’ve got a complete, nutritionally balanced meal experience.
A Kitchen Memory That Changed Everything
I’ll never forget standing in my grandmother’s Pittsburgh kitchen on a cold January morning, watching her hands work through a rich, sticky dough with such confidence and grace. She was making babka for the first time since immigrating, and I remember thinking the process seemed impossibly complex. Flour dusted her apron, butter stained her fingers, and the kitchen smelled like home—like cinnamon, dark chocolate, and possibility.
Years later, when one of my closest friends asked if we could adapt babka for her newly diagnosed celiac disease, I realized my grandmother’s lesson wasn’t just about following a recipe. It was about understanding the why behind each step, so you could bend the rules without breaking the magic. That’s what this guide is all about.
Which Version Is Right for You?
Not every dietary variation works the same way for babka—and I want to be honest about that. Some swaps are seamless; others require mindful adjustments. Here’s my breakdown to help you choose the version that matches your life right now.
- Classic Babka – The foundation recipe that works as written. Perfect for those without dietary restrictions who want to experience this traditional treat.
- Keto Babka – Requires significant flour and sugar substitutions. Expect a denser crumb and slightly different rise, but the chocolate swirl remains absolutely decadent. Best for those committed to low-carb living.
- Vegan Babka – Swap eggs and butter for plant-based alternatives. The texture is nearly identical to the original, making this my most successful adaptation. Great news if you’re dairy-free too.
- Gluten-Free Babka – Uses a specialized blend of GF flours. The dough behaves differently during shaping, but the final result is moist and tender. Requires patience and precision.
- Dairy-Free Babka – A middle ground between vegan and classic. You keep eggs for structure while swapping butter and cream for coconut oil alternatives. Offers excellent flavor with easier execution.
The Base Ingredients (Works for All Versions)
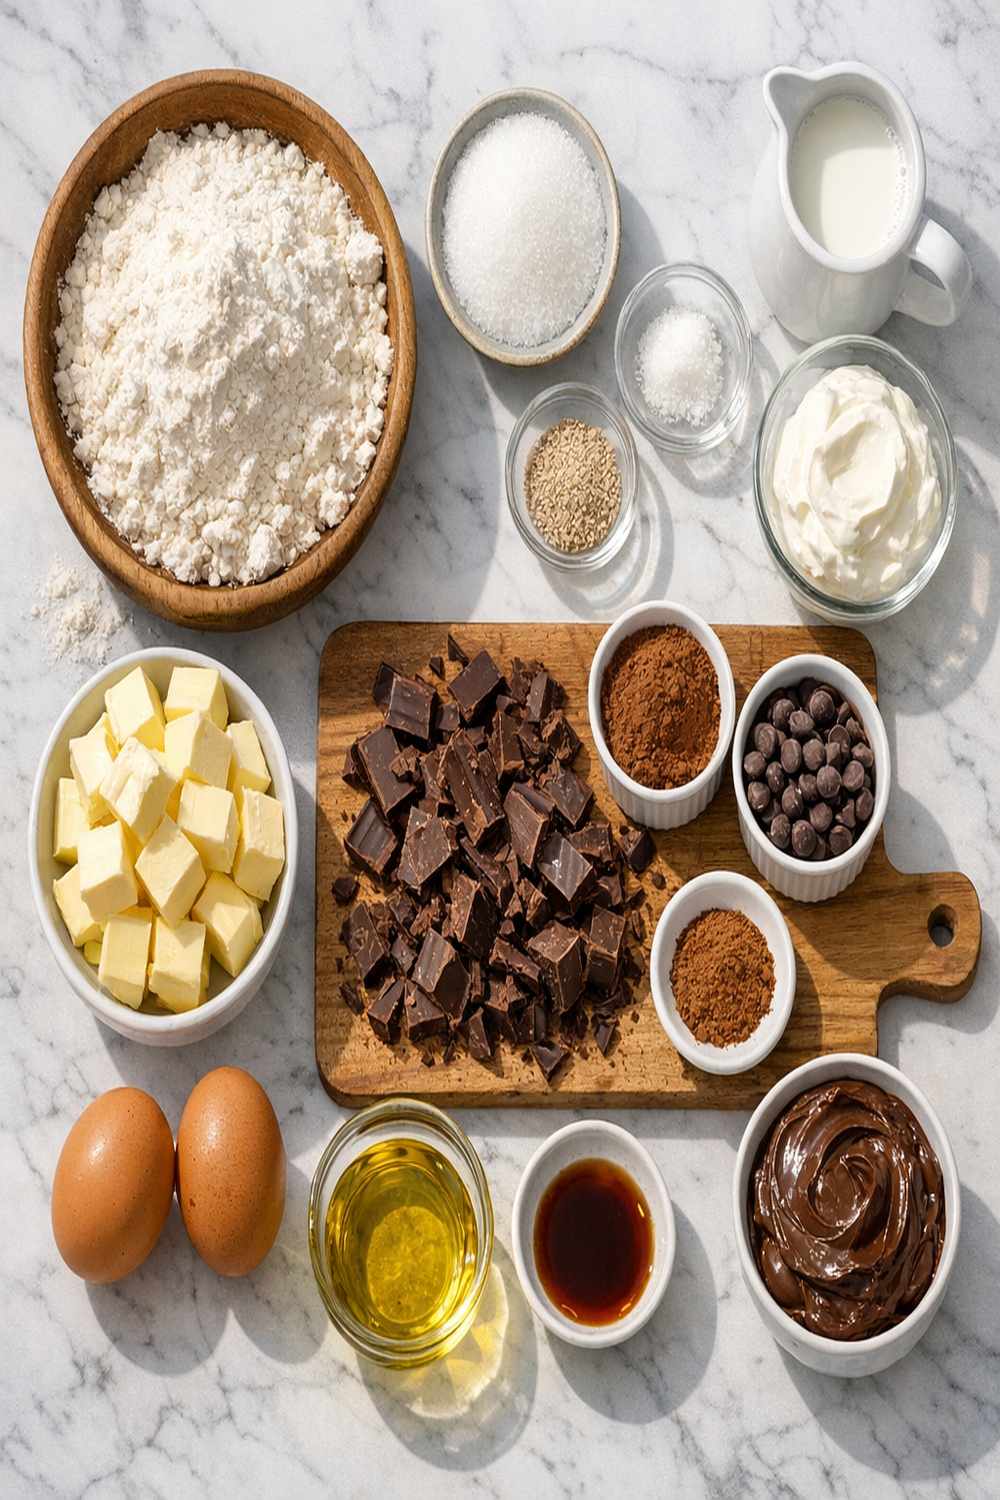
These are the ingredients that form the foundation of every babka variation. I’ve included notes about which dietary versions use each component and where substitutions happen later in the process. Measuring carefully—by weight when possible—is essential for bread baking success.
For the Dough
- 1½ teaspoons kosher salt (Diamond Crystal brand, not table salt which is denser)
- 1 teaspoon pure vanilla extract (not imitation—the real thing makes a noticeable difference)
- ½ cup granulated sugar (100g, provides food for yeast and structure)
- 10 tablespoons unsalted butter (142g, softened to room temperature for even distribution)
- 4 large eggs (room temperature, crucial for proper emulsification and rise)
- 2¼ teaspoons instant yeast (one 1.25-ounce packet, active dry or instant work equally well)
- ½ cup whole milk (120mL, room temperature to prevent killing the yeast)
- 4½ cups all-purpose flour (540g, spooned and leveled—never pack measuring cups)
For the Chocolate Filling and Glaze
- ¾ cup powdered sugar (90g, sifted to prevent lumps in the glaze)
- ½ cup unsalted butter (113g, cubed into small pieces for even melting)
- 8 ounces dark chocolate (225g, chopped—70% cacao or higher for depth)
- ⅓ cup unsweetened cocoa powder (30g, Dutch-process for richer color and flavor)
- ⅓ cup water (80mL, room temperature for dissolving sugar evenly)
- ⅓ cup granulated sugar (66g, for the filling layer)
- 2 teaspoons ground cinnamon (fresh spice adds warmth without bitterness)
- ½ cup heavy cream (120mL, full-fat for richest texture)
Makes: One beautiful loaf (approximately 12-16 slices), serving 6-8 people generously.
Dietary Substitution Chart
Here’s where the magic happens. I’ve organized this chart so you can see exactly what changes for your dietary needs without getting lost in the details. Keep this nearby while you’re baking.
- Powdered Sugar (¾ cup) -> Keto: ¾ cup powdered monk fruit or erythritol blend | Vegan: stays the same | Gluten-Free: stays the same | Dairy-Free: stays the same
- All-Purpose Flour (4½ cups) -> Keto: 2 cups almond flour + 1½ cups coconut flour + ½ cup psyllium husk powder | Vegan: stays the same | Gluten-Free: Bob’s Red Mill 1-to-1 GF blend (use 5 cups, dough is wetter) | Dairy-Free: stays the same
- Heavy Cream (½ cup) -> Keto: stays the same | Vegan: ½ cup full-fat coconut milk (canned, not lite) | Gluten-Free: stays the same | Dairy-Free: ½ cup full-fat coconut milk
- Eggs (4 large) -> Keto: stays the same | Vegan: 4 flax eggs (1 tablespoon ground flaxseed + 3 tablespoons water per egg, let sit 15 minutes) | Gluten-Free: stays the same | Dairy-Free: stays the same
- Granulated Sugar in Filling (⅓ cup) -> Keto: ⅓ cup monk fruit sweetener | Vegan: stays the same | Gluten-Free: stays the same | Dairy-Free: stays the same
- Butter in Filling (½ cup) -> Keto: stays the same | Vegan: ½ cup vegan butter | Gluten-Free: stays the same | Dairy-Free: ½ cup refined coconut oil
- Butter in Dough (10 tablespoons) -> Keto: stays the same | Vegan: 10 tablespoons vegan butter + 2 tablespoons coconut oil | Gluten-Free: stays the same | Dairy-Free: 10 tablespoons refined coconut oil (flavor is more subtle)
- Whole Milk (½ cup) -> Keto: stays the same (milk is low in carbs) | Vegan: ½ cup unsweetened oat milk (closest neutral flavor) | Gluten-Free: stays the same | Dairy-Free: ½ cup unsweetened almond milk
How to Make Babka Recipe Your Way
I’m walking you through the process step-by-step, with dietary modifications noted at each critical juncture. This isn’t just about following instructions—it’s about understanding what’s happening in your dough so you can troubleshoot with confidence. When I work with clients, I always emphasize that bread baking teaches patience and presence.
Step 1: Activate Your Yeast and Create the Dough Base
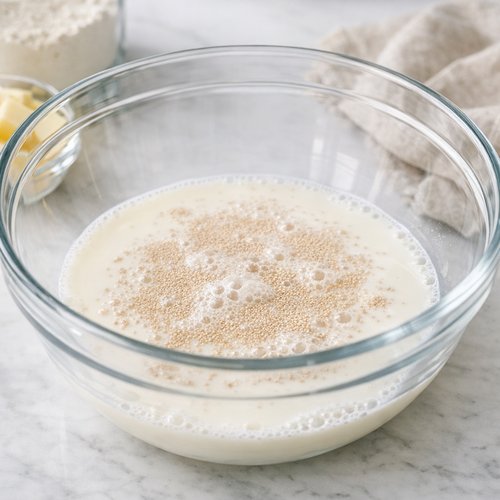
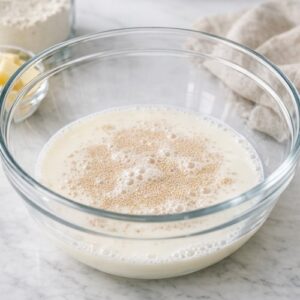
In a large mixing bowl, combine your room-temperature milk with the instant yeast and let it sit for about two minutes. This isn’t strictly necessary with instant yeast, but it gives you a visual confirmation that your yeast is alive and active. You should see tiny bubbles forming—that’s the sign you’re ready to proceed.
Add your sugar, eggs, and vanilla extract to the milk-yeast mixture. For vegan versions: your flax eggs should be fully prepared 15 minutes before this step. For all versions: whisk these wet ingredients together until well combined, about one minute of vigorous mixing.
In a separate bowl, whisk together your flour and salt. For gluten-free versions: sift your GF flour blend with the salt to aerate and remove any lumps that can create dense spots in your crumb.
Gradually add your dry ingredients to the wet ingredients, stirring with a sturdy wooden spoon or the paddle attachment of your stand mixer. Mix until you have a shaggy, rough dough that pulls away from the bowl sides. This should take about two minutes.
Step 2: Add Butter and Develop the Dough
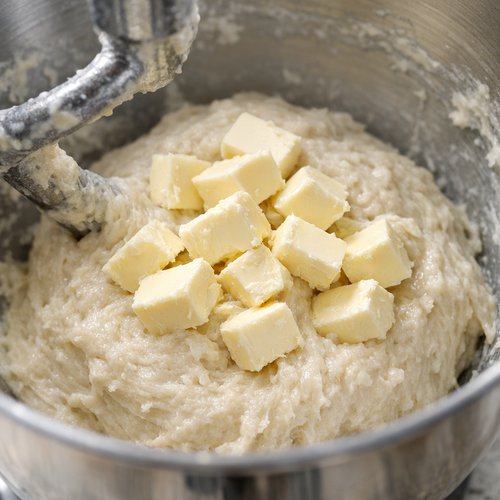
Now comes the part that intimidated me for years: adding softened butter to a wet dough. Cut your butter into small tablespoon-sized pieces. For dairy-free versions: your coconut oil should be at room temperature but not melted.
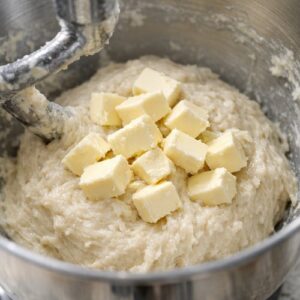
Add the butter pieces one at a time, allowing each addition to mostly incorporate before adding the next. This process takes about five to seven minutes total. Your dough will look greasy and messy—that’s exactly right. You’re creating an emulsion where butter, eggs, and flour become a cohesive structure.
Once all butter is incorporated, switch to the dough hook attachment if using a stand mixer. For keto versions: expect this dough to be noticeably denser and heavier than traditional babka dough; this is normal. Knead on medium speed for about eight minutes until the dough becomes smooth, elastic, and pulls away cleanly from the bowl. It should feel slightly sticky but not wet.
Step 3: First Rise (Bulk Fermentation)
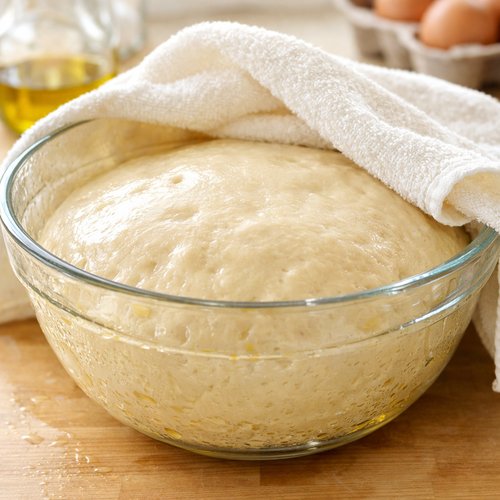
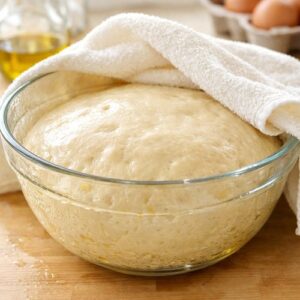
Transfer your dough to a lightly oiled bowl. Turn it to coat all sides with a thin layer of oil. Cover with a damp kitchen towel or plastic wrap. Let it rise in a warm spot (around 75-78°F) for about one hour, or until doubled in volume.
Expert’s Nutritional Tip: During fermentation, the yeast and bacteria in the dough begin breaking down gluten and producing lactic acid, which increases mineral bioavailability. This means your body can absorb more zinc, iron, and magnesium from the flour. For all versions: this slow fermentation is where the real nutrition magic happens, so don’t rush it.
You’ll know it’s ready when you gently poke the dough and the indentation stays rather than bouncing back immediately. For gluten-free versions: this rise might be slightly shorter (45-50 minutes) since GF dough doesn’t develop gluten network as efficiently.
Step 4: Prepare Your Chocolate Filling
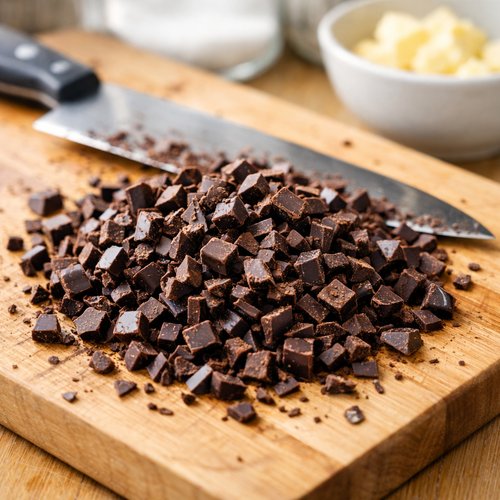
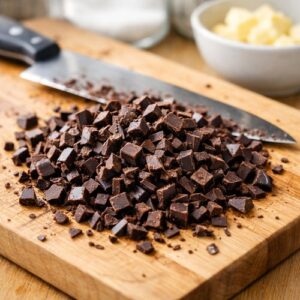
While your dough rises, create the filling that makes babka absolutely irresistible. Chop your dark chocolate into small, uniform pieces—about the size of chocolate chips. This ensures even melting and distribution throughout the filling.
In a small saucepan over low heat, combine your ½ cup butter and heavy cream. For vegan versions: use vegan butter and canned full-fat coconut milk. For dairy-free versions: use coconut oil and coconut milk. Heat gently, stirring occasionally, until the butter is melted and the mixture is steaming but not boiling.
Remove from heat and add your chopped chocolate. Let it sit for one minute—this residual heat is usually enough to melt the chocolate completely. Stir gently and smoothly until you have a glossy, homogeneous ganache. For keto versions: use only high-quality dark chocolate with minimal added sugars.
Stir in your unsweetened cocoa powder, ⅓ cup granulated sugar (or keto sweetener), ground cinnamon, and a tiny pinch of salt. Mix until perfectly smooth. For all versions: let this filling cool to room temperature—about 20 minutes—before using. If it’s too warm, it will make your dough sticky and difficult to handle.
Step 5: Shape and Spiral
Once your dough has doubled, turn it out onto a lightly floured work surface. For gluten-free versions: dust with GF flour blend instead. Don’t punch it down aggressively; rather, gently deflate it by pressing with your fingertips.
Using a rolling pin, gently roll your dough into a large rectangle, approximately 16 inches by 12 inches. The dough should be about ¼-inch thick—thin enough to roll easily, but thick enough to hold filling without tearing. For keto doughs: these are more fragile; work slowly and patch any tears gently with dough scraps.
Spread your cooled chocolate filling evenly across the entire surface of the dough, leaving about a ½-inch border on all sides. Use an offset spatula to create an even layer. Don’t be tempted to use more filling—too much will ooze out during baking.
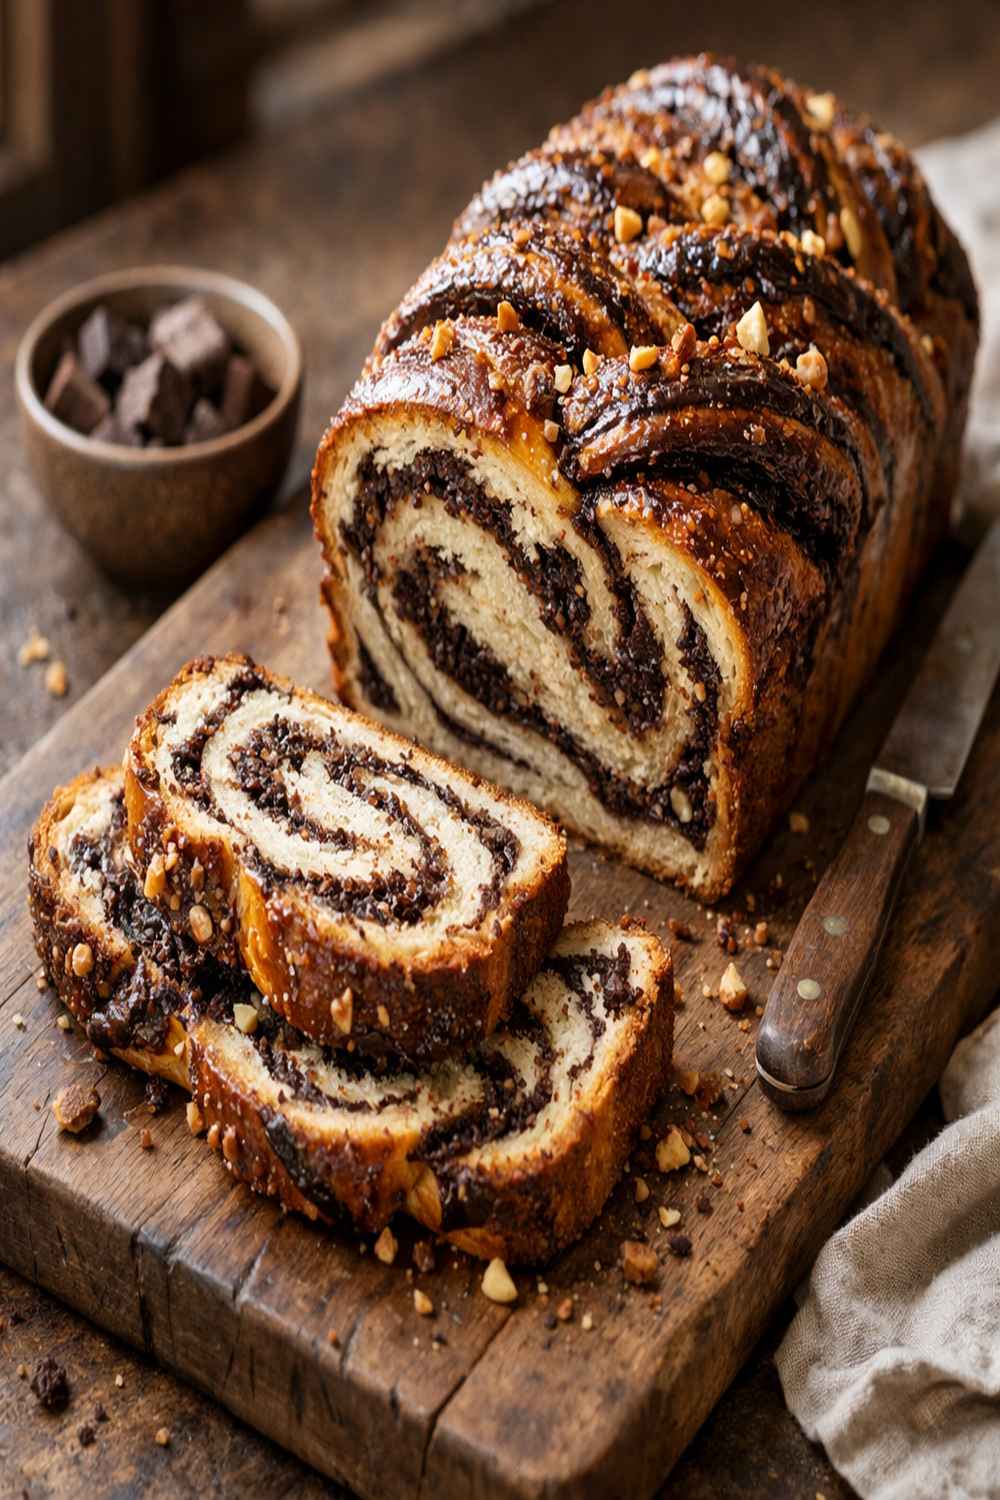
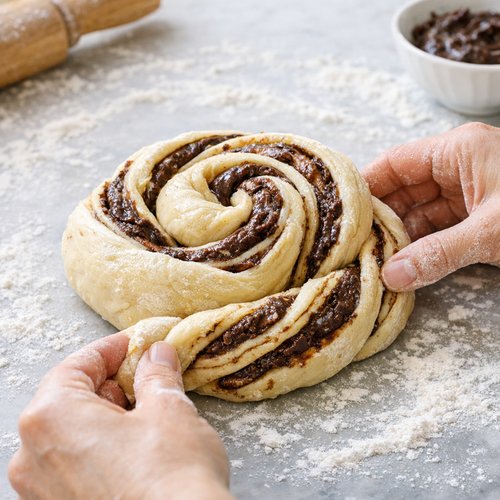
Starting from one long side, roll the dough tightly toward you, creating a long spiral log. For all versions: this is a crucial moment—roll slowly and deliberately, keeping tension consistent so the spirals stay even. Seal the final edge by pressing gently with your fingers.
Step 6: Create the Signature Twist
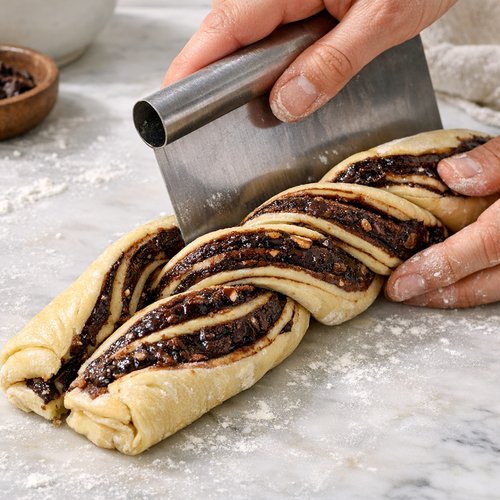
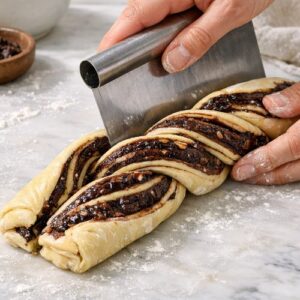
This is what makes babka different from a simple chocolate roll. You’re going to create a beautiful twisted loaf. Using a sharp knife or bench scraper, carefully cut your log in half lengthwise, creating two long strands. For gluten-free doughs: use a serrated knife and a gentle sawing motion rather than pushing straight down.
Twist these two strands around each other, maintaining the spiral orientation as you twist. This takes practice and patience—you want the spirals to remain visible as you wind them together. Coil the twisted dough into your prepared loaf pan (8×4 inches), tucking the ends under to create a compact loaf.
Step 7: Second Rise (Final Proof)
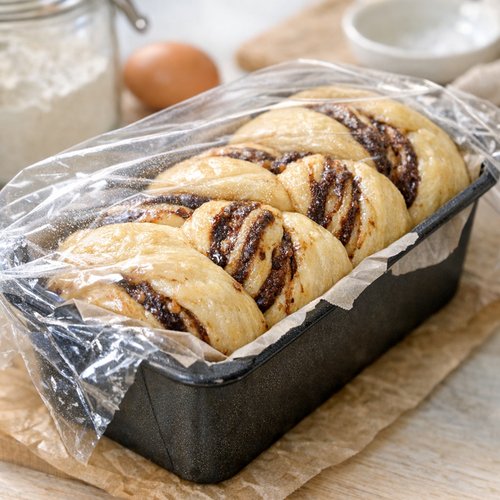
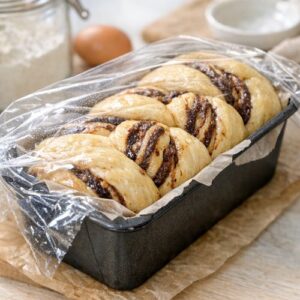
Cover your loaf pan loosely with plastic wrap or a damp towel. Let it rise in a warm spot for 45 minutes to one hour, until the dough rises just above the rim of the pan and jiggles slightly when you gently shake the pan.
For all versions: avoid over-proofing. A slightly under-proofed babka is better than one that’s over-proofed, which will collapse during baking and create a dense crumb. If you’re unsure, poke it gently—it should hold a slight indentation but bounce back slightly.
About 30 minutes before you plan to bake, preheat your oven to 350°F. For convection ovens: reduce temperature to 325°F and reduce baking time by about 5 minutes. Position your oven rack to the lower-middle position so the bottom can bake thoroughly without the top burning.
Step 8: Bake to Golden Perfection
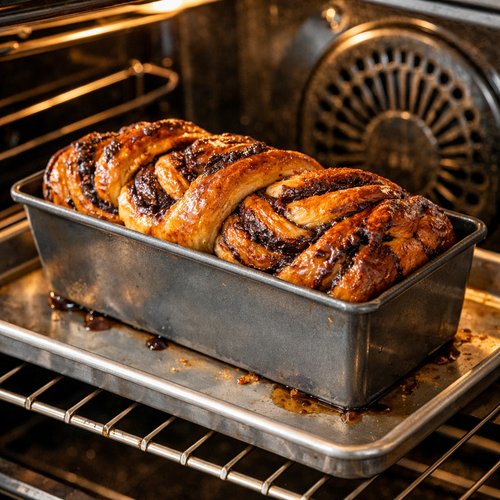
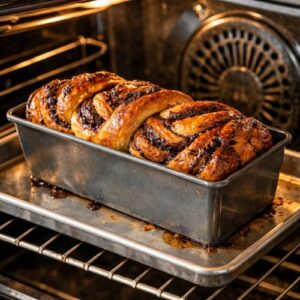
Place your loaf pan on a sheet pan (to catch any drips) and transfer it to your preheated oven. Bake for 35-45 minutes, depending on your oven and how perfectly your dough proofed. For gluten-free versions: bake closer to 45 minutes; they need slightly longer to set completely.
The babka is done when the top is deep golden brown and a skewer inserted into the center comes out clean or with just a few moist crumbs. Don’t overbake or the chocolate filling will become dry. For all versions: if the top is browning too quickly, loosely tent with foil for the last 10 minutes of baking.
Remove from the oven and let cool in the pan for 10 minutes. This resting period allows the crumb to set so it slices cleanly. Turn it out onto a wire rack and cool completely—at least one hour—before glazing.
Step 9: Create the Signature Glaze
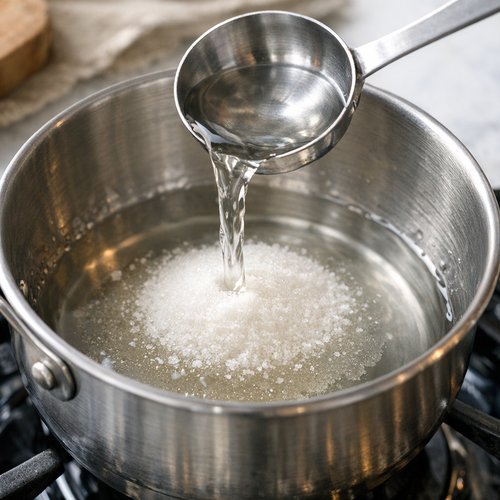
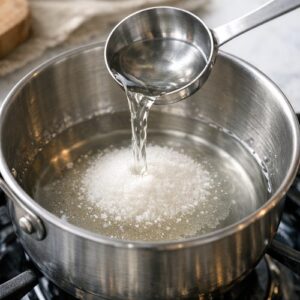
While your babka cools, prepare your beautiful glaze. In a small saucepan, combine ⅓ cup water and ⅓ cup granulated sugar (or appropriate keto sweetener). Heat over medium, stirring occasionally, until the sugar dissolves completely and the mixture comes to a gentle simmer.
Remove from heat and stir in your ¾ cup powdered sugar and ⅓ cup unsweetened cocoa powder, whisking until completely smooth. For all versions: sift the cocoa powder and powdered sugar together first if lumps are visible; a lumpy glaze creates an uneven appearance.
Let the glaze cool for about five minutes until it reaches a pourable consistency. It should coat a spoon smoothly but still drip slowly. For keto versions: if using erythritol-based sweeteners, add them after the mixture cools slightly, as heat can affect their sweetness.
Using a pastry brush or small spoon, generously coat the top and sides of your completely cooled babka with the glaze. For restaurant-quality presentation: let the excess drip naturally down the sides rather than trying to control it perfectly. That’s where the elegance lives.
Make-Ahead Guide: Preparation for Busy Life
As a busy dietitian who helps clients balance nutrition with realistic schedules, I want you to know that babka is incredibly make-ahead friendly. This is one of my favorite aspects of this recipe.
Prepare up to two days ahead: Make your chocolate filling, cover it, and refrigerate. Let it come to room temperature before using. Prepare the dough up to 24 hours ahead: Complete through Step 3, then refrigerate in an oiled, covered bowl. The cold fermentation actually improves flavor—this is called retardation and is used in top bakeries worldwide. Remove from the fridge 30 minutes before shaping.
Freeze fully baked, unglazed babka: Wrap tightly in plastic wrap and then aluminum foil. It keeps frozen for up to three months. Thaw at room temperature and glaze before serving. For best results: reheat unglazed frozen babka in a 300°F oven for 10-15 minutes to restore moisture, then glaze.
Individual slice freezing: Slice and wrap individual portions in plastic wrap, then freeze. These thaw in about one hour at room temperature and can be quickly reheated in a toaster oven or standard oven at 300°F for 5 minutes.
Common Mistakes to Avoid
After working with countless home bakers, I’ve seen these pitfalls trip people up repeatedly. Knowing about them in advance means you’ll avoid these completely.
- Using cold ingredients: Butter, eggs, and milk all need to be at room temperature. Cold ingredients won’t incorporate smoothly into the dough, creating a streaky, uneven crumb. If you forget, submerge eggs in warm water for five minutes and leave butter on the counter for 30 minutes.
- Overfilling the chocolate layer: It’s tempting to add extra chocolate, but too much will leak out during baking, making a mess and creating dry spots in your loaf. The ⅓ cup filling ratio I’ve given you is tested and perfected for the dough amount.
- Rushing the proofing stages: Both rises are essential for developing flavor and structure. A rushed babka will taste yeasty and flat. Even if it takes a bit longer than timing suggests, wait until the dough shows visual signs of readiness—the indentation test and jiggle test are your friends.
- Baking at the wrong temperature: Too hot and the outside burns before the inside bakes; too cold and you get a pale, dense loaf. Use an oven thermometer—many home ovens run 25-50°F off from what the dial says. This single tool solved more baking failures than anything else in my kitchen.
Nutrition Comparison Across Versions
Here’s the real talk about how these different versions compare nutritionally. All data is based on USDA FoodData Central and standard recipe analysis tools, calculated per slice (assuming 12 slices per loaf).
- Classic Babka: Calories: 340 | Protein: 6g | Carbs: 42g | Fat: 16g | Fiber: 2g | Excellent source of B vitamins from fermentation
- Keto Babka: Calories: 285 | Protein: 8g | Carbs: 8g | Fat: 22g | Fiber: 3g | Net carbs: 5g per slice. Higher fat from keto flour blend; protein increased from nut flours
- Vegan Babka: Calories: 335 | Protein: 5g | Carbs: 43g | Fat: 15g | Fiber: 2g | Slightly lower protein than classic due to egg replacement, but comparable otherwise
- Gluten-Free Babka: Calories: 325 | Protein: 4g | Carbs: 45g | Fat: 14g | Fiber: 3g | Higher fiber from GF blend; slightly less protein development possible without gluten network
- Dairy-Free Babka: Calories: 330 | Protein: 6g | Carbs: 41g | Fat: 16g | Fiber: 2g | Nearly identical to classic version; coconut oil provides medium-chain triglycerides
Expert’s Nutritional Insight: The fermentation process in all versions increases the bioavailability of minerals and creates beneficial lactic acid bacteria. This is why traditionally made bread is easier to digest than quick breads, even though the carb content appears similar on paper. If you have any digestive sensitivity to bread, the slow fermentation in babka might actually be more tolerable than store-bought options.
How Each Version Tastes Different
I’m going to be completely honest with you about the flavor and texture experience of each variation, because I believe you deserve to know what you’re getting before you invest time and ingredients.
Classic Babka is the gold standard: rich, buttery, with complex yeasty notes and a tender crumb that’s almost custardy. The chocolate filling remains silky and melts on your tongue. This is indulgence without apology.
Keto Babka has a noticeably denser, more pound-cake-like texture. It’s supremely moist—actually more moist than classic—which is wonderful, but it doesn’t have the same airy quality. The almond and coconut flour bring an almost nutty undertone that isn’t unpleasant but is distinctly different. The chocolate remains excellent. This version is less “babka” and more “keto chocolate cake,” and that’s perfectly fine if you know that going in.
Vegan Babka surprised me with how close it comes to the original. The crumb is slightly less tender—not noticeably so to most people—and there’s a subtle coconut undertone from the vegan butter. The texture holds up beautifully and slices cleanly. If someone handed me a slice without telling me it was vegan, I’d happily eat it and be none the wiser.
Gluten-Free Babka has the biggest texture departure. It’s more crumbly, with a slightly gritty mouthfeel from the GF flour blend. However, it’s surprisingly moist and flavorful. The chocolate shines, and the cinnamon-sugar layer becomes more prominent since there’s less gluten structure to compete with it. Many people actually prefer the flavor even if the texture is different.
Dairy-Free Babka is nearly indistinguishable from classic if you use refined coconut oil that’s been refined to remove coconut flavor. The crumb is just as tender, the rise is just as impressive. This is my recommendation for anyone who needs dairy-free but wants the closest experience to the original.
Can I Store Babka Recipe?
Proper storage keeps your babka fresh and delicious for days. Here’s exactly how I handle it for each version.
On the counter (all versions): Stored in an airtight container or wrapped tightly in plastic wrap, babka stays fresh and pleasant for two to three days at room temperature. The crumb continues to soften slightly, which some people prefer. After three days, it becomes noticeably stale.
In the refrigerator (all versions): Wrap tightly and refrigerate for up to five days. The cold actually slows staling, which is counterintuitive but scientifically accurate. Reheat slices in a 300°F oven for five minutes before serving to restore some of the original texture.
In the freezer (all versions): Wrap the entire loaf in plastic wrap, then aluminum foil, removing as much air as possible. Freeze for up to three months. Thaw at room temperature for about four hours, or overnight in the refrigerator. For keto versions specifically: these actually hold moisture better in the freezer than classic versions and thaw beautifully.
Sliced and frozen individually: Wrap each slice in plastic wrap, then place in a freezer bag, removing excess air. These individual slices thaw in about one hour and can be quickly reheated for instant gratification on busy mornings.
What to Serve With Babka Recipe?
Babka is luxurious enough to stand alone, but pairing it thoughtfully with complementary foods elevates your entire eating experience. Here are my favorite serving combinations for each dietary version.
For Classic and Dairy-Free Versions: A warm cup of espresso or cappuccino is traditional for a reason—the bitterness complements the sweet chocolate perfectly. For breakfast contexts, serve with fresh Greek yogurt (or coconut yogurt for dairy-free) and fresh berries to add brightness and nutrition. For brunch: pair with baked pasta dishes for a complete meal spread that feels restaurant-quality.
For Vegan Babka: Serve with vegan cream cheese and a drizzle of date syrup for an elegant brunch. Fresh citrus—blood oranges or pink grapefruit—cuts through the richness beautifully. Herbal teas like chamomile or peppermint are perfect alongside.
For Gluten-Free Babka: Since the texture is different, I recommend serving with whipped cream or crème fraîche to add moisture and richness. A hot chocolate or rich coffee drink complements it wonderfully. For lighter occasions: serve with just fresh berries and a dusting of powdered sugar.
For Keto Babka: This is already a rich, satisfying dessert, so serve with just coffee or herbal tea. Since it’s denser, smaller slices feel perfectly appropriate—a 1-inch slice is genuinely satisfying compared to a larger slice of regular babka.
- Fresh Berries (all versions) – raspberries or blackberries add tartness without overwhelming the chocolate; works particularly well with vegan and gluten-free versions
- Premium Coffee or Espresso (all versions) – the traditional pairing that works universally across every dietary variation
- Greek Yogurt or Coconut Yogurt (all versions) – adds protein, richness, and a tangy contrast to the sweet chocolate
- Fresh Citrus Segments (classic, vegan, dairy-free) – blood oranges, grapefruits, or pomegranate arils bring brightness
- Whipped Cream or Dairy-Free Whipped Topping (all versions) – especially important for gluten-free versions to add moisture
Seasonal Variations: Adapting Through the Year
One of my favorite discoveries while developing this recipe was realizing how beautifully babka adapts to seasonal ingredients and flavors. This keeps the recipe exciting throughout the year.
Spring Babka: Replace half the dark chocolate with white chocolate. Add the zest of two lemons to your dough at Step 2, and add one tablespoon of fresh lemon juice to your glaze. The brightness is absolutely perfect for spring brunches. For vegan versions: use dairy-free white chocolate.
Summer Babka: Create a raspberry-chocolate version by swirling fresh or frozen raspberries into your chocolate filling. Add one teaspoon of almond extract to your dough for delicate floral notes. The combination of dark chocolate and tart raspberries is summer perfection.
Fall Babka: This is the season for spice. Increase your cinnamon to one tablespoon in the filling and add ¼ teaspoon each of nutmeg, ginger, and cloves. Reduce the cinnamon slightly in the filling so spices don’t overwhelm. Serve with warm apple cider or chai tea.
Winter Babka: Create a peppermint-chocolate version by adding ½ teaspoon pure peppermint extract to your chocolate filling. You can also add ¼ cup crushed candy canes to the filling layer. Drizzle with white chocolate glaze for holiday elegance. For all dietary versions: ensure your peppermint extract is the appropriate type for your dietary needs.

Babka Recipe
Ingredients
Method
- In a large mixing bowl, combine your room-temperature milk with the instant yeast and let it sit for about two minutes. This isn't strictly necessary with instant yeast, but it gives you a visual confirmation that your yeast is alive and active. You should see tiny bubbles forming—that's the sign you're ready to proceed. Add your sugar, eggs, and vanilla extract to the milk-yeast mixture. For vegan versions: your flax eggs should be fully prepared 15 minutes before this step. For all versions: whisk these wet ingredients together until well combined, about one minute of vigorous mixing. In a separate bowl, whisk together your flour and salt. For gluten-free versions: sift your GF flour blend with the salt to aerate and remove any lumps that can create dense spots in your crumb. Gradually add your dry ingredients to the wet ingredients, stirring with a sturdy wooden spoon or the paddle attachment of your stand mixer. Mix until you have a shaggy, rough dough that pulls away from the bowl sides. This should take about two minutes.
- Now comes the part that intimidated me for years: adding softened butter to a wet dough. Cut your butter into small tablespoon-sized pieces. For dairy-free versions: your coconut oil should be at room temperature but not melted. Add the butter pieces one at a time, allowing each addition to mostly incorporate before adding the next. This process takes about five to seven minutes total. Your dough will look greasy and messy—that's exactly right. You're creating an emulsion where butter, eggs, and flour become a cohesive structure. Once all butter is incorporated, switch to the dough hook attachment if using a stand mixer. For keto versions: expect this dough to be noticeably denser and heavier than traditional babka dough; this is normal. Knead on medium speed for about eight minutes until the dough becomes smooth, elastic, and pulls away cleanly from the bowl. It should feel slightly sticky but not wet.
- Transfer your dough to a lightly oiled bowl. Turn it to coat all sides with a thin layer of oil. Cover with a damp kitchen towel or plastic wrap. Let it rise in a warm spot (around 75-78°F) for about one hour, or until doubled in volume. Expert's Nutritional Tip: During fermentation, the yeast and bacteria in the dough begin breaking down gluten and producing lactic acid, which increases mineral bioavailability. This means your body can absorb more zinc, iron, and magnesium from the flour. For all versions: this slow fermentation is where the real nutrition magic happens, so don't rush it. You'll know it's ready when you gently poke the dough and the indentation stays rather than bouncing back immediately. For gluten-free versions: this rise might be slightly shorter (45-50 minutes) since GF dough doesn't develop gluten network as efficiently.
- While your dough rises, create the filling that makes babka absolutely irresistible. Chop your dark chocolate into small, uniform pieces—about the size of chocolate chips. This ensures even melting and distribution throughout the filling. In a small saucepan over low heat, combine your ½ cup butter and heavy cream. For vegan versions: use vegan butter and canned full-fat coconut milk. For dairy-free versions: use coconut oil and coconut milk. Heat gently, stirring occasionally, until the butter is melted and the mixture is steaming but not boiling. Remove from heat and add your chopped chocolate. Let it sit for one minute—this residual heat is usually enough to melt the chocolate completely. Stir gently and smoothly until you have a glossy, homogeneous ganache. For keto versions: use only high-quality dark chocolate with minimal added sugars. Stir in your unsweetened cocoa powder, ⅓ cup granulated sugar (or keto sweetener), ground cinnamon, and a tiny pinch of salt. Mix until perfectly smooth. For all versions: let this filling cool to room temperature—about 20 minutes—before using. If it's too warm, it will make your dough sticky and difficult to handle.
- Once your dough has doubled, turn it out onto a lightly floured work surface. For gluten-free versions: dust with GF flour blend instead. Don't punch it down aggressively; rather, gently deflate it by pressing with your fingertips. Using a rolling pin, gently roll your dough into a large rectangle, approximately 16 inches by 12 inches. The dough should be about ¼-inch thick—thin enough to roll easily, but thick enough to hold filling without tearing. For keto doughs: these are more fragile; work slowly and patch any tears gently with dough scraps. Spread your cooled chocolate filling evenly across the entire surface of the dough, leaving about a ½-inch border on all sides. Use an offset spatula to create an even layer. Don't be tempted to use more filling—too much will ooze out during baking. Starting from one long side, roll the dough tightly toward you, creating a long spiral log. For all versions: this is a crucial moment—roll slowly and deliberately, keeping tension consistent so the spirals stay even. Seal the final edge by pressing gently with your fingers.
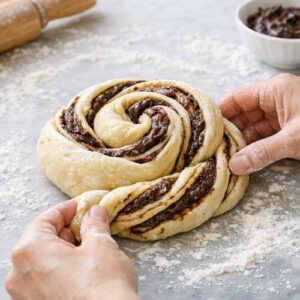
- This is what makes babka different from a simple chocolate roll. You're going to create a beautiful twisted loaf. Using a sharp knife or bench scraper, carefully cut your log in half lengthwise, creating two long strands. For gluten-free doughs: use a serrated knife and a gentle sawing motion rather than pushing straight down. Twist these two strands around each other, maintaining the spiral orientation as you twist. This takes practice and patience—you want the spirals to remain visible as you wind them together. Coil the twisted dough into your prepared loaf pan (8x4 inches), tucking the ends under to create a compact loaf.
- Cover your loaf pan loosely with plastic wrap or a damp towel. Let it rise in a warm spot for 45 minutes to one hour, until the dough rises just above the rim of the pan and jiggles slightly when you gently shake the pan. For all versions: avoid over-proofing. A slightly under-proofed babka is better than one that's over-proofed, which will collapse during baking and create a dense crumb. If you're unsure, poke it gently—it should hold a slight indentation but bounce back slightly. About 30 minutes before you plan to bake, preheat your oven to 350°F. For convection ovens: reduce temperature to 325°F and reduce baking time by about 5 minutes. Position your oven rack to the lower-middle position so the bottom can bake thoroughly without the top burning.
- Place your loaf pan on a sheet pan (to catch any drips) and transfer it to your preheated oven. Bake for 35-45 minutes, depending on your oven and how perfectly your dough proofed. For gluten-free versions: bake closer to 45 minutes; they need slightly longer to set completely. The babka is done when the top is deep golden brown and a skewer inserted into the center comes out clean or with just a few moist crumbs. Don't overbake or the chocolate filling will become dry. For all versions: if the top is browning too quickly, loosely tent with foil for the last 10 minutes of baking. Remove from the oven and let cool in the pan for 10 minutes. This resting period allows the crumb to set so it slices cleanly. Turn it out onto a wire rack and cool completely—at least one hour—before glazing.
- While your babka cools, prepare your beautiful glaze. In a small saucepan, combine ⅓ cup water and ⅓ cup granulated sugar (or appropriate keto sweetener). Heat over medium, stirring occasionally, until the sugar dissolves completely and the mixture comes to a gentle simmer. Remove from heat and stir in your ¾ cup powdered sugar and ⅓ cup unsweetened cocoa powder, whisking until completely smooth. For all versions: sift the cocoa powder and powdered sugar together first if lumps are visible; a lumpy glaze creates an uneven appearance. Let the glaze cool for about five minutes until it reaches a pourable consistency. It should coat a spoon smoothly but still drip slowly. For keto versions: if using erythritol-based sweeteners, add them after the mixture cools slightly, as heat can affect their sweetness. Using a pastry brush or small spoon, generously coat the top and sides of your completely cooled babka with the glaze. For restaurant-quality presentation: let the excess drip naturally down the sides rather than trying to control it perfectly. That's where the elegance lives.
Notes
FAQs
Can I make babka in a regular loaf pan, or do I need a special pan?
You absolutely can use a regular 8×4-inch loaf pan—that’s what I’ve designed this recipe for. However, traditional babka is often made in a brioche mold or round cake pan, which creates