Bran Muffin Recipe
 Rosa Crumley
August 2, 2026
Rosa Crumley
August 2, 2026
This post contains affiliate links. As an Amazon Associate I earn from qualifying purchases.
I’ve learned something crucial as a registered dietitian: the busiest people among my clients aren’t the ones who struggle with nutrition—they’re the ones who’ve mastered meal prep. Make this batch of wholesome bran muffins once on Sunday, and you’ll have grab-and-go breakfasts, snacks, and even dessert components ready for the entire week. This isn’t just about convenience; it’s about giving yourself permission to eat nourishing food without the daily stress. I’ve included natural sweeteners and whole grains that keep your energy steady from morning until lunch, and I’ve designed this recipe to stay moist and delicious through Friday. Whether you’re fueling early morning workouts, packing lunches, or looking for an afternoon pick-me-up that actually satisfies, these muffins work harder than you’d expect.
Bran Muffin Recipe Meal Prep: Cook Once, Eat All Week
I discovered the true power of meal prep during my first year working in Pittsburgh’s healthcare system. I was running between hospital consultations, nutrition counseling appointments, and community workshops—barely pausing to eat. One Sunday, my grandmother called with her signature question: “Rosa, are you taking care of yourself?” That conversation sparked something. I spent that afternoon in my kitchen, and I made a double batch of muffins using her techniques combined with modern nutritional science. By Wednesday, when I was exhausted during a particularly demanding shift, those muffins in my break room refrigerator felt like an act of self-love. That’s when I understood: meal prep isn’t about restriction or rigid planning. It’s about honoring yourself enough to plan ahead. These bran muffins became my weekly ritual, and now I’m sharing that same gift with you.
Why This Recipe Is Perfect for Meal Prep
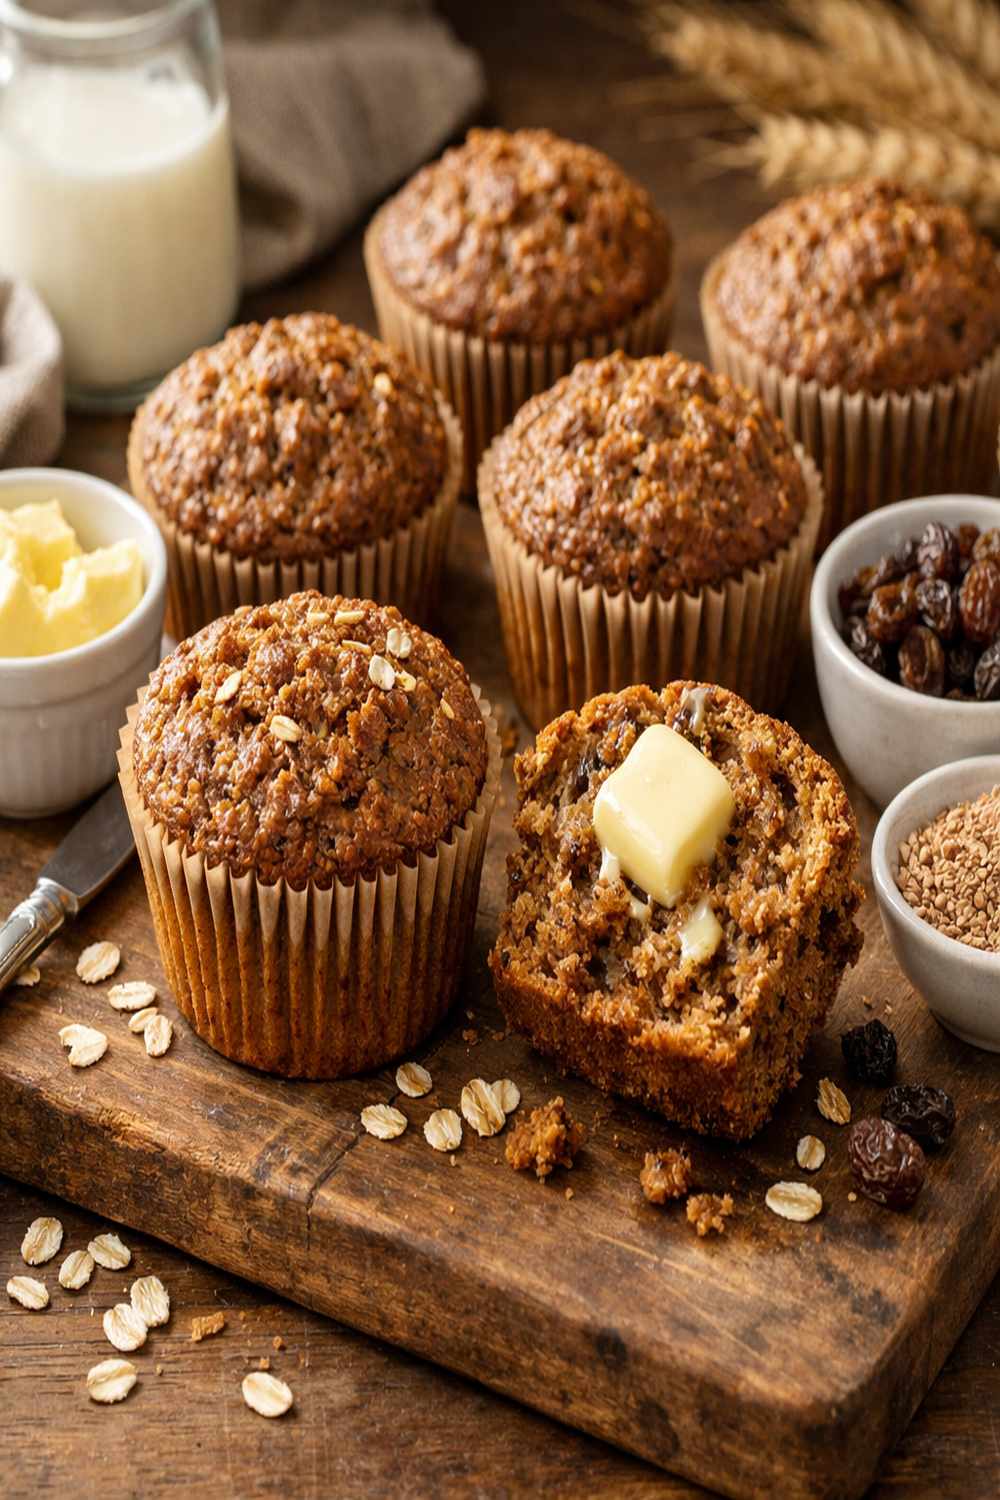
- Five days of grab-and-go breakfasts — bake once on Sunday for Monday through Friday morning nutrition without any morning decisions
- Superior moisture retention — the applesauce and coconut oil keep these muffins tender through day five, actually improving in flavor as they sit
- Versatile across every meal occasion — serve at breakfast with Greek yogurt, pack as afternoon snacks, crumble over oatmeal, or pair with dinner as a wholesome dessert component
Your Weekly Meal Plan With This Recipe
One batch of twelve muffins transforms into completely different experiences throughout your week. The same recipe, prepared once, becomes multiple meals with simple additions and different serving contexts. This is the efficiency that keeps you excited about eating well—variety without extra cooking time.
- Monday Breakfast — Serve warm from the refrigerator with a dollop of thick Greek yogurt and fresh berries on top, drizzled lightly with raw honey. Add a handful of almonds for protein balance.
- Wednesday Snack — Slice your muffin in half, toast it lightly in your toaster oven, and spread with natural almond butter and thin slices of banana. The warmth reactivates the moisture beautifully.
- Friday Dessert — Crumble one muffin over vanilla yogurt with a sprinkle of granola and a few chopped pecans for textural contrast. This feels indulgent while providing sustained energy for your evening.
The Ingredients — Scaled for a Full Week
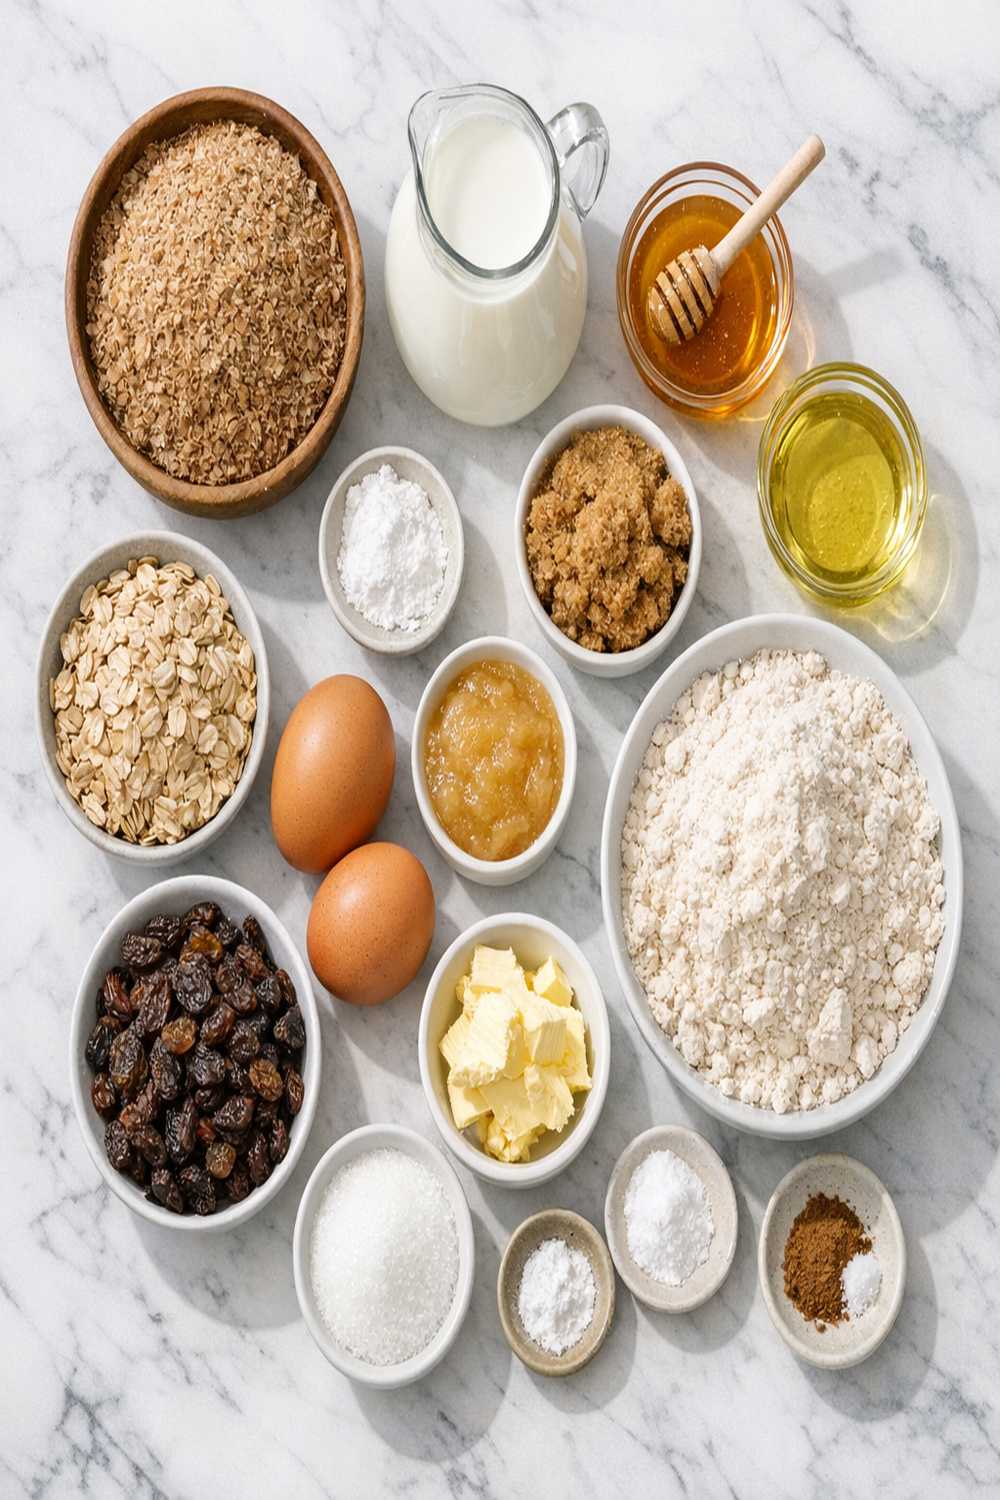
This recipe makes one dozen muffins—the perfect portion for one person eating all week, or two people enjoying variety. All ingredients should be at room temperature before you begin; this ensures even mixing and optimal rise. I’ve chosen each ingredient specifically for its nutritional profile and how it holds during refrigerator storage.
For the Dry Components
- ½ teaspoon ground cinnamon (Ceylon cinnamon has a warmer, sweeter profile than cassia)
- ¼ teaspoon ground ginger (optional but adds warmth and aids digestion)
- 1½ cups whole wheat flour (spooned and leveled, never packed, for accurate measurement)
- 1 cup wheat bran (the powerhouse ingredient that provides fiber and texture)
- ½ teaspoon fine sea salt (enhances all flavors without adding sodium significantly)
- ½ teaspoon baking soda (essential for tender crumb structure)
- 1 teaspoon baking powder (aluminum-free if you’re sensitive)
For the Wet Components
- ½ cup pure maple syrup or honey (honey adds subtle floral notes that maple doesn’t provide)
- ⅓ cup coconut oil (melted and slightly cooled, creates moisture and subtle richness)
- ⅓ cup unsweetened applesauce (room temperature, replaces some fat while maintaining tenderness)
- 1 cup unsweetened plant-based milk or dairy milk (room temperature prevents temperature shock to the batter)
- 1 teaspoon pure vanilla extract (not imitation, which contains synthetic vanillin)
- 1 large egg (room temperature for proper emulsification and lift)
For Mix-Ins and Garnish
- ⅔ cup raisins (soaked briefly in warm water if you prefer plumper fruit)
- 2 tablespoons chopped walnuts (optional, adds omega-3 fatty acids and textural interest)
The Meal Prep Process: How to Make Bran Muffin Recipe in Bulk
I’m going to walk you through my efficient system that treats muffin-making like a professional kitchen would—organized, strategic, and designed to minimize your active time at the counter. This isn’t complicated baking; it’s intentional cooking.
Step 1: Prepare Your Station and Oven
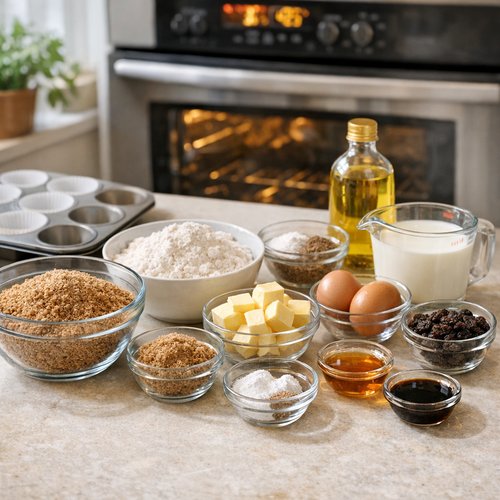
Start by preheating your oven to 425°F and gathering all your ingredients on the counter in the order you’ll use them. This process, called mise en place in professional kitchens, prevents forgotten ingredients and keeps you moving efficiently. Line a twelve-cup muffin tin with paper liners or spray with nonstick spray. Paper liners make cleanup nearly effortless and are compostable—no extra waste from your meal prep routine.
Step 2: Combine All Dry Ingredients in One Bowl
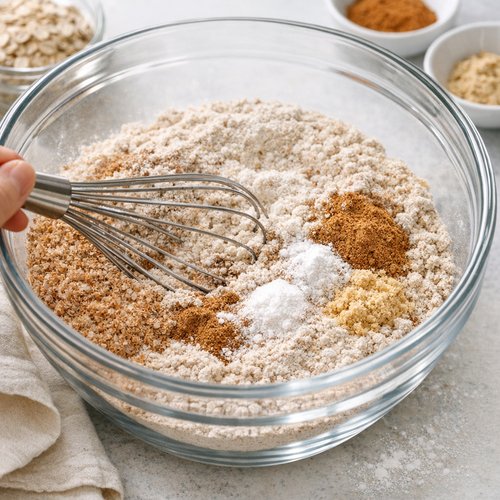
In a large mixing bowl, whisk together the whole wheat flour, wheat bran, baking powder, baking soda, fine salt, cinnamon, and ginger if you’re using it. Whisk for about thirty seconds to distribute the leavening agents and spices evenly throughout the flour. This step is crucial because it prevents pockets of baking soda in your finished muffins. Set this bowl aside and don’t walk away—you’re building momentum now.
Step 3: Combine All Wet Ingredients in a Second Bowl
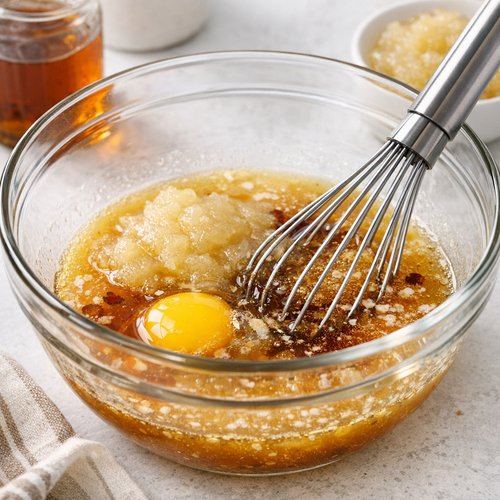
In a medium mixing bowl, whisk together the room-temperature egg, maple syrup or honey, melted coconut oil, applesauce, vanilla extract, and plant-based or dairy milk. Whisk until the mixture is completely homogeneous—about one full minute of steady whisking. You’re creating an emulsion here; the vigorous whisking helps the fat and liquid combine smoothly, which translates to a tender muffin with no greasiness.
Step 4: Combine Wet and Dry With Purpose
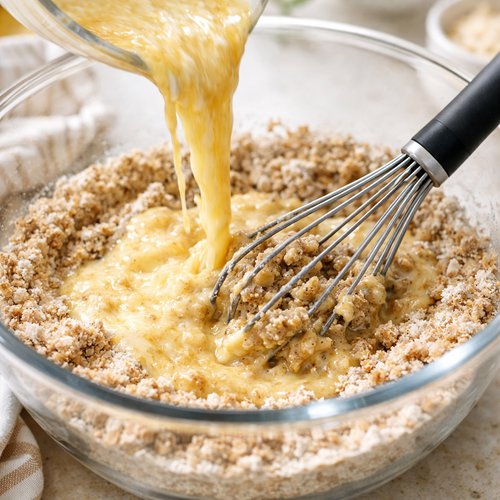
Pour the wet ingredients into the bowl with your dry ingredients. Using a flexible whisk, stir until just combined—this is essential. Overmixing develops gluten, which makes muffins tough and dense. You’re looking for a batter where you can no longer see streaks of dry flour, but lumps are completely acceptable. The batter should look thick and slightly shaggy. Switch to a rubber spatula and fold in the raisins and walnuts gently, being careful not to overwork the batter.
Step 5: Fill and Bake With the Two-Temperature Method
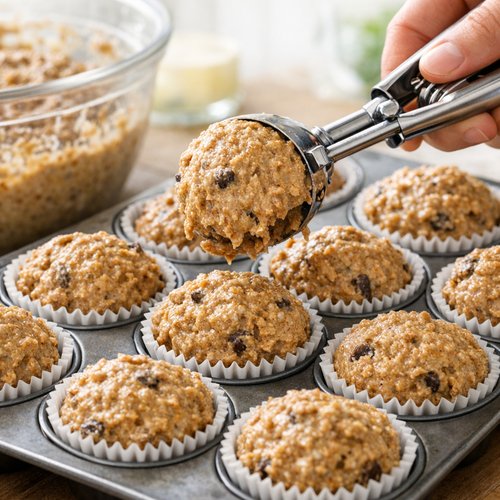
Using an ice cream scoop or spoon, distribute the batter evenly among your muffin cups, filling each cup completely to the top. This creates the characteristic domed top that catches when you bite into it. Immediately place the muffin tin into your preheated 425°F oven and bake for exactly five minutes. Then, without removing the muffins, reduce the oven temperature to 350°F and bake for fourteen to fifteen additional minutes. This two-temperature method is a professional technique: the initial high heat creates oven spring and sets the structure quickly, while the lower temperature allows the interior to cook through without overbrowning the tops. A toothpick inserted into the center of a muffin should come out clean with just a few moist crumbs clinging to it—not completely dry.
Step 6: Cool Strategically for Storage Success
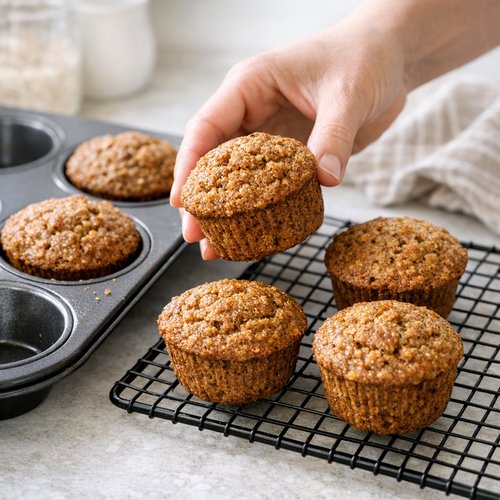
Let the muffins cool in the tin for five minutes—this allows the structure to set without making them impossible to remove. Transfer each muffin to a wire cooling rack and let them cool to room temperature, about twenty minutes. Do not skip the wire rack; resting them in the pan traps steam, which makes the bottoms soggy and accelerates mold growth during storage. Once they’re completely cool, they’re ready for storage.
Storage and Organization System
- Glass Containers With Tight-Sealing Lids — Glass doesn’t absorb odors or flavors, won’t leach chemicals when warm, and lets you see at a glance what you have. Pyrex or similar brands are reliable and affordable. Store at room temperature for two days, then transfer to the refrigerator for days three through five.
- Portioning Into Pairs — Organize your muffins in groups of two per container or wrapped in parchment paper individually. This prevents you from opening one large container repeatedly, which exposes all your muffins to air and humidity fluctuations.
- Labeling System — Use a permanent marker or label maker to write the baking date directly on the container. Include “Eat By” followed by the date five days from your baking date. This removes any guesswork and builds accountability into your meal prep system.
How to Reheat Without Losing Quality
The beauty of these muffins is that they’re delicious at room temperature, but reheating them properly elevates the entire experience. Here’s my system based on what day of the week you’re eating them and what you’re pairing them with.
Monday or Tuesday (Fresh from the fridge) — Simply remove from the refrigerator fifteen minutes before eating and enjoy at room temperature. The chill has actually enhanced the moisture and deepened the flavors. No reheating needed.
Wednesday Through Friday (Mid-week refresh) — Wrap your muffin loosely in a damp paper towel and microwave for fifteen to twenty seconds. This gentles warms it and the moisture prevents any drying. Alternatively, slice your muffin horizontally and place it cut-side-down in a toaster oven at 300°F for three minutes. This method is superior if you’re planning to top it with yogurt or almond butter because the gentle warmth reactivates the vanilla and spice flavors without making the muffin soggy.
Can I Freeze Bran Muffin Recipe?
Yes, absolutely, and this is where meal prep transforms from weekly strategy into monthly strategy. I freeze muffins all the time, and when you do it correctly, they’re indistinguishable from freshly baked.
Freezing Method: Allow muffins to cool completely to room temperature. Wrap each muffin individually in parchment paper, then place all wrapped muffins into a gallon-sized freezer bag, pressing out as much air as possible. Label with the date using a permanent marker. Muffins keep beautifully for up to three months in the freezer.
Thawing for Best Results: Remove a muffin from the freezer and unwrap it. Place it on the counter at room temperature for thirty to forty minutes, or wrap it loosely in a damp paper towel and microwave for thirty seconds. The slow thaw prevents condensation from making the muffin soggy. For best texture, consume thawed muffins within two hours of thawing.
Nutrition Information
Per muffin (based on twelve servings): approximately 220 calories, 8 grams protein, 32 grams carbohydrates, 8 grams dietary fiber, and 7 grams fat. The USDA recognizes whole wheat flour and wheat bran as significant sources of dietary fiber, B vitamins, and minerals like magnesium and manganese. One muffin provides roughly 30 percent of your daily fiber recommendation, which supports digestive health and creates stable blood sugar throughout your morning. The combination of honey or maple syrup with applesauce provides natural sweetness with a lower glycemic index than refined sugar—meaning your energy stays steady rather than spiking and crashing.
Across a full week of eating these muffins, you’re consuming approximately 42 grams of dietary fiber, which meets or exceeds the daily recommendation for most adults. This consistency is what makes meal prep so powerful from a nutritional standpoint: you’re not relying on willpower or motivation each morning. The good choice is already made for you.
Expert’s Nutritional Insight: The Power of Wheat Bran
As a registered dietitian, I want to emphasize something many home cooks overlook: wheat bran is not just a texture ingredient—it’s nutritional medicine. One cup of wheat bran contains roughly 23 grams of dietary fiber and only 63 calories. Unlike some “healthy” add-ins that taste like cardboard, bran here adds genuine texture and nutty flavor while supporting digestive health, cholesterol management, and blood sugar stability. The bran’s insoluble fiber also creates that satisfying fullness that keeps you genuinely satisfied until lunch, not just mechanically full.
Common Mistakes to Avoid
Overmixing the batter: This is the number one mistake I see. Overmixing develops gluten, transforming these tender muffins into dense, tough rounds. Mix until the dry ingredients are just moistened. Lumps are your friend—they disappear during baking.
Using cold ingredients: Cold eggs, cold milk, and cold applesauce prevent proper emulsification, resulting in a grainy texture and uneven rise. Take everything out of the refrigerator thirty minutes before baking. This single step transforms your results dramatically.
Skipping the two-temperature bake method: Baking entirely at 350°F creates pale, flat muffins. The initial five minutes at 425°F creates oven spring and sets the structure—this is non-negotiable. Don’t cheat this step.
Storing while still warm: Trapped steam causes condensation inside your storage container, leading to mold growth by day three. Always cool completely on a wire rack before storing. This single habit extends your muffins’ life from three days to five days.
Seasonal Variations
Spring and Summer: Replace half the raisins with fresh blueberries and add the zest of one lemon to the wet ingredients. Lemon brightens the whole grain flavors and pairs beautifully with fresh berries at breakfast.
Fall and Winter: Add one teaspoon pumpkin pie spice to the dry ingredients and replace the vanilla extract with almond extract. Fold in one-half cup chopped dried cranberries instead of all raisins. This transforms the recipe into a seasonal sensation that feels indulgent despite being deeply nourishing.
What to Pair With Bran Muffin Recipe Throughout the Week
These muffins are wonderful standalone, but pairing them strategically throughout your week prevents boredom and creates complete meals. I’m sharing my favorite combinations that require minimal effort but feel like you’ve planned something special.
- Monday Pairing: Serve warm with Greek yogurt (providing additional protein), fresh berries, and a drizzle of raw honey. This creates a complete breakfast with all three macronutrients—carbohydrates from the muffin, protein from the yogurt, and a bit of healthy fat from the muffin’s coconut oil.
- Tuesday Pairing: Toast and top with natural almond butter and thin banana slices. The banana adds potassium and additional natural sweetness, while almond butter provides satiety-boosting healthy fats.
- Wednesday Pairing: Serve alongside a big spinach salad with apple vinaigrette, creating contrast between savory greens and the slightly sweet muffin. This feels like an unusual combination but works beautifully—the sweetness complements bitter greens perfectly.
- Thursday Pairing: Crumble one muffin over cottage cheese with fresh berries and a sprinkle of granola. This high-protein option works beautifully as a substantial afternoon snack.
- Friday Pairing: Serve as dessert alongside a cup of herbal tea. By Friday, these muffins taste even better because the flavors have melded—they feel like a small indulgence that’s actually good for you.
Make-Ahead Guide: Maximizing Your Meal Prep
I want to share my professional system for stretching one baking session into multiple weeks of breakfast security. When you understand the full scope of your options, meal prep becomes genuinely empowering.
The Hybrid System: Bake twelve muffins on Sunday as usual. Eat six muffins throughout the week. Immediately freeze the remaining six muffins in pairs wrapped in parchment, then placed in a freezer bag labeled with the date. The following week, you have the option to bake fresh or defrost your backup batch, giving you flexibility if your schedule shifts. Many of my clients maintain a rotating supply of frozen muffins—always baking a batch every two weeks and maintaining a small frozen inventory for emergencies or particularly chaotic weeks.
Doubling Down: Consider baking a double batch (two tin’s worth) at once. Your active time increases by only ten minutes, but you’ve created enough frozen inventory for a full month. Most ovens accommodate two muffin tins at once with proper spacing. This is the “work smarter” approach: one afternoon of focused cooking creates a month of food security.

Bran Muffin Recipe
Ingredients
Method
- Start by preheating your oven to 425°F and gathering all your ingredients on the counter in the order you'll use them. This process, called mise en place in professional kitchens, prevents forgotten ingredients and keeps you moving efficiently. Line a twelve-cup muffin tin with paper liners or spray with nonstick spray. Paper liners make cleanup nearly effortless and are compostable—no extra waste from your meal prep routine.

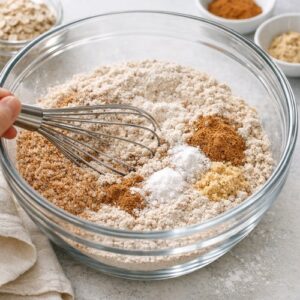
- In a large mixing bowl, whisk together the whole wheat flour, wheat bran, baking powder, baking soda, fine salt, cinnamon, and ginger if you're using it. Whisk for about thirty seconds to distribute the leavening agents and spices evenly throughout the flour. This step is crucial because it prevents pockets of baking soda in your finished muffins. Set this bowl aside and don't walk away—you're building momentum now.
- In a medium mixing bowl, whisk together the room-temperature egg, maple syrup or honey, melted coconut oil, applesauce, vanilla extract, and plant-based or dairy milk. Whisk until the mixture is completely homogeneous—about one full minute of steady whisking. You're creating an emulsion here; the vigorous whisking helps the fat and liquid combine smoothly, which translates to a tender muffin with no greasiness.

- Pour the wet ingredients into the bowl with your dry ingredients. Using a flexible whisk, stir until just combined—this is essential. Overmixing develops gluten, which makes muffins tough and dense. You're looking for a batter where you can no longer see streaks of dry flour, but lumps are completely acceptable. The batter should look thick and slightly shaggy. Switch to a rubber spatula and fold in the raisins and walnuts gently, being careful not to overwork the batter.

- Using an ice cream scoop or spoon, distribute the batter evenly among your muffin cups, filling each cup completely to the top. This creates the characteristic domed top that catches when you bite into it. Immediately place the muffin tin into your preheated 425°F oven and bake for exactly five minutes. Then, without removing the muffins, reduce the oven temperature to 350°F and bake for fourteen to fifteen additional minutes. This two-temperature method is a professional technique: the initial high heat creates oven spring and sets the structure quickly, while the lower temperature allows the interior to cook through without overbrowning the tops. A toothpick inserted into the center of a muffin should come out clean with just a few moist crumbs clinging to it—not completely dry.

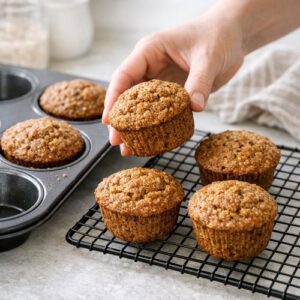
- Let the muffins cool in the tin for five minutes—this allows the structure to set without making them impossible to remove. Transfer each muffin to a wire cooling rack and let them cool to room temperature, about twenty minutes. Do not skip the wire rack; resting them in the pan traps steam, which makes the bottoms soggy and accelerates mold growth during storage. Once they're completely cool, they're ready for storage.
FAQs
Can I make these muffins without maple syrup or honey?
Yes, you can use one-third cup of coconut sugar, regular sugar, or even brown sugar. The flavor profile shifts slightly—sugar creates a more neutral sweetness compared to honey’s floral notes or maple’s woody depth—but the muffins work beautifully. Avoid artificial sweeteners; they tend to crystallize during baking and create an unpleasant texture in whole grain baking.
What happens if I don’t have wheat bran specifically?
Wheat bran is the key ingredient that makes these muffins nutritionally powerful, but if you can’t find it, you can substitute oat bran in equal amounts. The texture will be slightly softer and the fiber slightly different—oat bran is soluble fiber while wheat bran is insoluble—but the muffins will still be delicious and nourishing. Never skip this ingredient entirely; it’s what creates the signature flavor and structure.
How do I adapt this recipe for dairy-free eating?
Use unsweetened plant-based milk (almond, oat, or soy all work beautifully) and coconut oil as your fat source, which is already in the recipe. The egg is the only animal product, and it’s present for structure and lift. If you need to avoid eggs as well, try replacing the one egg with one-quarter cup of unsweetened applesauce plus one tablespoon of cornstarch, whisked together. This creates similar binding and lift.
Can I bake these in a loaf pan instead of muffin tins?
Absolutely. Divide the batter between two loaf pans lined with parchment paper. Using the same two-temperature method, bake at 425°F for five minutes, then reduce to 350°F and bake for thirty-five to forty minutes, until a toothpick inserted in the center comes out clean. Slice into fourteen pieces per loaf for portion control. A loaf format actually stores beautifully and is easier to grab and wrap for travel.
Why does my batter sometimes look curdled or separated?
This happens when ingredients aren’t at room temperature or when you’ve mixed too vigorously. Cold ingredients don’t emulsify properly. Always remove eggs, milk, and applesauce from the refrigerator at least thirty minutes before baking. If your batter does look slightly separated, don’t panic—gently whisk it together and proceed. The muffins will be fine. For future batches, commit to the room-temperature step; it makes a genuine difference in texture.
More Meal Prep Recipes You’ll Love
- Yogurt Cake — similar texture and moisture retention, excellent for weekend meal prep
- 20 Minute Bread Recipe — perfect alongside your muffins for complete meal prep weekends
- Applesauce Recipe — learn to make your own for deeper customization of your muffin ingredients
The Bigger Picture: Taking Back Your Week
Here’s what I’ve learned after years of helping busy people transform their relationship with food: the magic isn’t in any single recipe. It’s in showing up for yourself consistently, Sunday after Sunday. These bran muffins are my vehicle for that consistency, and I’m trusting that they’ll become yours too.
When you have wholesome muffins waiting in your refrigerator, you’re not reaching for whatever’s convenient—you’re reaching for something nourishing that you’ve made with your own hands. That’s not deprivation; that’s abundance. That’s self-care expressed through food.
This week, I encourage you to set aside two hours on Sunday. Gather your ingredients, preheat your oven, and make this recipe. Bake your batch. Line them up on your cooling rack and feel that moment of genuine accomplishment. Then pack them away, label your containers, and know that you’ve just given yourself the gift of five mornings of good nutrition without any decision-making required.
Your future self—the one facing a hectic Wednesday morning—will thank you profusely. Happy cooking!