Brown Sugar Zucchini Bread Recipe

This post contains affiliate links. As an Amazon Associate I earn from qualifying purchases.
Learning to make brown sugar zucchini bread isn’t just about this single recipe—it’s about mastering a fundamental baking technique that unlocks dozens of other recipes. I’m talking about the art of incorporating moisture-rich vegetables into quick breads while maintaining that perfect tender crumb. This technique teaches you how to balance moisture, fat, and structure in ways that elevate everything from quick bread baking to understanding emulsification itself. Once you understand what’s happening in this batter, you’ll approach every loaf with confidence.
Master the Technique Behind Brown Sugar Zucchini Bread: The Moment Everything Changed in My Kitchen
I still remember standing in my grandmother’s Pittsburgh kitchen on a humid August afternoon, watching her grate zucchini with the kind of practiced efficiency that only comes from fifty years of cooking. She squeezed the shreds in a kitchen towel—really wrung them out—and when I asked why, she simply said, “Rosa, water is the enemy of good bread. You control the moisture, you control everything.”
That single lesson transformed how I bake. For years before that moment, my vegetable breads came out dense, gummy, and disappointing. I was adding beautiful fresh zucchini but getting a brick in return. The problem wasn’t the ingredient—it was my technique. Once I understood that vegetables release moisture during baking, and that managing this moisture through proper squeezing, the right fat-to-flour ratio, and careful mixing was essential, everything changed.
Today, as a registered dietitian, I approach this recipe through both a nutritional and technical lens. Brown sugar zucchini bread becomes a vehicle for understanding how professional bakers create structure, tenderness, and flavor complexity all at once.
The Core Technique Explained: Vegetable Integration and Moisture Management
The heart of making exceptional zucchini bread is understanding vegetable integration—the art of incorporating water-rich produce into batters while maintaining proper structure and texture. This isn’t about dumping shredded zucchini into flour. This is precision work.
Here’s what’s happening scientifically: zucchini is approximately 95% water. When you bake it, that water becomes steam, which can either create a beautiful crumb structure or turn your bread into a dense, soggy mess. The difference comes down to three factors working in concert: first, you squeeze out excess moisture before incorporating it; second, you use a balanced ratio of fat (oil and yogurt) that prevents the water released during baking from destabilizing your gluten network; and third, you apply the proper mixing technique that respects the delicate balance between structure and tenderness.
The emulsion—that smooth, unified mixture you create when you whisk brown sugar with eggs, then incorporate oil and yogurt—is what holds everything together. When you fold in your dry ingredients with minimal mixing, you’re protecting those delicate gluten strands from overdevelopment. Overmixed batter creates tough bread. But when you fold in the zucchini, you’re distributing moisture evenly, which bakes into steam that creates lift and crumb.
Think of it like this: your batter is a system in balance. The sugar caramelizes slightly, creating flavor and moisture. The eggs provide structure and richness. The oil keeps it tender. The yogurt adds tang and moisture while strengthening crumb structure. The zucchini adds nutrition, subtle flavor, and—when handled correctly—beautiful moisture that becomes steam in the oven.
What This Technique Unlocks
Once you’ve mastered vegetable integration and moisture management, you’ll understand how to create dozens of other baked goods. This isn’t one-trick knowledge—it’s foundational.
- Carrot Cake – uses identical moisture management principles with a different vegetable
- Pumpkin Bread – applies the same emulsification and folding technique with seasonal produce
- Banana Bread – teaches you how fruit contributes both moisture and natural sweetness
- Applesauce Spice Cake – demonstrates how puréed produce replaces some fat while adding structure
- Sweet Potato Muffins – extends this technique to denser, more complex vegetable applications
- Cornbread with Corn Kernels – shows how to incorporate whole vegetables alongside ground grains
The Ingredients—Chosen to Teach the Technique
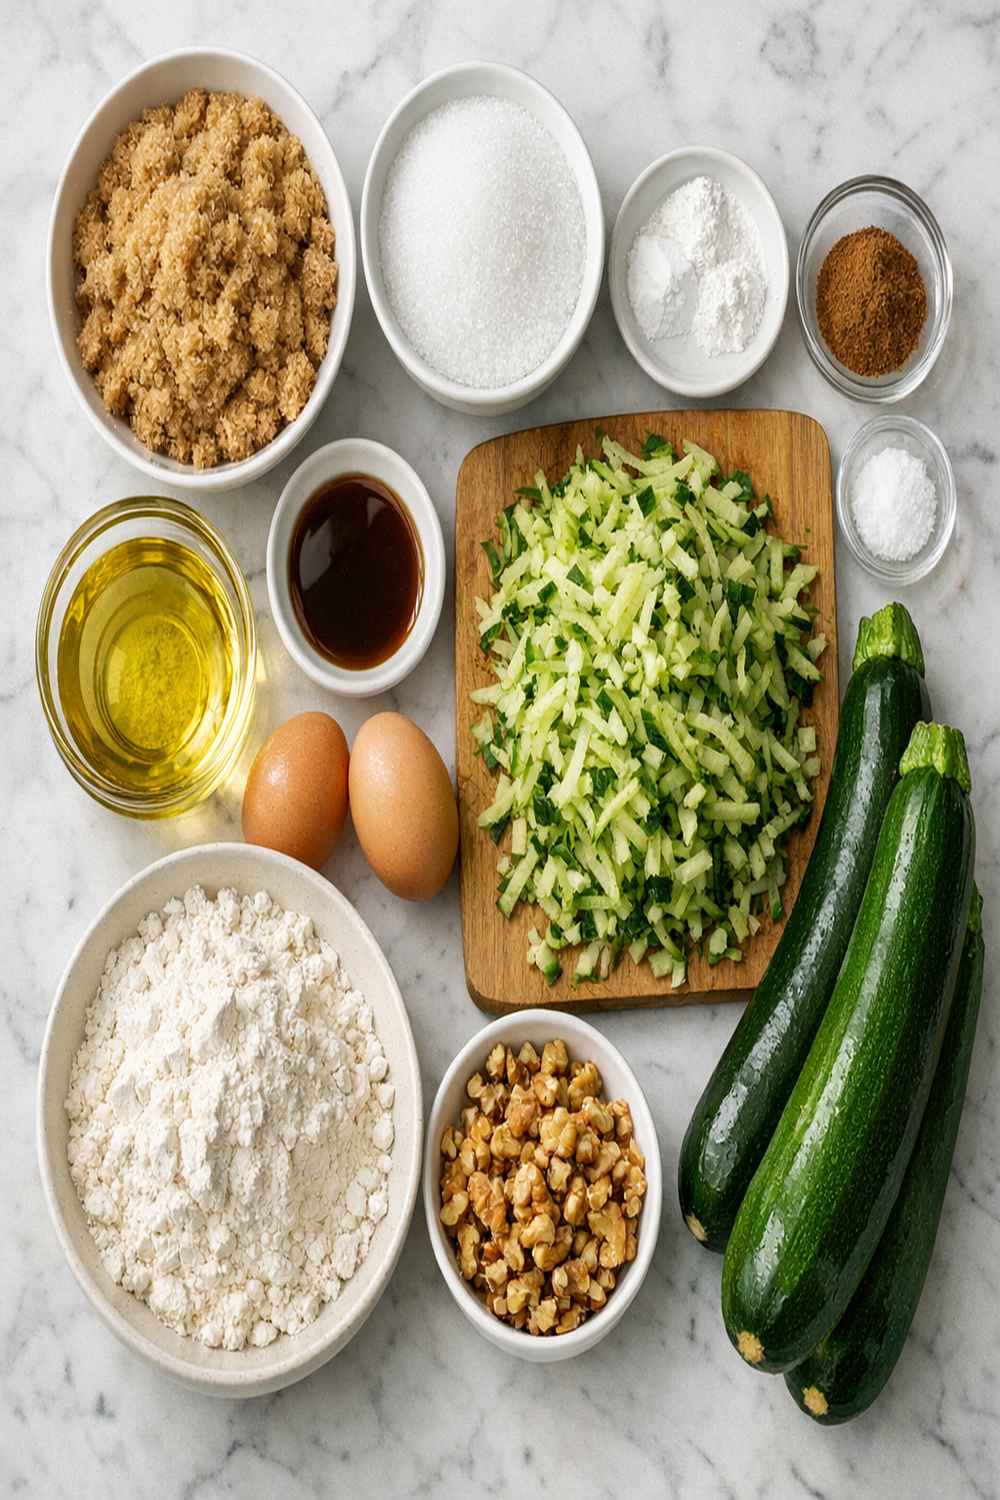
Every ingredient in this recipe was selected specifically to demonstrate how proper moisture management creates exceptional texture. I’ve chosen components that work together as a teaching system.
For the Cake
- 1½ teaspoons baking powder (creating lift without overpowering yeast flavor)
- 1½ cups grated zucchini with skin intact, lightly squeezed (teaching moisture control and vegetable integration)
- ½ teaspoon kosher salt (balancing sweetness and amplifying other flavors)
- ½ cup plain Greek yogurt (adding tang, moisture, and protein-based structure)
- 1 teaspoon vanilla extract (pure, not imitation, for depth)
- ½ cup neutral oil such as avocado or grapeseed (keeping crumb tender while supporting moisture balance)
- ½ cup packed light or dark brown sugar (adding moisture, richness, and caramel notes)
- 2 large eggs (room temperature, creating emulsion and binding)
- 2 tablespoons raw walnuts, finely chopped (optional garnish adding texture and nutrition)
- ½ teaspoon baking soda (reacting with yogurt’s lactic acid for additional rise)
- 1½ cups all-purpose flour (spooned and leveled, providing structure without toughness)
- 1¼ teaspoons ground cinnamon (enhancing subtle vegetable flavors)
Why These Ingredients Teach the Technique: The brown sugar provides moisture that helps keep the bread tender, while the combination of oil and yogurt creates a stable emulsion that won’t break when folding in wet zucchini. The Greek yogurt is essential—it’s not just moisture; it’s protein that strengthens crumb structure. Notice there’s no butter; the neutral oil prevents the bread from becoming greasy while distributing evenly. The cinnamon complements the subtle earthiness of zucchini skin without overwhelming it. This recipe makes one 9×5-inch loaf, or approximately 10 slices.
Expert’s Nutritional Tip: Why Greek Yogurt Changes Everything
As a registered dietitian, I want to highlight something many home bakers miss: the Greek yogurt in this recipe isn’t just a moisture source. It’s a functional ingredient that delivers 7-10 grams of protein per half cup, which strengthens the crumb matrix and keeps you satisfied longer than traditional zucchini bread made with only oil. The lactic acid in yogurt also activates baking soda more effectively, creating better rise. You’re getting nutrition and technique simultaneously.
The Masterclass: How to Make Brown Sugar Zucchini Bread
This isn’t just a recipe—it’s a teaching moment where every step demonstrates a principle you’ll use in countless other baking projects. I’m walking you through the technique with the detail a culinary mentor would provide.
Step 1: Prepare Your Pan and Preheat With Intention
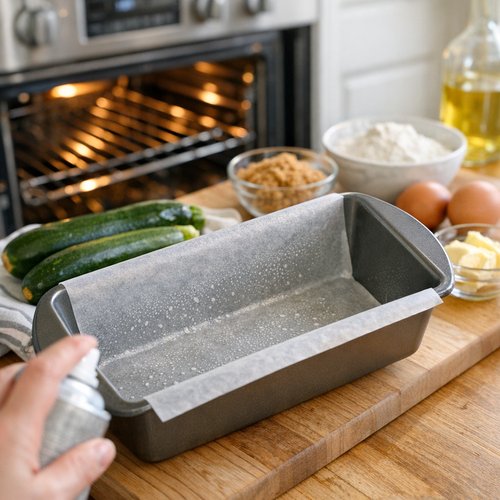
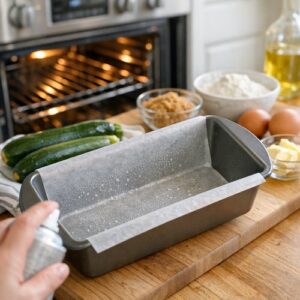
Start by positioning your oven rack to the center position, then preheat to 350°F. While the oven comes to temperature, take a 9×5-inch loaf pan and coat it lightly with neutral oil or cooking spray—every interior corner should be covered. Line the entire inside with parchment paper, allowing a 2-inch overhang on the long sides. This overhang is crucial; it becomes your handle for lifting the finished loaf cleanly from the pan.
Why 350°F and not 375°F? Zucchini bread needs gentle, steady heat. A hotter oven browns the exterior too quickly before the interior has time to bake through. You want golden exterior and moist interior happening simultaneously.
Step 2: Create Your Emulsion—The Foundation of Everything
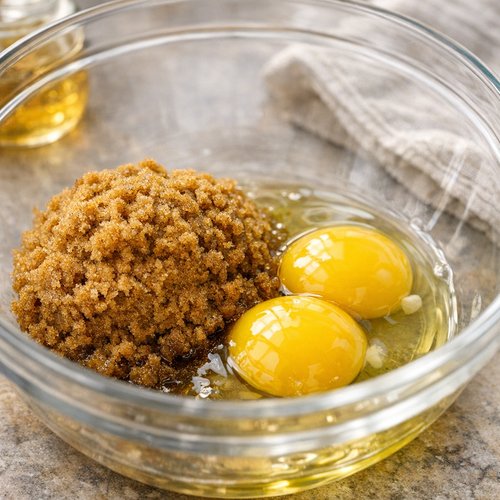
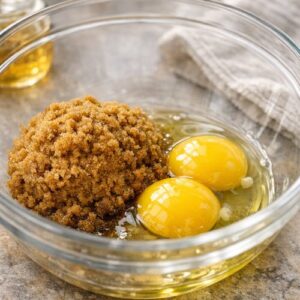
In a large mixing bowl, combine your half cup of packed brown sugar with two large room-temperature eggs. This is your moment to understand emulsification. Using a whisk, beat these together for approximately one full minute until the mixture becomes noticeably lighter in color and slightly foamy. You’re incorporating air and breaking down sugar crystals into tiny particles that distribute evenly.
Add your half cup of neutral oil in a thin stream while continuing to whisk. You’ll see the mixture become lighter and smoother—this is the oil binding with the egg yolk’s lecithin, creating a stable emulsion that won’t break. Whisk until completely smooth, about 30 seconds.
Now fold in your half cup of Greek yogurt, whisking until no streaks remain. The mixture should look creamy, unified, and smooth. This emulsion is your structural foundation. Everything else depends on it remaining intact.
Step 3: Add Your Flavor Foundation
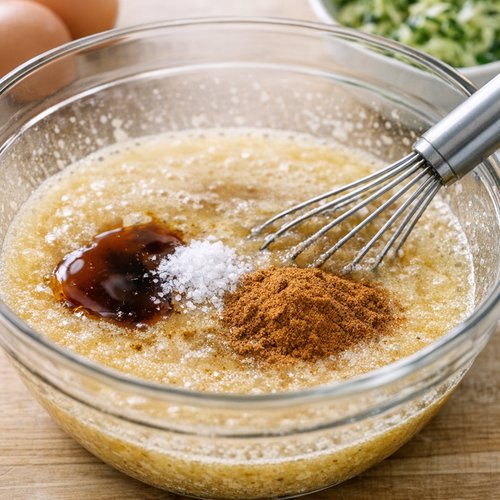
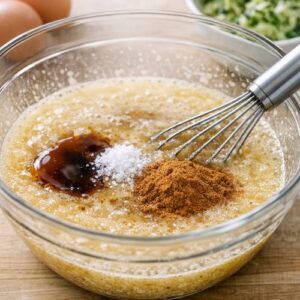
To your emulsion, add one teaspoon of vanilla extract, half a teaspoon of kosher salt, and one and a quarter teaspoons of ground cinnamon. Whisk these in thoroughly so the cinnamon distributes evenly—you don’t want spice clumps in your finished bread. The salt amplifies both the cinnamon and the subtle vegetable flavor coming. The vanilla adds depth without announcing itself. You should have a beautifully spiced, unified batter at this point.
Step 4: Incorporate Dry Ingredients With Respect for Structure
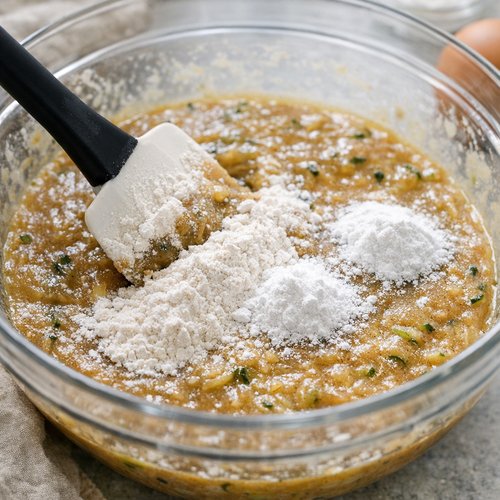
Sprinkle your flour, baking powder, and baking soda directly over the wet mixture. This is where technique becomes critical. Using a rubber spatula, fold these dry ingredients into the wet mixture using a gentle, deliberate technique. Push the spatula down the center, sweep it across the bottom, and fold the bottom portion up and over. Rotate the bowl and repeat. Do this about 12-15 times until no dry flour streaks remain.
This is the exact moment where most home bakers fail. They overmix, developing gluten, which creates tough, dense bread. It’s okay if there are small lumps remaining—these will hydrate and disappear during baking. A slightly undermixed batter creates tender crumb. A fully mixed batter creates a brick.
Step 5: The Critical Step—Gentle Zucchini Folding
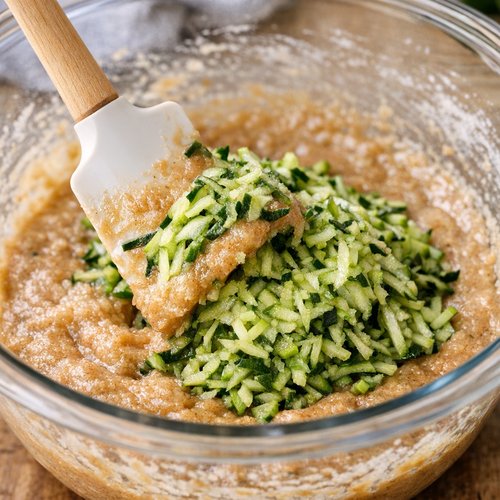
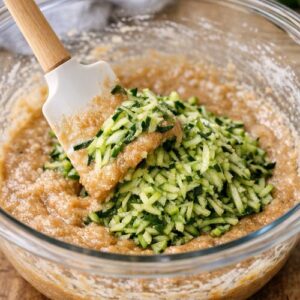
Prepare your zucchini by grating it on the large holes of a box grater, leaving the skin on. You’ll have approximately 1½ cups of shreds. Immediately place these in a clean kitchen towel and squeeze firmly over the sink—and I mean squeeze. You want to remove as much excess moisture as possible. The more liquid you eliminate now, the better your bread’s texture will be. When you open the towel, the zucchini should be noticeably drier.
Fold the squeezed zucchini into your batter using the same gentle folding technique—push, sweep, fold, rotate. The batter will look thick and studded with green. You should see the zucchini distributed throughout, not clumped in sections. The batter should come together without any white flour streaks.
Step 6: Transfer and Bake With Patience
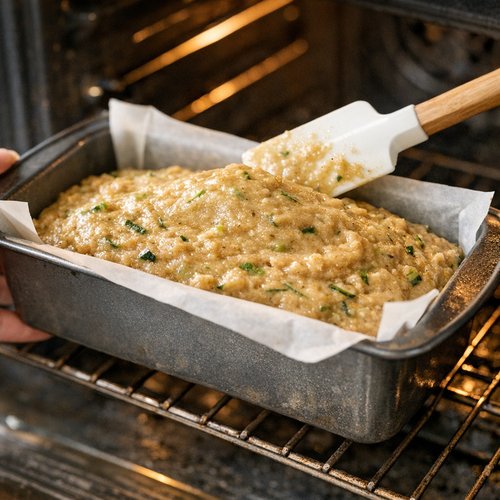
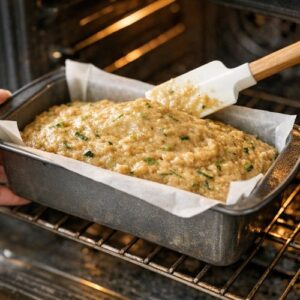
Pour your batter into the parchment-lined loaf pan, using a spatula to even the top into a gentle mound. Place the pan on the center oven rack and set your timer for 45 minutes as a starting point. Most loaves finish between 45-55 minutes depending on your oven’s characteristics.
Around minute 35, observe the top. If it’s already deep golden brown while the center still looks wet, tent the pan loosely with aluminum foil. This prevents over-browning while the interior finishes baking. The top should be golden brown—not pale, not dark. If it’s still pale at 45 minutes, let it continue.
The true test is the toothpick method: insert a toothpick or thin skewer into the absolute center of the loaf. When done, it should come out with just a few moist crumbs clinging to it—not wet batter, but not completely clean either. This is called “moist crumbs” and it’s the hallmark of properly baked quick bread.
Step 7: Cool With a Strategic Timeline
Remove the pan from the oven and place it on a wire rack. Let it rest for exactly 20 minutes. During this time, carryover cooking continues, and the bread sets just enough to release cleanly from the pan without falling apart.
After 20 minutes, grip the parchment overhang and lift the loaf from the pan. Place it directly onto the wire rack (no pan) and allow it to cool completely—a full hour is ideal. Slicing warm bread tears the crumb; cooled bread slices cleanly. This patience is part of technique.
How to Know You’ve Mastered the Technique
Professional bakers recognize excellence through specific sensory indicators. When you’ve truly mastered vegetable integration and moisture management, you’ll notice these signs:
- The Smell Test – As it bakes, the aroma should be complex: toasted cinnamon, caramelized sugar, and subtle vegetable earthiness all mingling together. No sour or off smells indicate proper chemical reactions
- The Visual Inspection – A golden-brown exterior with a slight dome on top (not a crater) indicates proper rise. When you slice it, the crumb should be fine and even, not tunneled or dense. You should see tiny air pockets throughout
- The Texture Test – When you bite, the bread should be tender and moist but never gummy. It should hold together cleanly without crumbling. The crumb should feel tender on your tongue, not mealy or dry
- The Moisture Balance – The interior should feel moist but not wet. It should taste richly flavored, not bland. The zucchini should be completely integrated—you taste its subtle earthiness but don’t see big chunks
Common Technique Mistakes and How to Fix Them
- Dense, Gummy Bread – This happens when you don’t squeeze enough moisture from the zucchini, or when you overmix the batter. Solution: In the future, squeeze the zucchini aggressively, and use the fold-and-rotate technique rather than stirring. If this already happened, your bread is still edible—slice it thinner and toast the slices lightly
- Tunneling (Large Air Pockets) – This indicates overmixing and too-vigorous incorporation of leavening agents. Solution: Mix more gently. The batter should look slightly lumpy when the zucchini is folded in. Gentle is always better than thorough in quick breads
- Dry, Crumbly Texture – Usually caused by overbaking or using too much flour (from packing it into the measuring cup). Solution: Measure flour by spooning it into the cup and leveling with a knife. Use the toothpick test religiously. If this happened, you can salvage slices by toasting them and serving with nut butter or cream cheese
- Sinking Center or Crater Top – Often indicates oven temperature was too high, causing the exterior to set before the interior fully rises. Solution: Use an oven thermometer to verify your oven runs at 350°F. Some ovens run 25 degrees hot or cold, which completely changes results
Practice Variations to Build Your Skill
Once you’ve made this recipe successfully once, you’re ready to explore variations that deepen your understanding of the technique.
Variation 1: The Spiced Version (Easiest) – Add ¼ teaspoon each of ground nutmeg and ground ginger to the cinnamon. This teaches you how spice balance works. The technique remains identical; you’re just expanding flavor complexity. Make this second version to confirm you understand the fundamental process.
Variation 2: The Protein-Boosted Version (Intermediate) – Replace ¼ cup of the flour with high-quality vanilla protein powder. This teaches you how substitutions affect moisture and structure. You’ll need to slightly increase the wet ingredients because protein powder absorbs more liquid than flour. Reduce flour to 1¼ cups and add 2 additional tablespoons of yogurt. This demonstrates how ingredient ratios interact.
Variation 3: The Seasonal Version (Advanced) – In fall, replace half the zucchini with grated apple or pear (squeezed very dry), and increase cinnamon to 1½ teaspoons. This teaches you how different vegetables behave. Apples and pears release moisture differently than zucchini; they’re more acidic and slightly drier. You’ll notice the bread tastes entirely different while using identical technique. This is mastery—understanding how technique adapts to different ingredients.
Seasonal Variations: Adapt This Recipe Year-Round
Spring Version: Replace half the zucchini with grated fresh asparagus or finely chopped green onions. The bread becomes more savory. Reduce cinnamon to ¾ teaspoon and add ½ teaspoon fresh ground black pepper. Serve it less as a dessert and more as a vegetable bread with cheese.
Summer Version: This is your classic. Use peak-season zucchini, but add ½ cup fresh corn kernels folded in with the zucchini. The sweetness of corn complements the brown sugar beautifully.
Fall Version: Replace one-third of the zucchini with grated carrots (squeezed very dry). Add ½ teaspoon ground ginger and ¼ teaspoon ground cloves. This creates a warmer spice profile and deeper flavor complexity.
Winter Version: Use the core recipe but add ½ cup grated white chocolate folded in with the zucchini (very carefully so it doesn’t fully melt and create clumps). The richness feels more indulgent during cold months. The chocolate should be cold before folding so it maintains its structure.
Make-Ahead Guide: Professional Meal Prep Strategies
As someone who works with busy professionals and families, I’ve developed strategies that let you prepare this bread in advance without sacrificing quality.
The Dry Ingredients Approach (Best Option): Up to 5 days ahead, mix your flour, baking powder, baking soda, salt, and cinnamon in a sealed container. When you’re ready to bake, prepare your zucchini (squeeze immediately before use), make the emulsion, fold in dry ingredients, fold in zucchini, and bake immediately. This takes 15 minutes of active time.
The Prepared Batter Approach (Use Within 2 Hours): Prepare the complete batter, transfer it to your parchment-lined pan, cover with plastic wrap, and refrigerate up to 2 hours. The batter will be cold when it enters the oven, which actually helps—it rises more slowly and evenly. Add 5-10 minutes to your baking time since you’re starting from cold.
The Freezer Strategy (Best for Long-Term): After cooling completely, wrap the entire loaf tightly in plastic wrap, then in aluminum foil. Freeze up to 3 months. Thaw at room temperature for 3-4 hours before serving. Alternatively, slice before freezing and thaw individual slices in the toaster or toaster oven—this actually improves texture since you’re gently rehydrating while warming.
Can I Store Brown Sugar Zucchini Bread?
Storage depends on your timeline and how you want to enjoy your bread:
Room Temperature (Best for 2 days): Once cooled completely, wrap your loaf in plastic wrap or store in an airtight container at room temperature. The bread stays fresh and the crumb remains tender. Most people find this window offers peak flavor and texture.
Refrigerator (Good for 5-6 days): Wrap tightly in plastic wrap, then store in an airtight container in the refrigerator. The cool temperature slows staling slightly, and the bread remains moist. Serve at room temperature or warmed gently—cold bread from the fridge tastes dense.
Freezer (Excellent for 3 months): Wrap your cooled loaf in plastic wrap, then in aluminum foil, removing as much air as possible. Label with the date. Thaw at room temperature for 3-4 hours. Frozen bread tastes excellent once thawed—the defrosting process gently rehydrates the crumb. Alternatively, slice before freezing for quick individual portions you can toast directly from frozen.
Expert Tip: If your bread develops dry edges after refrigerating, wrap it in a slightly damp paper towel while thawing to rehydrate those sections. This simple step restores texture dramatically.
Nutrition Information
Per serving (based on 10 slices per loaf, per USDA nutritional database):
- Calories: 245
- Total Fat: 14g (mostly from the healthy neutral oil)
- Saturated Fat: 1.5g
- Protein: 4g (from eggs and Greek yogurt)
- Total Carbohydrates: 28g
- Dietary Fiber: 0.8g (from zucchini)
- Sugars: 16g (mostly from brown sugar; natural sugars in zucchini are minimal)
- Sodium: 160mg
Nutritional Highlights: This bread delivers satisfying protein from Greek yogurt and eggs—nearly 4 grams per slice—which makes it more filling than traditional zucchini breads. The neutral oil provides heart-healthy monounsaturated fats. Zucchini contributes minimal calories while adding moisture and subtle minerals like manganese and potassium. This is genuinely nourishing bread, not empty carbs.
For someone watching sugar intake, this bread contains 16g of sugar per slice, which comes primarily from the brown sugar. You could reduce the brown sugar to ⅜ cup and substitute 2 tablespoons of unsweetened applesauce (which adds moisture to compensate) if you prefer lower-sugar options, though the bread will be less caramelized.
What to Serve With Brown Sugar Zucchini Bread
This bread shines brightest when paired thoughtfully. Its delicate vegetable notes and warm spice profile pair with specific accompaniments that let the technique shine.
- Greek Yogurt with Honey – The tanginess of yogurt echoes the yogurt in the bread itself, while honey adds gentle sweetness. The live cultures in yogurt also aid digestion of the bread’s carbohydrates
- Cream Cheese or Mascarpone – Rich, tangy spread that doesn’t compete with the bread’s flavor. Spread on warm or room-temperature slices. The richness makes each bite feel indulgent
- Almond or Walnut Butter – A protein-rich spread that complements the bread’s existing protein. This combination makes a complete breakfast or snack
- Ricotta Mixed with Cinnamon and Honey – A restaurant-quality pairing that transforms simple bread into something elegant
- Sliced Fresh Figs or Berries – Fresh fruit alongside bread balances the richness with bright acidity and natural sweetness
For breakfast, I often serve slices alongside pastries like authentic babka to demonstrate how different mixing techniques create different textures—the contrast teaches you intuitively about technique. This bread also pairs beautifully with morning coffee or afternoon tea.

Brown Sugar Zucchini Bread Recipe
Ingredients
Method
- Start by positioning your oven rack to the center position, then preheat to 350°F. While the oven comes to temperature, take a 9x5-inch loaf pan and coat it lightly with neutral oil or cooking spray—every interior corner should be covered. Line the entire inside with parchment paper, allowing a 2-inch overhang on the long sides. This overhang is crucial; it becomes your handle for lifting the finished loaf cleanly from the pan. Why 350°F and not 375°F? Zucchini bread needs gentle, steady heat. A hotter oven browns the exterior too quickly before the interior has time to bake through. You want golden exterior and moist interior happening simultaneously.
- In a large mixing bowl, combine your half cup of packed brown sugar with two large room-temperature eggs. This is your moment to understand emulsification. Using a whisk, beat these together for approximately one full minute until the mixture becomes noticeably lighter in color and slightly foamy. You're incorporating air and breaking down sugar crystals into tiny particles that distribute evenly. Add your half cup of neutral oil in a thin stream while continuing to whisk. You'll see the mixture become lighter and smoother—this is the oil binding with the egg yolk's lecithin, creating a stable emulsion that won't break. Whisk until completely smooth, about 30 seconds. Now fold in your half cup of Greek yogurt, whisking until no streaks remain. The mixture should look creamy, unified, and smooth. This emulsion is your structural foundation. Everything else depends on it remaining intact.
- To your emulsion, add one teaspoon of vanilla extract, half a teaspoon of kosher salt, and one and a quarter teaspoons of ground cinnamon. Whisk these in thoroughly so the cinnamon distributes evenly—you don't want spice clumps in your finished bread. The salt amplifies both the cinnamon and the subtle vegetable flavor coming. The vanilla adds depth without announcing itself. You should have a beautifully spiced, unified batter at this point.
- Sprinkle your flour, baking powder, and baking soda directly over the wet mixture. This is where technique becomes critical. Using a rubber spatula, fold these dry ingredients into the wet mixture using a gentle, deliberate technique. Push the spatula down the center, sweep it across the bottom, and fold the bottom portion up and over. Rotate the bowl and repeat. Do this about 12-15 times until no dry flour streaks remain. This is the exact moment where most home bakers fail. They overmix, developing gluten, which creates tough, dense bread. It's okay if there are small lumps remaining—these will hydrate and disappear during baking. A slightly undermixed batter creates tender crumb. A fully mixed batter creates a brick.
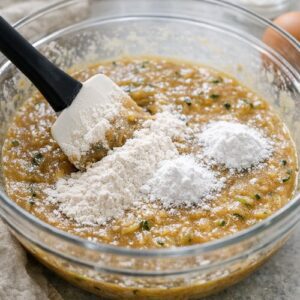
- Prepare your zucchini by grating it on the large holes of a box grater, leaving the skin on. You'll have approximately 1½ cups of shreds. Immediately place these in a clean kitchen towel and squeeze firmly over the sink—and I mean squeeze. You want to remove as much excess moisture as possible. The more liquid you eliminate now, the better your bread's texture will be. When you open the towel, the zucchini should be noticeably drier. Fold the squeezed zucchini into your batter using the same gentle folding technique—push, sweep, fold, rotate. The batter will look thick and studded with green. You should see the zucchini distributed throughout, not clumped in sections. The batter should come together without any white flour streaks.
- Pour your batter into the parchment-lined loaf pan, using a spatula to even the top into a gentle mound. Place the pan on the center oven rack and set your timer for 45 minutes as a starting point. Most loaves finish between 45-55 minutes depending on your oven's characteristics. Around minute 35, observe the top. If it's already deep golden brown while the center still looks wet, tent the pan loosely with aluminum foil. This prevents over-browning while the interior finishes baking. The top should be golden brown—not pale, not dark. If it's still pale at 45 minutes, let it continue. The true test is the toothpick method: insert a toothpick or thin skewer into the absolute center of the loaf. When done, it should come out with just a few moist crumbs clinging to it—not wet batter, but not completely clean either. This is called "moist crumbs" and it's the hallmark of properly baked quick bread.
- Remove the pan from the oven and place it on a wire rack. Let it rest for exactly 20 minutes. During this time, carryover cooking continues, and the bread sets just enough to release cleanly from the pan without falling apart. After 20 minutes, grip the parchment overhang and lift the loaf from the pan. Place it directly onto the wire rack (no pan) and allow it to cool completely—a full hour is ideal. Slicing warm bread tears the crumb; cooled bread slices cleanly. This patience is part of technique.
Notes
FAQs
Can I Use Whole Wheat Flour Instead of All-Purpose?
Yes, but understand what you’re changing. Whole wheat flour absorbs more water than all-purpose flour, so your bread will be denser unless you increase your wet ingredients. Replace half the all-purpose flour with whole wheat flour (¾ cup each), and add 2 additional tablespoons of Greek yogurt to compensate for the increased absorption. The technique remains identical, but you’re teaching yourself how different flours demand different hydration ratios.
What If My Zucchini Is Very Watery?
Some zucchini varieties release more moisture than others. If you squeeze your zucchini and liquid continues dripping, you have extra-watery zucchini. Squeeze more aggressively, or place the shreds in a fine-mesh strainer lined with cheesecloth overnight in the refrigerator—the moisture will drain away. This teaches you that technique adapts to ingredient variation. Don’t skip the squeezing step; it’s non-negotiable for proper texture.
Can I Add Nuts or Chocolate Chips?
Absolutely. Fold ½ cup of chopped walnuts or pecans, or ½ cup of chocolate chips, into the batter with the zucchini. This doesn’t change the core technique, but it demonstrates how add-ins distribute through proper folding technique. Finely chop nuts so they distribute evenly. For chocolate chips, use good-quality pieces and fold them in gently so they don’t break. This teaches you that technique is flexible—the core principles adapt to creative additions.
Why Does My Bread Have a Tunnel Down the Middle?
A tunnel running vertically through the center indicates you overmixed the batter, likely developing too much gluten which then created a large air pocket that expanded during baking. Solution for next time: use the fold-and-rotate technique rather than stirring. Gently is always better than thorough. Your current loaf is still edible—slice it and serve with spreads that hide the tunnel.
How Do I Know If My Oven Temperature Is Accurate?
Invest in an inexpensive oven thermometer—they cost $10-15 and are one of the best kitchen tools you’ll buy. Place it on the center rack where your bread bakes, preheat to 350°F, and check the actual temperature after 15 minutes. Many home ovens run 25-50 degrees hot or cold, which completely changes baking results. If yours is inaccurate, adjust your oven dial accordingly, or use your thermometer as your guide. This single step transforms your baking success rate dramatically.
More Recipes Using This Technique
- Authentic Irish Soda Bread Recipe with Buttermilk – teaches how buttermilk (another cultured dairy product like yogurt) reacts with baking soda for lift, using similar moisture management principles
- Best Beginner Sourdough Recipe – takes these foundational techniques into fermented territory, showing how time and hydration create complexity
Conclusion: You’ve Just Unlocked a Kitchen Superpower
You now understand vegetable integration and moisture management—a technique that transforms your entire approach to baking. You know why squeezing matters, how emulsions work, when to fold versus stir, and what to look for when determining doneness. These aren’t random steps in a recipe; they’re principles that apply to carrot cake, pumpkin bread, banana bread, and countless other applications.
The next time you bake, you’ll approach it differently. You’ll understand the why behind every instruction, not just the what. You’ll know how to adapt when ingredients behave differently. You’ll recognize when something is going wrong mid-process and have the knowledge to adjust.
That’s the real gift of learning to make brown sugar zucchini bread well. You’re not just making one loaf—you’re building a foundation that makes you a genuinely confident baker.
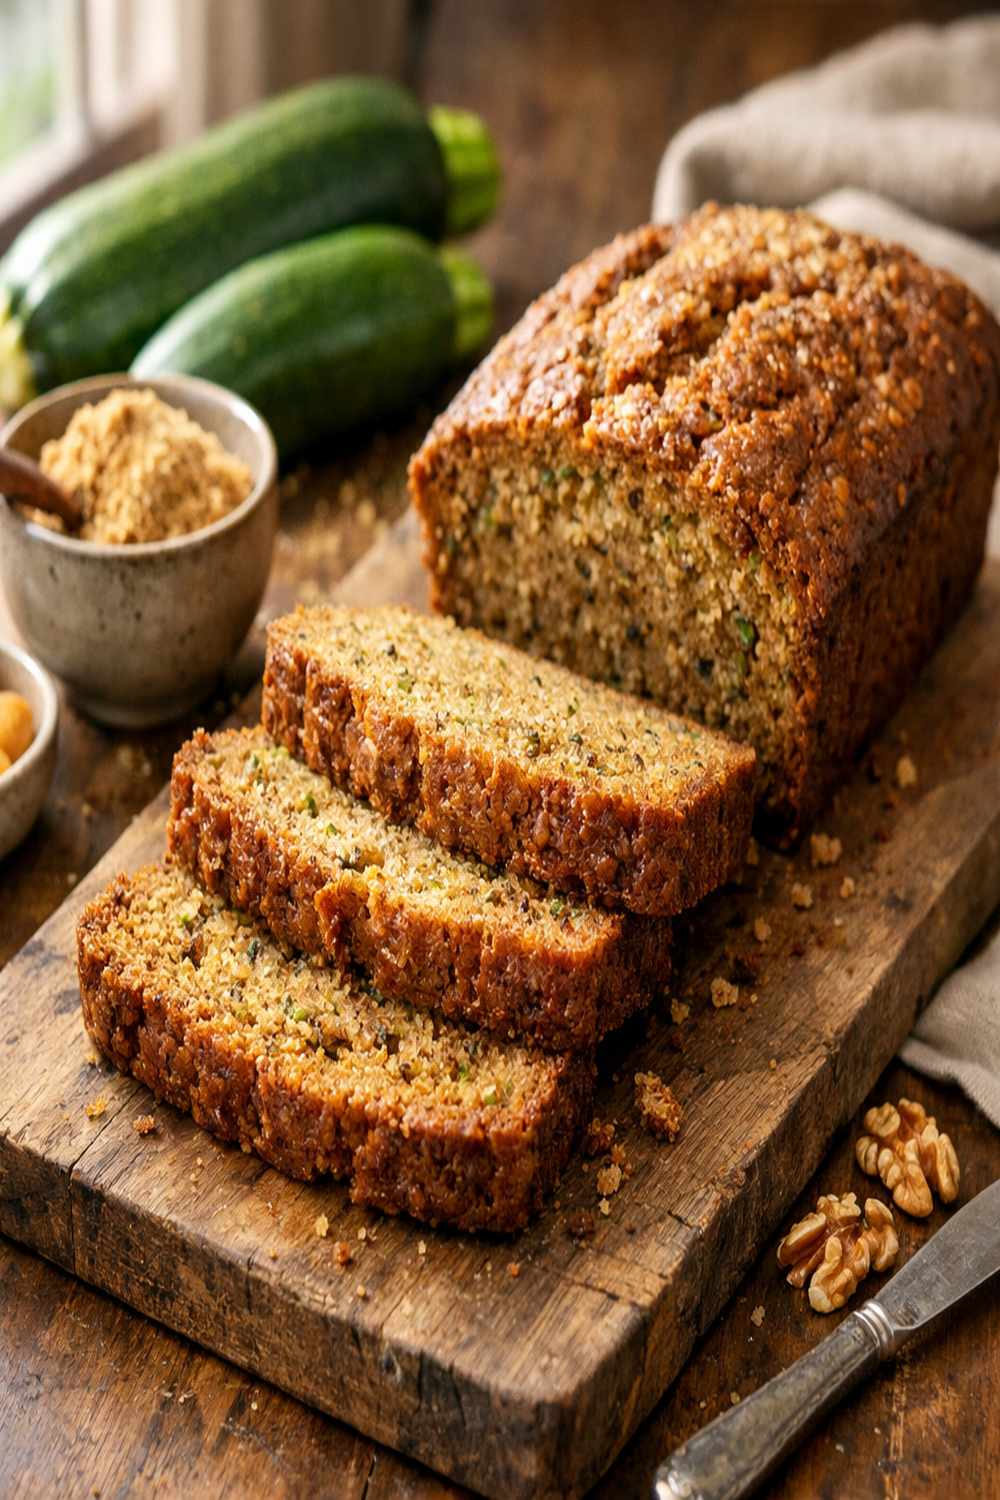
Slice your finished loaf warm or at room temperature. Notice the fine, even crumb. Taste the delicate earthiness of the zucchini, the warm spice of cinnamon, the subtle tang of yogurt. This is what proper technique creates. This is what you’ve just mastered.
Happy cooking!