Cacao Cookie Recipe
 Rosa Crumley
September 7, 2026
Rosa Crumley
September 7, 2026
This post contains affiliate links. As an Amazon Associate I earn from qualifying purchases.
This cacao cookie recipe doesn’t just taste incredible—it stops people in their tracks. The moment these warm, glossy rounds emerge from your oven with their signature crackled tops and impossibly soft centers, you’ll understand why my grandmother kept a tin of these hidden in her kitchen. Here’s how to make a treat that looks as good as it tastes, with restaurant-quality technique simplified for your home kitchen.
The Most Beautiful Cacao Cookie Recipe You’ll Ever Make (And It’s Easier Than It Looks)
I’ll never forget the first time I watched my grandmother pull these cookies from her vintage oven. The aroma alone drew everyone into the kitchen, but what stayed with me was how they looked—jewel-toned, almost jeweled with their deep mahogany finish and that slight shimmer on top. She never fussed over them, never decorated them elaborately. They needed nothing but themselves to impress.
That simplicity taught me something profound about good cooking: when ingredients are chosen with care and technique is honored, presentation takes care of itself. These cacao cookies embody that philosophy entirely. They’re elegant enough for a dinner party, approachable enough for a Tuesday afternoon, and forgiving enough that even newer cooks achieve beautiful results.
The Visual Elements That Make This Dish Stunning
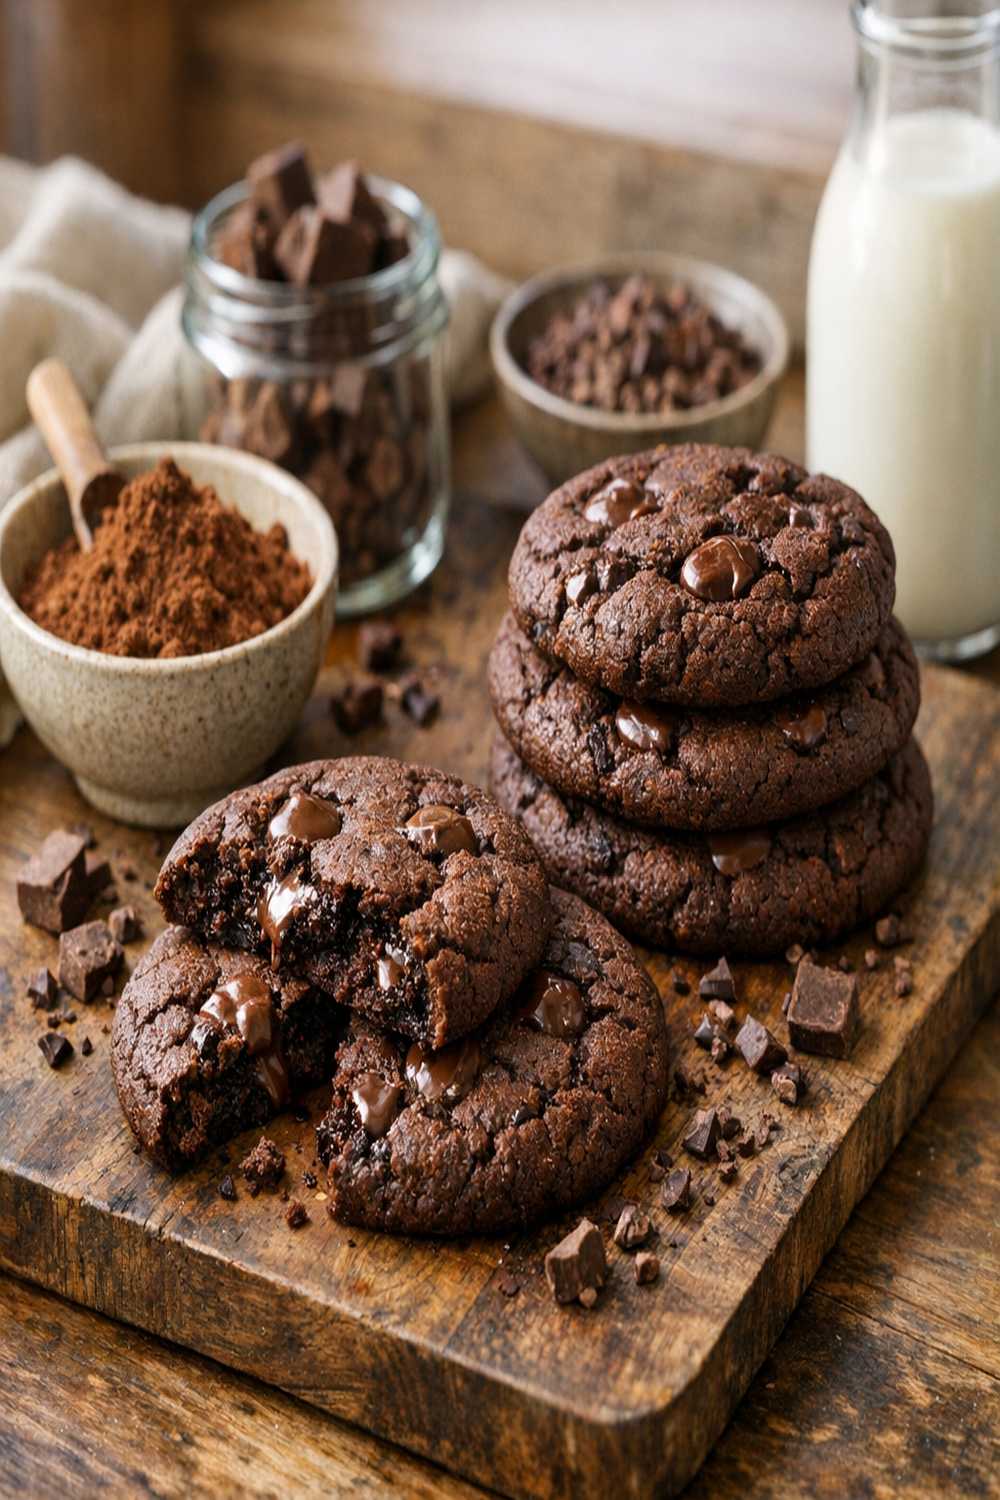
What makes these cookies visually spectacular isn’t complexity—it’s the interplay of subtle, sophisticated elements working in harmony. Let me break down the visual architecture that makes these so striking.
- Deep Mahogany Color – The cocoa powder creates that rich, luxurious hue that signals indulgence. This deep brown is complemented beautifully against white serving plates or wooden surfaces, creating natural contrast that photographs beautifully in any lighting.
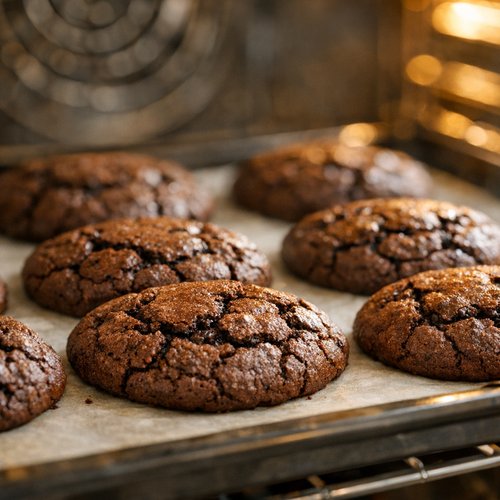
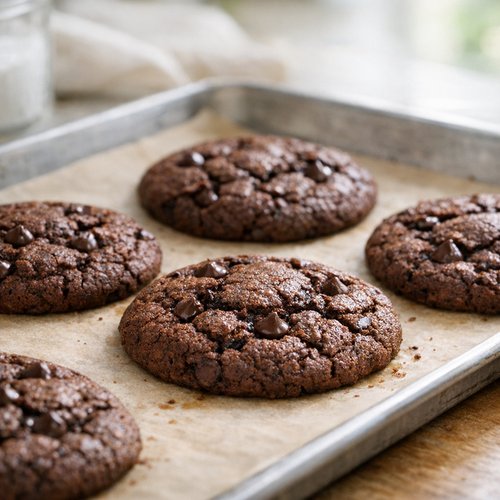
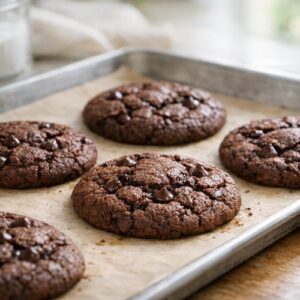
- Crackled Surface Texture – The magic happens during baking when the top sets slightly while the interior remains soft, creating organic fissures that catch light. These natural cracks make each cookie unique and visually interesting, like artisan craftsmanship.
- Soft, Pillowy Dome – Unlike thin, crispy cookies, these maintain height and dimension. When arranged on a platter, they create visual depth and composition rather than lying flat. This three-dimensional quality is what transforms them from snack to showpiece.
Choosing Ingredients for Maximum Visual Impact
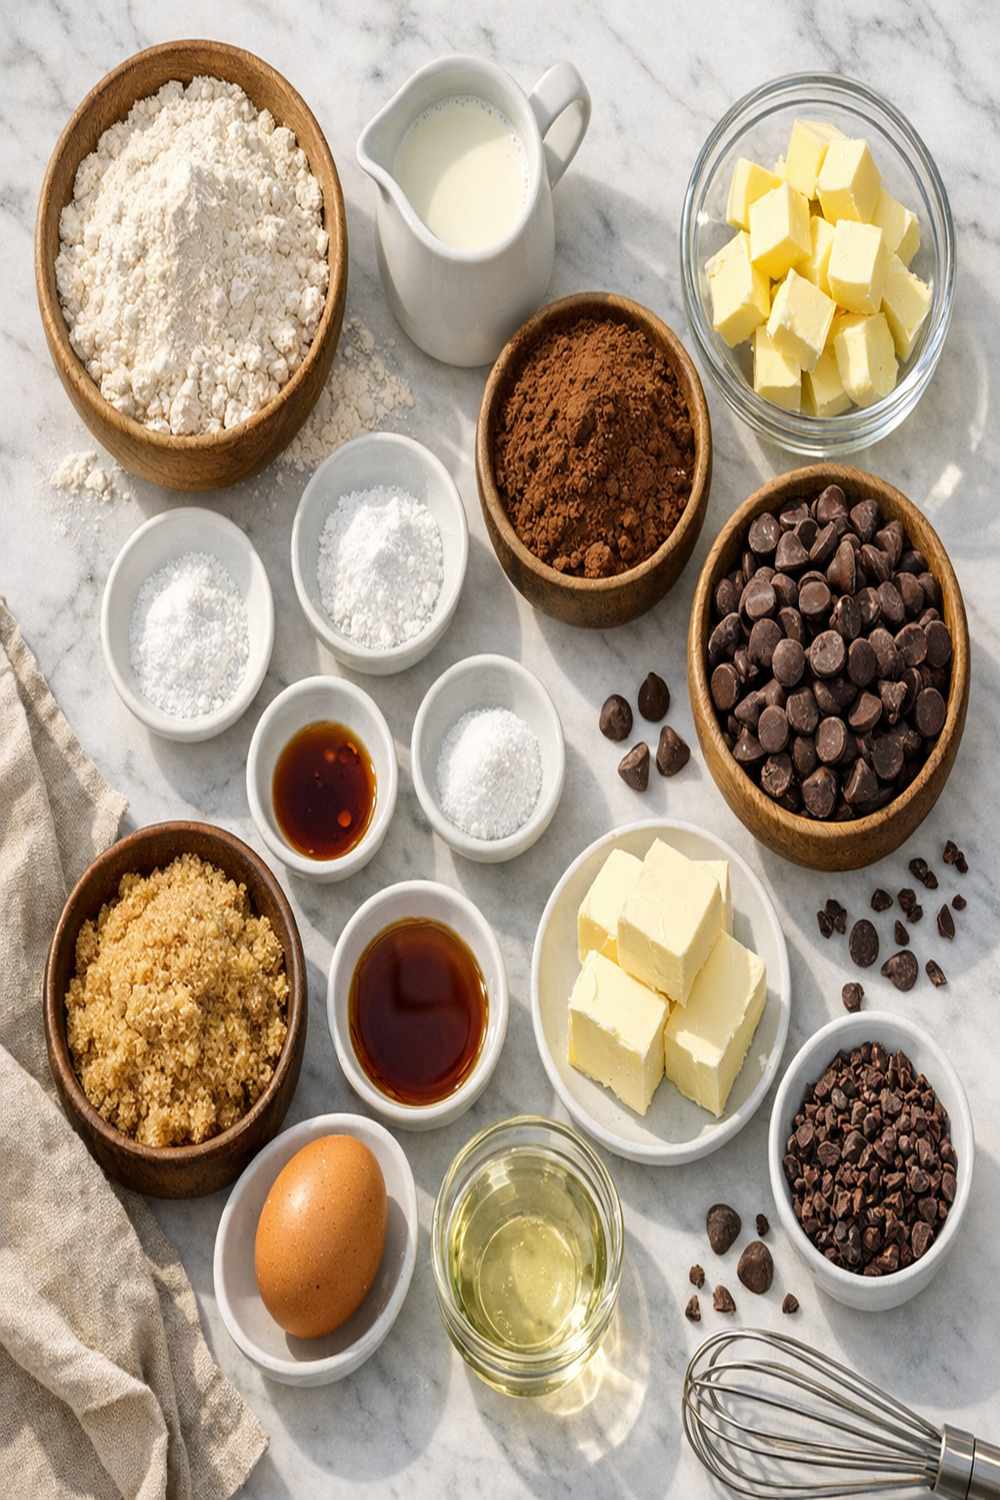
As a dietitian, I approach ingredient selection from both a nutritional and visual perspective. Each component in this recipe plays a dual role: it contributes to flavor and nutrition while also building the visual narrative. Premium unsalted butter provides that glossy sheen, quality cocoa powder delivers color depth, and fresh eggs create structure that holds that signature dome shape. Everything here matters.
For the Base
- 50 g unsweetened cocoa powder (natural processed, which creates deeper mahogany tones than Dutch-process)
- 140 g all-purpose flour (spooned and leveled, never packed—precision affects texture and dome shape)
- ¼ teaspoon sea salt (enhances cocoa flavor without affecting appearance)
- 1 teaspoon pure vanilla extract (not imitation, which creates a slightly muddy color)
- 1 large egg (room temperature for best emulsification and rise)
- ½ teaspoon baking soda (leavening agent that creates that signature crackle)
- 150 g unsalted butter (room temperature, never melted cold—this ensures proper creaming and contributes to that beautiful glossy finish)
- 175 g granulated sugar (divided into portions for better texture and appearance)
Yield: Makes approximately 12-14 cookies
How to Make Picture-Perfect Cacao Cookie Recipe
I’m going to walk you through each step as if we’re creating edible art together. Notice how I’ve included presentation notes throughout—these aren’t afterthoughts, but integral to achieving those gorgeous results.
Step 1: Prepare Your Stage and Ingredients
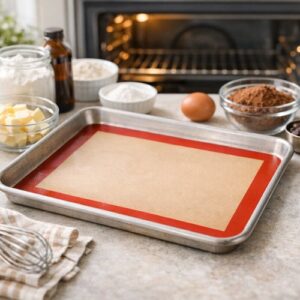
Begin by positioning your oven rack in the center and preheating to 350°F (177°C). Line a baking sheet with parchment paper or a silicone mat—this ensures even heat distribution and prevents bottom browning that could compromise the visual appeal. Have all ingredients at room temperature before you start. Cold ingredients won’t cream properly, which means your cookies won’t have that beautiful domed shape.

Step 2: Whisk Dry Ingredients Together
In a medium mixing bowl, combine the flour, cocoa powder, baking soda, and sea salt. Use a whisk to blend these thoroughly—don’t skip this step. When you whisk rather than stir, you’re aerating the flour and distributing the leavening evenly. This is what creates those gorgeous, uniform cracks across the surface. Set this mixture aside.

Step 3: Create Your Base Foundation
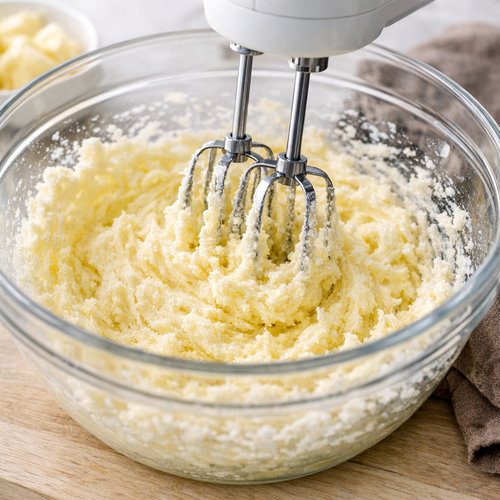
In a large bowl, combine your softened butter and sugar. Using an electric mixer on medium speed, cream these together for approximately 3-4 minutes. You’ll know you’re done when the mixture turns pale and fluffy—this is crucial for visual texture. The air beaten into the butter creates lift, which results in that signature puffy dome rather than a flat disc. Scrape down the sides of your bowl to ensure even mixing.
Step 4: Incorporate Wet Ingredients
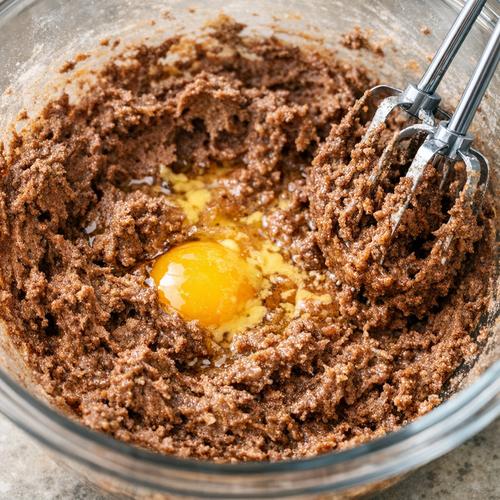
Add your room-temperature egg to the creamed mixture and beat for about 1 minute until fully incorporated. The mixture should look slightly broken at first—this is normal. Add your vanilla extract and beat for another 30 seconds. You’ll notice the mixture becoming smoother and more cohesive. This homogeneous texture is what allows the cookies to bake evenly.
Step 5: Combine Wet and Dry with Precision
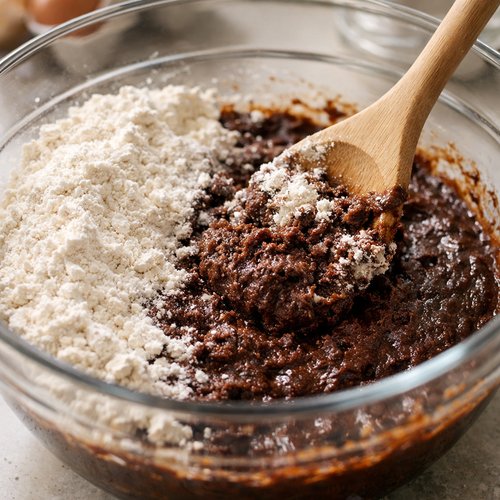
Now here’s where technique matters for both texture and appearance: add your flour mixture in two additions rather than all at once. Add half, mixing on low speed just until you see no dry flour streaks. Scrape down your bowl completely—unmixed pockets of flour will create uneven browning. Add the remaining flour mixture and mix again briefly. Stop mixing as soon as the dough comes together. Overmixing develops gluten, which toughens the cookies and affects that tender crumb.
Step 6: Portion with Intention
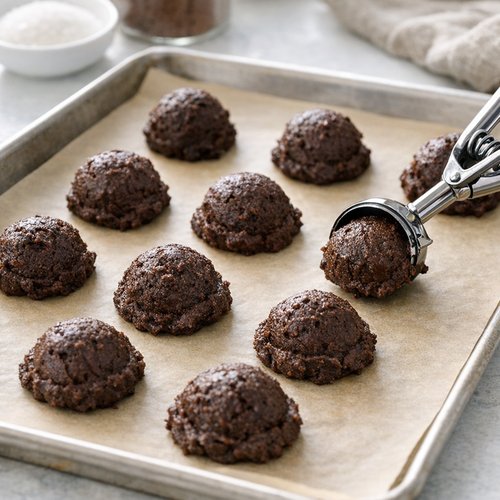
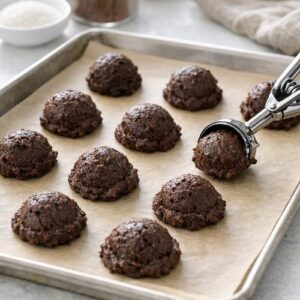
Using a cookie scoop (about 2-tablespoon size), form dough balls and place them on your prepared baking sheet, spacing them about 2 inches apart. Uniformly sized dough balls are essential for uniform baking and that professional appearance. If you don’t have a scoop, use two spoons to roughly divide the dough into 12-14 equal portions. Uniform cookies photograph beautifully and impress more than haphazard sizes.
Step 7: Bake with Precision Timing
Bake for 8-11 minutes—timing depends on your oven’s personality. Watch for the moment when the tops appear set and slightly crackled, but the center still jiggles very slightly when you gently shake the pan. The cookies will continue cooking on the residual heat of the baking sheet. Remove them too early and they’ll be too soft to move; too late and they’ll bake through completely, losing that signature fudgy center.
Step 8: Cool with Patience for Perfect Texture
Leave the cookies on the baking sheet for exactly 10 minutes—not less, not more. During this time, the residual heat sets the structure while the center remains soft. You’ll see them firm up and potentially develop more surface cracks, which is exactly what you want. After 10 minutes, transfer them to a cooling rack to cool completely. This two-stage cooling process is what creates that perfect textural contrast between the set exterior and fudgy interior.
Expert’s Nutritional Insight
Here’s something I’ve discovered through my dietitian experience: quality cocoa powder—whether natural or Dutch-process—contains flavonoids, which are powerful antioxidants. When you choose real cocoa over chocolate coating, you’re getting actual nutritional benefit alongside flavor. One of these cookies contains approximately 8-10 grams of cocoa solids, providing real polyphenol content. Pair that with the whole egg and you’ve got selenium, choline, and lutein too. These aren’t “health cookies,” but they’re not nutritional zeros either. That’s the balance I aim for in every recipe.
The Plating Masterclass
Presentation transforms these cookies from homemade treats into something worthy of a pastry display. The beauty is that this recipe requires minimal styling—the cookies are visually striking on their own. Here’s how to present them professionally.
- Arrange in Odd Numbers – Place cookies in groups of three, five, or seven on your serving platter. Odd numbers create visual interest that even numbers lack. A small white ceramic plate or wooden board serves as the perfect neutral backdrop that lets the deep brown color sing.
- Create Height Variation – Rather than laying them all flat, slightly lean some cookies against each other. This creates dimension and makes the platter more visually dynamic. Think of it as creating a landscape rather than a grid.
- Negative Space is Your Friend – Don’t crowd the platter. Leave breathing room around and between cookies. This makes them appear more elegant and valuable rather than abundant. Restaurant plating always includes intention in placement.
Photography Tips for This Dish
These cookies photograph beautifully, but lighting and composition matter. As someone who spent years watching my grandmother’s kitchen light transform throughout the day, I learned that natural light is everything.
- Golden Hour Magic – Photograph these cookies in the hour before sunset when light is warm and directional. The golden light catches the crackled surface and creates shadows that emphasize texture. Avoid harsh midday sun, which flattens the colors.
- Shoot from 45 Degrees – Position your camera at a 45-degree angle to the cookies rather than directly overhead. This angle captures both the dome shape and the crackled surface, telling the complete visual story. It also shows that fudgy interior if you’ve broken one open slightly for the shot.
- Style with Intention – Include a cooling rack, a vintage spoon, or a cup of coffee in the frame. These contextual props tell the story of homemade comfort without distracting from the stars of the shot. The deep brown of the cookies contrasts beautifully against white china or natural wood.
Make-Ahead Guide for Confident Entertaining
As a professional, I plan ahead whenever possible. These cookies are wonderfully accommodating for advance preparation, which means less stress on the day you’re entertaining.
Dough Preparation (Up to 3 Days Ahead): Mix your dough completely, wrap it well in plastic wrap, and refrigerate. Cold dough actually bakes more evenly and develops better flavor. When you’re ready to bake, remove from the refrigerator 15 minutes before portioning. You may need an extra 1-2 minutes of baking time since the dough starts cold.
Unbaked Portions (Up to 2 Weeks in Freezer): Scoop your dough balls onto a parchment-lined baking sheet, freeze until solid (about 2 hours), then transfer to a freezer bag. Bake from frozen, adding 2-3 minutes to the baking time. This is my favorite method for entertaining—you can have fresh, warm cookies in 15 minutes.
Baked Cookies (Up to 5 Days in an Airtight Container): Store cooled cookies in an airtight container at room temperature. The cookies actually improve on day two as flavors meld. Place parchment between layers to prevent sticking. If they firm up, gently warm them in a 275°F oven for 3 minutes to restore softness.
Common Mistakes to Avoid
Through years of teaching cooking classes, I’ve identified the pitfalls that prevent home cooks from achieving gorgeous results. Here’s how to sidestep them.
- Using Cold Ingredients – Cold eggs and butter don’t incorporate evenly, resulting in dense cookies without the proper dome. Always allow ingredients to reach room temperature. This takes just 30 minutes and completely transforms your result.
- Overmixing After Adding Flour – I see this constantly. The moment you see no dry flour streaks, stop mixing. Continued mixing develops gluten, which makes cookies tough and prevents that signature tender crumb and fudgy center.
- Removing Cookies Too Early – The temptation is strong, but pulling cookies from the oven when they look slightly underbaked is essential. They continue baking on the hot sheet. Remove them too early and they won’t hold their structure; remove them too late and you’ve lost the fudgy center.
- Skipping the Room-Temperature Rest – Those 10 minutes on the baking sheet aren’t optional. They’re when the cookies set their structure while the center stays soft. Rush this step and you get either raw cookies or fully baked ones with no nuance.
Seasonal Color Variations
The beautiful thing about this base recipe is its flexibility for seasonal adaptation. The cookies themselves remain unchanged, but your presentation can shift with the seasons.
Spring: Serve on pale pink or sage green plates. Add fresh mint leaves around the cookies and a light dusting of powdered sugar resembling spring snow. The contrast of deep brown against soft pastels feels fresh and sophisticated.
Summer: Present on rustic wooden boards alongside fresh berries—raspberries and blackberries echo the cocoa’s depth. A scatter of edible flowers like pansies adds brightness. The vibrant colors of berries make the cookies feel like part of a vibrant garden spread.
Fall: Arrange on a deep burgundy or mustard plate to echo autumn tones. Include cinnamon sticks, star anise, or dried orange slices in the presentation. These spices echo the cocoa’s warmth and ground the cookies in harvest season aesthetics.
Winter: Present simply on white or cream plates with a light dusting of sea salt or perhaps edible gold dust catching the light. Surround with pomegranate seeds or dried cranberries for festive color. The simplicity feels elegant and allows the cookies’ beauty to shine against minimal distraction.
Can I Store Cacao Cookie Recipe?
Storage is straightforward, and I’ve learned tricks that preserve both flavor and that all-important visual appeal.
Room Temperature Storage (Up to 5 Days): Place cooled cookies in an airtight container, separating layers with parchment paper to prevent sticking and breaking. Keep them in a cool, dry place away from direct sunlight, which fades that beautiful mahogany color. The cookies will firm up slightly over time, which actually improves texture on days 2-3.
Freezer Storage (Up to 3 Months): Freeze baked cookies in a freezer-safe container with parchment between layers. Thaw at room temperature for about 20 minutes before serving, or warm briefly in a 275°F oven to restore softness and that fresh-baked appearance. Frozen cookies actually maintain their visual appeal beautifully if stored properly.
Flavor Peak Timing: Interestingly, the cookies develop depth of flavor on day 2. If you’re serving guests, baking a day ahead actually improves the experience. The cocoa flavor deepens and becomes more sophisticated.
Nutrition Information
Based on USDA nutrition data, here’s what you’re getting per cookie (makes 12 cookies):
- Calories: Approximately 185 per cookie
- Total Fat: 10g (saturated fat 6g from quality butter)
- Carbohydrates: 24g (includes 18g sugar from granulated sugar)
- Protein: 2g (from eggs and cocoa)
- Fiber: 1g (from cocoa solids)
- Sodium: 95mg (intentional, enhances cocoa flavor)
The cocoa powder here provides real nutritional benefit beyond flavor. Unsweetened cocoa contains polyphenols and flavonoids—antioxidants linked to cardiovascular health in numerous studies. One cookie delivers approximately 8-10 grams of cocoa solids, which is meaningful from a nutritional perspective. The egg provides choline, essential for brain health, while the butter provides fat-soluble vitamin A and vitamin E. This isn’t health food, but it’s far more nutritionally coherent than many desserts because we’re using whole, recognizable ingredients. That’s how I approach all my recipes: honest indulgence that nourishes alongside satisfying.
What to Serve Alongside for a Complete Visual Spread
These cookies are stunning on their own, but a thoughtful tablescape elevates the entire experience. I think about complementary colors, textures, and flavors when planning what surrounds them.
- Espresso or Strong Coffee – The bitter intensity of espresso balances the cookie’s sweetness while the colors complement each other perfectly. A small white cup creates striking contrast against the dark coffee and darker cookies.
- Whipped Cream or Crème Fraîche – Serve a generous dollop alongside for those who want to dip. The pure white provides visual contrast that makes the cookies appear even deeper brown. Crème fraîche’s tanginess balances sweetness beautifully.
- Fresh Berries – A small handful of raspberries or blackberries on the plate adds color pop and provides tartness that cleanses the palate between bites. The jewel tones echo the cookies’ richness.
- A Light Dessert Accompaniment – Consider pairing with a light, elegant vegetable-forward appetizer before the cookies in a dinner progression. Or look to a freshly baked bread earlier in the meal to echo the warmth these cookies provide.

Cacao Cookie Recipe
Ingredients
Method
- Begin by positioning your oven rack in the center and preheating to 350°F (177°C). Line a baking sheet with parchment paper or a silicone mat—this ensures even heat distribution and prevents bottom browning that could compromise the visual appeal. Have all ingredients at room temperature before you start. Cold ingredients won't cream properly, which means your cookies won't have that beautiful domed shape.
- In a medium mixing bowl, combine the flour, cocoa powder, baking soda, and sea salt. Use a whisk to blend these thoroughly—don't skip this step. When you whisk rather than stir, you're aerating the flour and distributing the leavening evenly. This is what creates those gorgeous, uniform cracks across the surface. Set this mixture aside.

- In a large bowl, combine your softened butter and sugar. Using an electric mixer on medium speed, cream these together for approximately 3-4 minutes. You'll know you're done when the mixture turns pale and fluffy—this is crucial for visual texture. The air beaten into the butter creates lift, which results in that signature puffy dome rather than a flat disc. Scrape down the sides of your bowl to ensure even mixing.

- Add your room-temperature egg to the creamed mixture and beat for about 1 minute until fully incorporated. The mixture should look slightly broken at first—this is normal. Add your vanilla extract and beat for another 30 seconds. You'll notice the mixture becoming smoother and more cohesive. This homogeneous texture is what allows the cookies to bake evenly.

- Now here's where technique matters for both texture and appearance: add your flour mixture in two additions rather than all at once. Add half, mixing on low speed just until you see no dry flour streaks. Scrape down your bowl completely—unmixed pockets of flour will create uneven browning. Add the remaining flour mixture and mix again briefly. Stop mixing as soon as the dough comes together. Overmixing develops gluten, which toughens the cookies and affects that tender crumb.

- Using a cookie scoop (about 2-tablespoon size), form dough balls and place them on your prepared baking sheet, spacing them about 2 inches apart. Uniformly sized dough balls are essential for uniform baking and that professional appearance. If you don't have a scoop, use two spoons to roughly divide the dough into 12-14 equal portions. Uniform cookies photograph beautifully and impress more than haphazard sizes.
- Bake for 8-11 minutes—timing depends on your oven's personality. Watch for the moment when the tops appear set and slightly crackled, but the center still jiggles very slightly when you gently shake the pan. The cookies will continue cooking on the residual heat of the baking sheet. Remove them too early and they'll be too soft to move; too late and they'll bake through completely, losing that signature fudgy center.
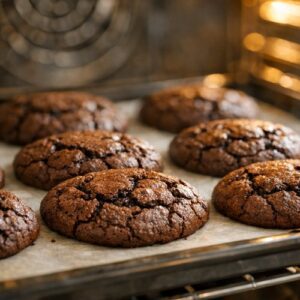
- Leave the cookies on the baking sheet for exactly 10 minutes—not less, not more. During this time, the residual heat sets the structure while the center remains soft. You'll see them firm up and potentially develop more surface cracks, which is exactly what you want. After 10 minutes, transfer them to a cooling rack to cool completely. This two-stage cooling process is what creates that perfect textural contrast between the set exterior and fudgy interior.
Notes
FAQs
Why Do My Cookies Spread Too Much or Not Spread Enough?
Spreading is controlled by butter temperature and ingredient proportions. If your cookies spread too much, your butter was too warm or your kitchen too hot. Slightly chill your dough and ensure your baking sheet is cool before portioning. If they barely spread, your flour was packed too densely—always spoon flour into measuring cups and level with a knife rather than scooping directly from the bag, which compresses the flour. Room temperature matters too; if your kitchen is cold, cookies spread less.
How Do I Get That Perfect Crackle on Top?
The crackle comes from the interaction between the set exterior and soft interior during baking. Ensure your oven is fully preheated (use an oven thermometer for accuracy), and resist opening the oven door during baking, which disrupts heat flow. The precise baking time of 8-11 minutes is crucial—this window is where the magic happens. If you’re not seeing cracks, your oven may be running cool. Invest in an oven thermometer; many home ovens run 25°F cooler or hotter than the dial indicates.
Can I Substitute the Egg?
Substitutions are tricky because eggs provide structure, emulsification, and moisture. If you need an egg-free version, use aquafaba (the liquid from canned chickpeas)—use 3 tablespoons of aquafaba per egg. The texture will be slightly different, less fudgy and more cakey, but still delicious. For vegan butter, use a 1:1 substitution, though the flavor complexity won’t be quite as deep.
Why Are My Cookies Cake-like Rather Than Fudgy?
Overworking the dough or using too much flour creates cake-like texture. The flour measurement matters enormously—spoon and level, don’t pack. Additionally, if you’re baking longer than 11 minutes, the cookies overbake. Aim for the lower end of the timing range if you want maximum fudginess. Also, ensure you’re not creaming the butter and sugar too long; 3-4 minutes is sufficient. Longer creaming incorporates too much air, creating a cakier crumb.
Can I Double This Recipe?
Absolutely. Simply double all ingredient amounts. However, when doubling the dough, divide it and work with one batch at a time rather than mixing everything together, which can cause overmixing. Also, space your cookies carefully on the baking sheet—they need 2 inches between centers to bake evenly. You may need to bake in batches. Consider doubling only to the point that fits your baking sheet, then repeating the process, rather than tripling or quadrupling, which becomes unwieldy.
More Visually Stunning Recipes
- Chocolate Chip Cookie Bites – Smaller format of chocolate indulgence for elegant entertaining
- my weeknight pasta – A savory showstopper with equally impressive visual appeal
- Sopa de Fideo – A rustic soup with beautiful layered presentation
Final Thoughts
There’s something sacred about food that nourishes both the eye and the soul simultaneously. These cacao cookies taught me that lesson in my grandmother’s kitchen decades ago. They’re proof that simplicity, when executed with intention and technique, creates something far more impressive than complexity ever could.
Every time you bake these cookies, you’re practicing the skill of presence. You’re timing precisely, watching carefully, honoring the process. That care translates to the final result in ways that recipes alone can’t capture. Your guests will taste it. They’ll see it in the glossy finish and the perfect dome, the generous cracks across the surface. They’ll feel the warmth of your intention in every bite.
That’s what cooking is really about—creating moments where people feel valued enough to warrant our time and attention. These cookies do exactly that, beautifully and accessibly, every single time.
Happy cooking!