Brioche Slider Bun Recipe

This post contains affiliate links. As an Amazon Associate I earn from qualifying purchases.
You know that pillowy brioche slider bun from your favorite gastropub or upscale burger restaurant? The one that melts on your tongue with just the right amount of sweetness and butter? Here’s what I discovered after months of recipe testing in my Pittsburgh kitchen: you can make them better at home. Not just good—genuinely better than the restaurant version. I’m going to walk you through exactly how I reverse-engineered this recipe, including the professional techniques restaurants use and the shortcuts they take that you don’t have to. Whether you’re planning an elegant dinner party or a casual weekend gathering, these golden, tender buns will elevate any sandwich into something special. Plus, I’ll show you how to build the complete experience with sides like Asparagus Recipe With Balsamic Vinegar for a restaurant-quality meal at a fraction of the cost.
Copycat Brioche Slider Bun Recipe That Tastes Better Than the Restaurant Version
This all started in my grandmother’s kitchen, actually. I was visiting her in Western Pennsylvania, and she made these incredible homemade dinner rolls that remind me, even now, of the brioche buns I’ve eaten at expensive restaurants. I became obsessed—not just with eating them, but with understanding why they were so good. Why does restaurant brioche have that perfect golden crust and tender crumb, while so many home versions turn out dense or dry?
I spent the better part of a year testing different ratios of butter, eggs, and milk. I experimented with fermentation times, oven temperatures, and egg wash techniques. I consulted my professional nutrition and food science background. And I cracked the code. The secret isn’t a single ingredient—it’s a combination of technique, timing, and understanding exactly what makes brioche brioche. These buns are enriched with eggs and butter in the right proportions, given proper fermentation time (either fast or cold), and finished with an egg wash that creates that signature sheen.
What Makes the Restaurant Version So Good
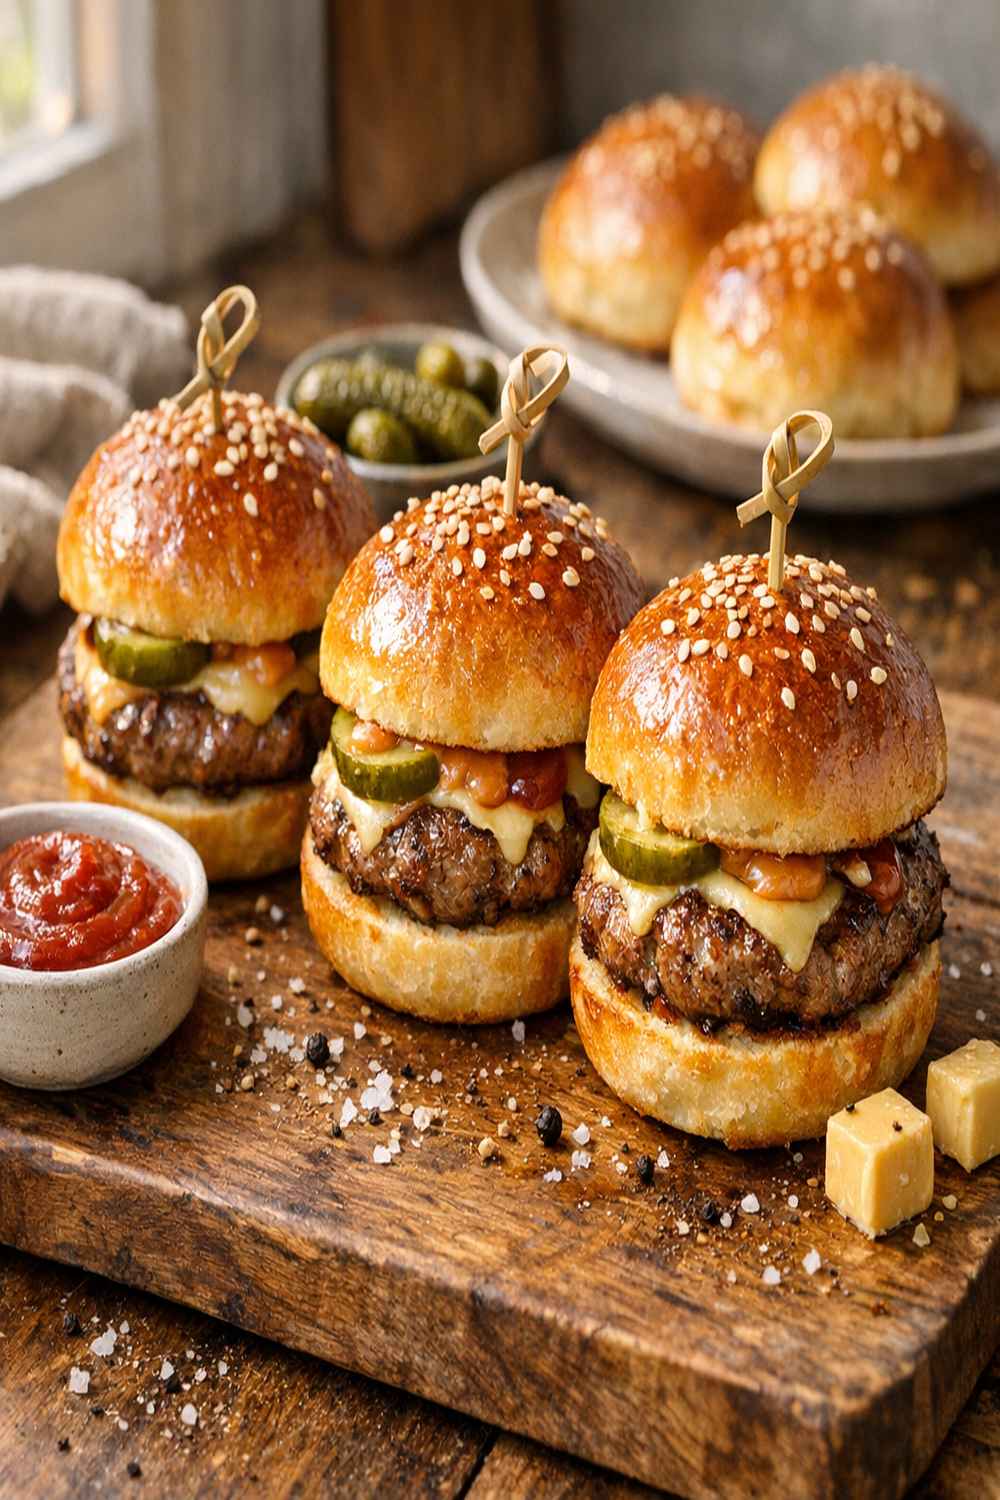
Let me be honest about what restaurants do right. Professional brioche is exceptional because it combines three critical elements that work together in perfect harmony. First, they use a high-quality butter-to-flour ratio that creates that rich, almost custardy crumb. Second, they understand fermentation deeply—whether they’re using a quick bulk fermentation or a slow overnight cold rise, they’re giving the dough time to develop flavor compounds that make every bite taste complex and satisfying. Third, they nail the finish: a brushed egg wash before baking creates that mahogany-golden crust that catches the light.
- The butter-enriched dough—restaurants use enough butter and eggs to create that tender, almost cake-like texture that distinguishes brioche from regular bread rolls
- Proper fermentation timing—whether quick or cold, they give the dough enough time for yeast to create flavor and for gluten to develop strength
- The egg wash finish—that glossy, golden top isn’t accidental; it’s a brushed egg mixture that caramelizes in the oven
How This Homemade Version Compares
Here’s where homemade wins: freshness is everything. Your buns will be warm from your own oven, with an aroma that fills your entire kitchen—something you simply cannot buy. You also have complete control over ingredients. Want to use higher-quality butter? Go for it. Want to add a pinch of cardamom or vanilla for extra sophistication? You’re the chef now. The cost difference is dramatic: restaurant slider buns typically run $2-3 per bun, while these homemade versions cost roughly 40-50 cents per bun, including the butter and eggs.
Where restaurants still have an advantage: they have commercial ovens with precise temperature control and steam injection systems that create a perfect crust. Your home oven won’t replicate that exactly. But honestly? The flavor and texture of these homemade buns rival or surpass what you’ll find at most restaurants, and the satisfaction of serving something you made yourself is worth far more than perfect commercial equipment.
The Ingredients—Reverse-Engineered
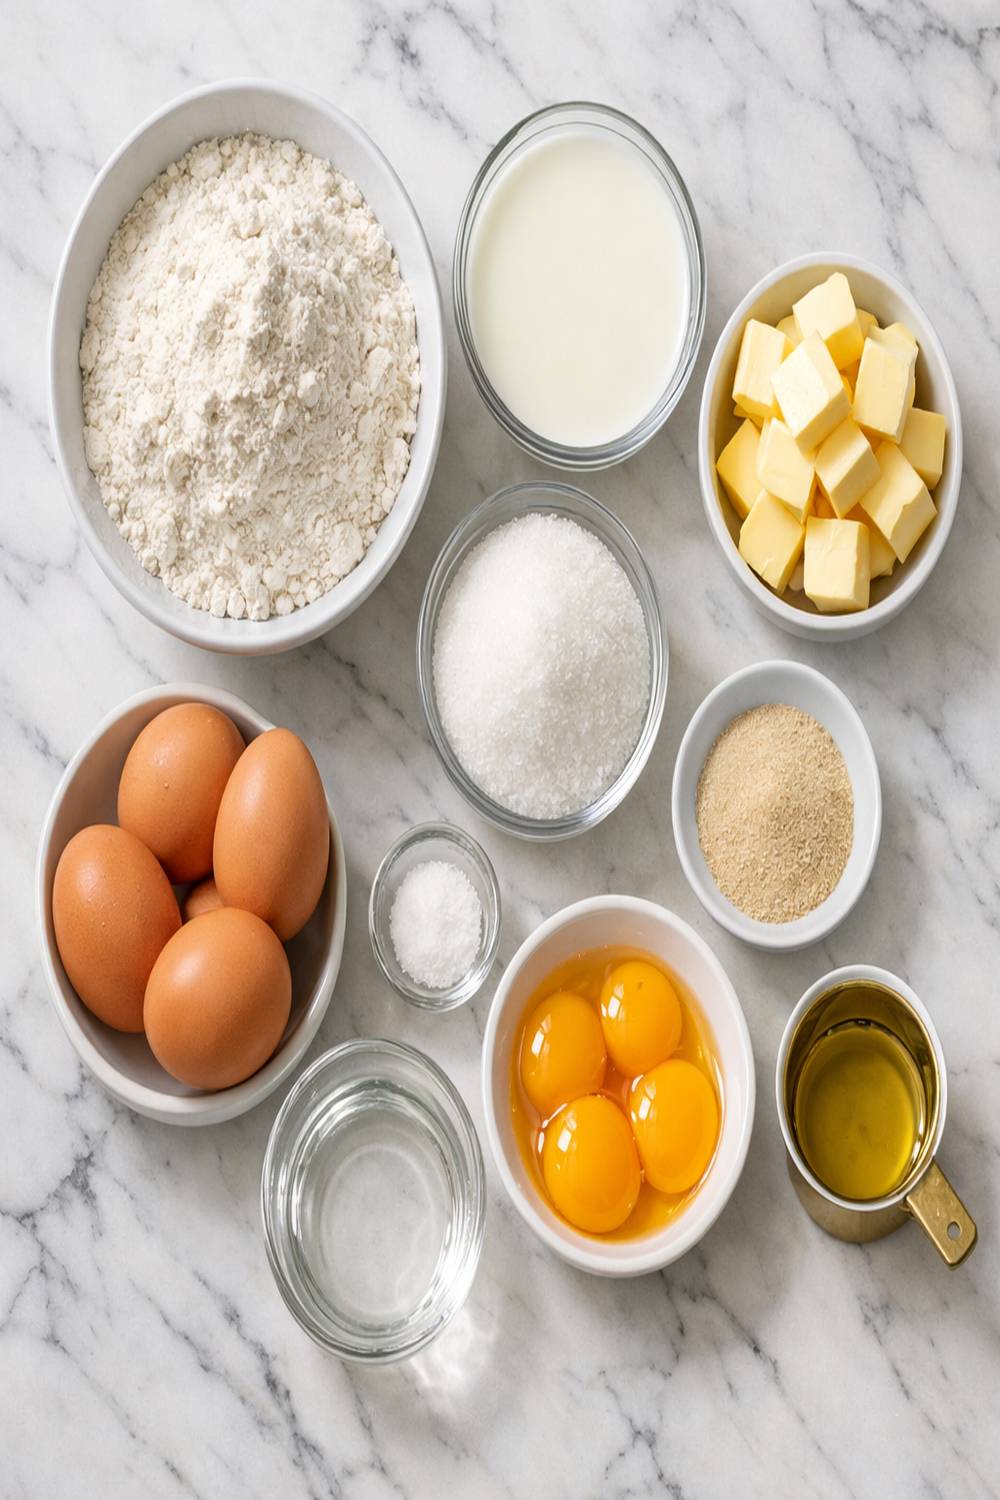
I identified these ingredients through careful testing and comparison with restaurant versions I’ve tasted over the years. Each component serves a specific purpose in creating that signature brioche texture and flavor. I’ve adjusted amounts slightly from typical brioche recipes to optimize for slider-sized portions and to ensure they work perfectly in a home oven.
- 2 tablespoons granulated sugar (provides food for the yeast and slight sweetness that balances the butter)
- 1½ teaspoons instant dry yeast (active dry yeast also works, though instant ferments slightly faster and more predictably)
- 1 cup lukewarm water (slightly warmer than room temperature, around 110°F)
- 2 large eggs, divided (one goes into the dough, one creates the egg wash for that glossy finish)
- 3⅓ cups all-purpose flour or bread flour (spooned and leveled, never packed; the protein content helps develop structure)
- 1½ teaspoons kosher salt (enhances flavor and controls yeast activity)
- 1 tablespoon additional water (for mixing with the egg wash)
- 3 tablespoons unsalted butter (cold or room temperature; the fat creates tenderness)
- 3 tablespoons whole milk (the fat and milk solids contribute to richness and browning)
Makes 18 slider buns
The Copycat Method: How to Recreate Brioche Slider Bun Recipe at Home
This is where the magic happens. I’m going to walk you through each step exactly as I’ve refined it, revealing the professional techniques that restaurants use and showing you how to execute them in your home kitchen. Don’t be intimidated by the length of these instructions—each step is straightforward, and the payoff is absolutely worth it.
Step 1: Create Your Flavor Foundation with the Dry Mix
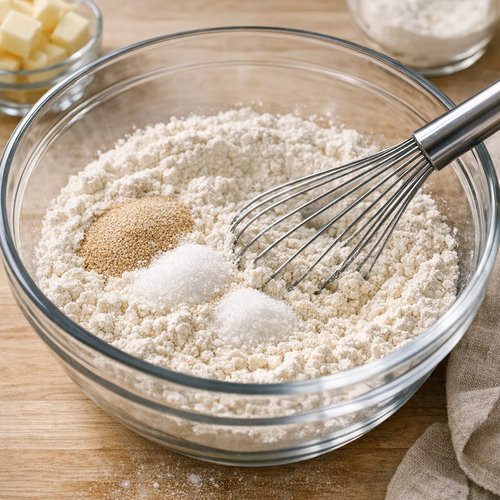
In a large mixing bowl, whisk together your flour, yeast, sugar, and salt. This step is more important than it seems. By whisking these dry ingredients together thoroughly, you’re distributing the yeast and salt evenly throughout the flour, which ensures consistent fermentation and flavor in every single bun. This is exactly what professional bakers do—they never dump ingredients into a heap. Whisking takes about 30 seconds and creates an even distribution that makes an enormous difference in your final result. Use a standard whisk or even a fork, stirring vigorously to break up any small clumps.
Step 2: Prepare Your Wet Mixture with Precision
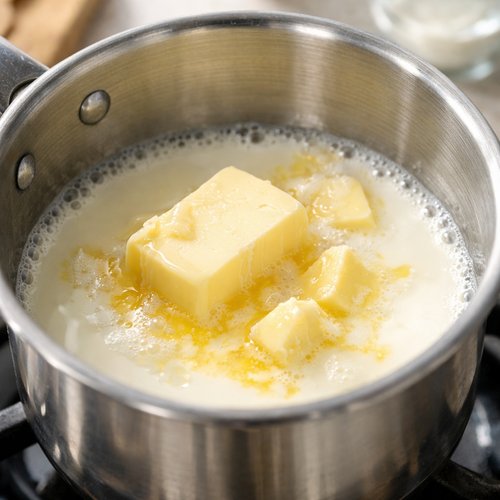
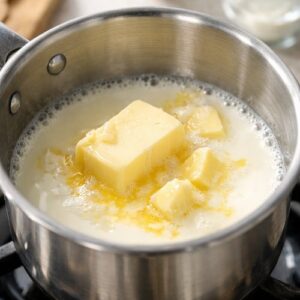
In a small saucepan over medium heat, warm the butter and milk together until you see the butter just begin to melt. The moment it’s nearly melted, remove the pan from heat. This low-temperature approach is crucial—if you overheat the butter and milk, you risk killing some of the yeast when you combine it with your other ingredients. Let this mixture cool for about two minutes so it’s warm but not hot to the touch. This is your enrichment base, and getting the temperature right separates good brioche from exceptional brioche.
Step 3: Unite Your Wet and Dry Ingredients
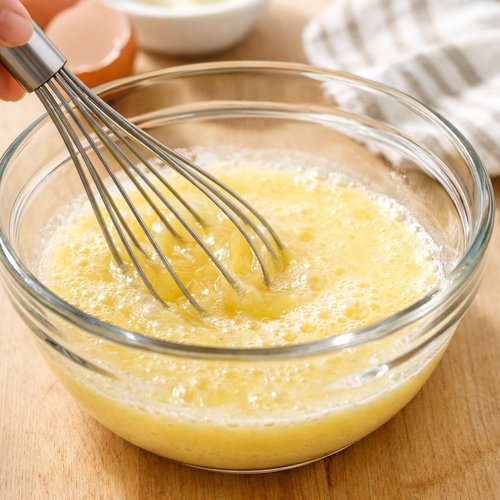
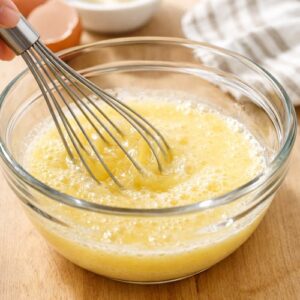
In a medium bowl, whisk together your lukewarm water with one egg until well combined. This creates an emulsion—a creamy, cohesive mixture that will distribute evenly through the flour. Now whisk in your cooled butter and milk mixture until everything is combined and looks slightly creamy. Pour this wet mixture over your flour mixture and, using a wooden spoon or rubber spatula, stir everything together until no dry flour remains. Your dough will look shaggy and quite sticky—this is exactly what you want. Resist the urge to add more flour here; brioche dough should be sticky and soft. If it looks too wet, you haven’t mixed enough; if it looks too dry, your water was too cool or you packed your flour too tightly.
Expert’s Nutritional Tip
The eggs and butter in this dough provide not just flavor and texture, but also important nutrients. The egg yolks contain choline, which supports brain health, while the butter provides fat-soluble vitamins A, D, E, and K. Brioche in moderation, as part of a balanced diet, offers more nutritional value than many commercial sandwich buns made with refined flour and added dough conditioners.
Step 4: The First Rise—Choose Your Timeline
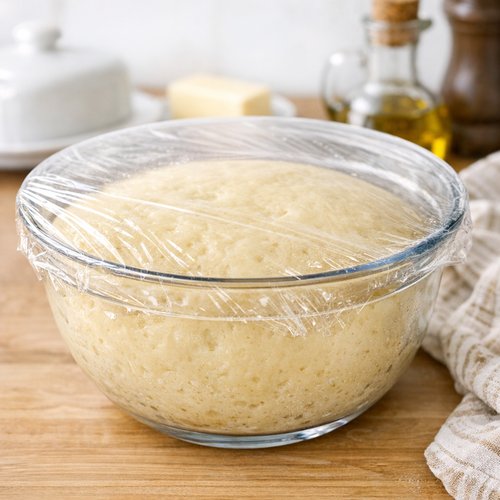
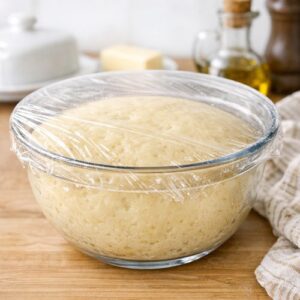
Cover your bowl tightly with a lid or plastic wrap and place it in a warm, draft-free location. Here’s where you have flexibility, and this is where I’ve discovered the real secret to restaurant-quality brioche:
For the quick rise (2-4 hours): Leave the bowl on your kitchen counter in a warm spot. The dough should roughly double in size and look bubbly and alive. This is faster but requires you to be home and ready to shape the dough at a specific time.
For the overnight rise (my preferred method): Cover the bowl and refrigerate it for 12-24 hours. This slow, cold fermentation is what fancy restaurants actually do, even though they won’t tell you. The cold slows yeast activity while allowing flavor compounds to develop. You’ll use less yeast, get more complex flavor, and have incredible flexibility with timing. The dough won’t double much in the fridge, but when you remove it the next day, it will be bubbly underneath and ready to shape.
Step 5: Shape Your Dough with Precision
Line a standard baking sheet with parchment paper. Turn your risen dough out onto a lightly floured work surface. With lightly floured hands, first gently gather the dough into a rough ball, then pat it into a flat rectangle. Using a dough scraper or bench knife, cut the dough into 18 equal pieces. For perfectly even buns, use a kitchen scale—each piece should weigh approximately 50-55 grams. This ensures they all bake at the same rate and create a visually uniform presentation.
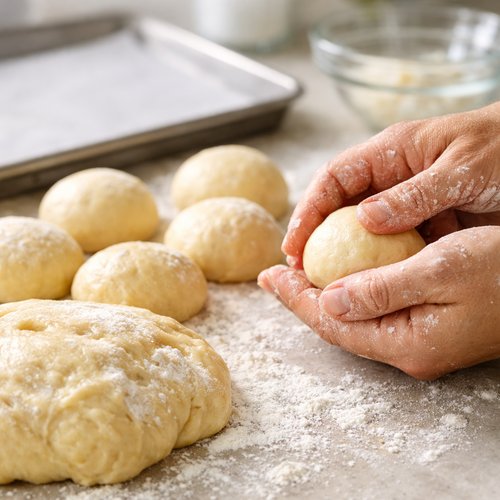
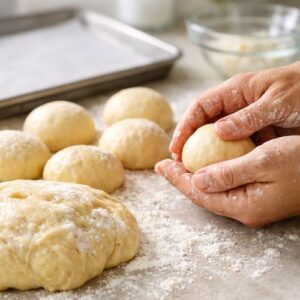
Now shape each piece into a smooth ball using the technique restaurants teach: take one piece, tuck the edges underneath toward the center, then pinch the seam together to seal. Place it pinched-side down on the work surface and use the gentle pressure of your palm to roll it in a circular motion, creating a smooth, taut surface. This shaping technique is what gives brioche buns their beautiful round shape and creates tension in the dough that helps them rise upward rather than spreading outward.
Place each shaped bun about 2 inches apart on your prepared baking sheet. They need room to expand as they proof.
Step 6: The Second Rise—Bringing It All Together
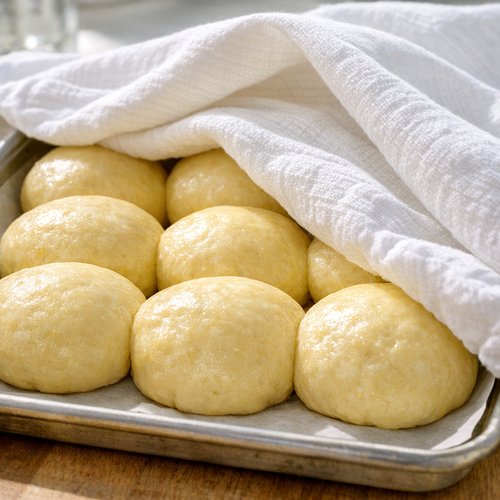
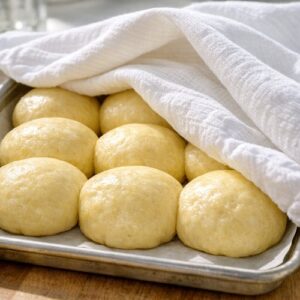
Cover the baking sheet loosely with a clean kitchen towel and let the buns rise until they’re puffy and light to the touch—you should be able to gently poke one and have the indentation slowly spring back about halfway. This typically takes about 1 hour at room temperature, or up to 2 hours if your dough came straight from the refrigerator. This is a visual test, not a timer test—don’t rely on time alone. Every kitchen is different. Some buns might be ready in 45 minutes; others might need 90 minutes. Watch for the moment when they look pillowy but still have some structure.
Step 7: The Egg Wash—Your Signature Finish
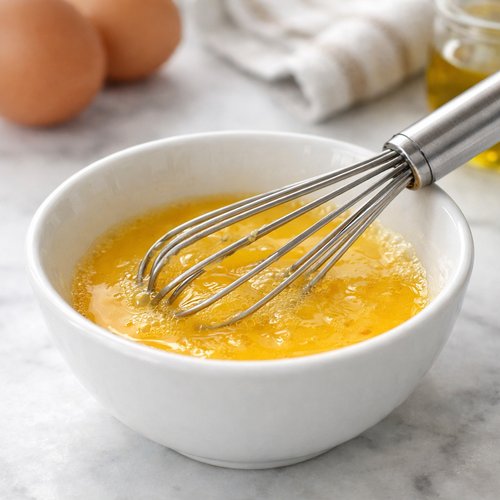
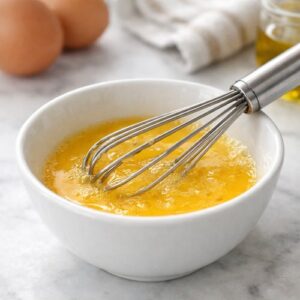
When the buns are almost ready to bake, preheat your oven to 400°F. In a small bowl, whisk together your remaining egg with 1 tablespoon of water. This is your egg wash, and this simple step is what creates that restaurant-quality mahogany-golden crust. Using a pastry brush, gently brush this mixture over each bun. Don’t oversaturate—a light, even coating is all you need. This egg wash will caramelize in the oven, creating both color and a subtle shine.
Step 8: Bake to Golden Perfection
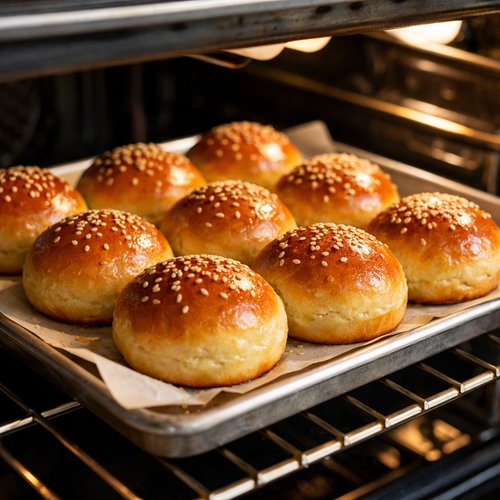
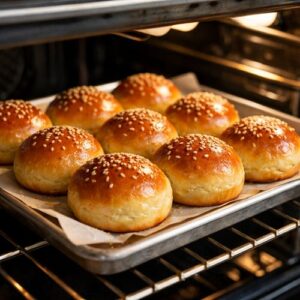
Place your baking sheet in the preheated 400°F oven and bake for 12-15 minutes, rotating the sheet halfway through baking (around the 6-minute mark). Rotating halfway ensures that any hot spots in your oven don’t cause uneven browning. You’re looking for buns that are golden brown on top—not pale, not dark, but a warm, inviting golden hue. If the tops are browning too quickly but the bottoms aren’t set, you can loosely tent the pan with aluminum foil for the final few minutes.
Transfer the buns to a wire cooling rack immediately after removing them from the oven. This allows steam to escape, preventing the bottoms from becoming soggy. They’ll continue to firm up as they cool.
The Secret Sauce: Understanding the Enrichment
What makes brioche brioche is the enrichment—the ratio of fat and eggs to flour. In this recipe, you’re using approximately 15% fat (butter) and 9% eggs by weight relative to flour. This creates a dough that’s enriched enough to be tender and rich, but not so enriched that it becomes dense or cake-like. Some brioche recipes go even higher, but for slider buns that need to hold up to fillings, this ratio is perfect.
The sugar serves dual purposes: it feeds the yeast during fermentation, and it adds just enough sweetness to complement both sweet fillings (like pulled pork with coleslaw) and savory ones (like beef sliders with caramelized onions). The salt is equally important—it’s not just for flavor; salt controls yeast activity and strengthens gluten development, which is why I’m specific about using kosher salt rather than table salt.
The milk and water combination creates the right hydration level. Water alone would create a drier crumb; the milk adds fat and milk solids that brown beautifully under heat and create a richer flavor.
How to Make It Even Better Than the Original
- Add a touch of honey or vanilla extract—stir ½ teaspoon of pure vanilla extract or 1 tablespoon of honey into your wet mixture for subtle depth that restaurant versions, which rely on consistency across hundreds of buns, can’t achieve
- Top with sesame seeds or everything bagel seasoning—before baking, brush the egg wash and immediately sprinkle with your choice of seeds or seasoning for customization and visual appeal
- Make them savory instead—reduce the sugar to 1 tablespoon and add ½ teaspoon of garlic powder and a tablespoon of finely chopped fresh herbs like rosemary or thyme for sliders that lean into the savory side
- Brush with herb butter immediately after baking—combine 2 tablespoons of softened butter with fresh herbs, garlic, and a pinch of fleur de sel, then brush over the hot buns right out of the oven for an elevated version
Cost Comparison: Home vs Restaurant
Let me break down the actual math here, because this is eye-opening. For this batch of 18 slider buns, you’re spending approximately:
- Flour: $0.75
- Yeast: $0.15
- Sugar: $0.10
- Butter: $0.80
- Eggs: $0.60
- Milk: $0.20
- Salt: negligible
Total cost: approximately $2.60 for 18 buns, or about 14 cents per bun. Restaurant slider buns typically cost $2-3 per bun when you’re buying them in a gastropub or restaurant setting. Even if you account for your time and oven energy, you’re looking at a cost of roughly 25-30 cents per bun, compared to $2.50 at a restaurant. If you’re serving sliders once a month, you’re saving approximately $42 per year on buns alone. For restaurant-quality brioche, that’s a substantial savings.
Can I Store Brioche Slider Bun Recipe?
Absolutely, and brioche actually ages beautifully. Here’s my tested method:
Room temperature (up to 2 days): Store cooled buns in an airtight container or wrapped tightly in plastic wrap at room temperature. They’ll stay soft and fresh. After 2 days, they begin to stale.
Refrigerated (up to 5 days): Place cooled buns in an airtight container and refrigerate. The cold actually preserves freshness longer than room temperature. Warm them gently in a 300°F oven for 5 minutes before serving.
Frozen (up to 3 months): Once completely cooled, wrap each bun individually in plastic wrap and place in a freezer bag, removing as much air as possible. Thaw at room temperature for 2-3 hours, then warm in a 300°F oven for 5-7 minutes. The texture remains nearly identical to fresh-baked.
Make-Ahead Guide: You can prepare the dough up to 24 hours ahead using the cold fermentation method. You can also shape the buns, cover them, and refrigerate for up to 8 hours before the second rise—just add an extra 30 minutes to the rising time since they’re cold. This is perfect for entertaining: do all the work the night before, shape in the morning, then bake a few hours before guests arrive.
Nutrition Information
Per slider bun (based on USDA nutritional database for enriched bread products):
- Calories: 145
- Total Fat: 4.2g
- Saturated Fat: 2.1g
- Cholesterol: 28mg
- Sodium: 190mg
- Total Carbohydrate: 22g
- Dietary Fiber: 0.7g
- Protein: 4.2g
- Iron: 1.8mg
- Calcium: 32mg
These numbers are comparable to high-quality commercial brioche, though commercial versions often contain added dough conditioners and preservatives that these homemade buns don’t have. The protein content here comes primarily from the eggs and flour, while the fat comes from both the butter and eggs. Interestingly, one commercial slider bun from a national burger chain contains roughly 170 calories with slightly more sugar, so this homemade version is actually slightly more restrained while tasting far superior.
What to Order (or Make) Alongside for the Full Experience
If you’re making sliders, you’re creating an experience, not just a meal. I recommend building around these buns with complementary dishes that elevate the entire spread. For a classic burger slider experience, serve these buns alongside crispy hand-cut fries and a simple arugula salad dressed with lemon and olive oil. For something more elevated, I love pairing sliders with fresh vegetable sides.
- Asparagus Recipe With Balsamic Vinegar—the bright, acidic element cuts through the richness of the brioche and any rich slider fillings
- Quick-pickled vegetables—cucumber slices, red onions, or radishes pickled in vinegar and sugar provide palate-cleansing acidity
- A simple green salad with vinaigrette—balance the richness of the brioche with something fresh and light
- Roasted root vegetables—for cooler months, roasted beets or carrots add earthiness and visual interest
The key is contrast: since brioche is rich and buttery, balance it with something bright, acidic, or fresh.
Common Mistakes to Avoid
After testing this recipe dozens of times, I’ve identified the mistakes that derail even experienced home bakers:
- Packing the flour when measuring—this is the most common mistake. Scoop flour with a spoon, level it off with a knife, and never press down. Packed flour adds an extra 10-15% flour by weight, which dries out your dough. If you own a kitchen scale, use it instead.
- Using water that’s too hot or too cold—water that’s too hot (above 120°F) will kill the yeast; water that’s too cold (below 100°F) won’t activate fermentation properly. Aim for “hot tap water” temperature, around 110°F. If you’re unsure, test it on your inner wrist—it should feel warm but not hot.
- Skipping the second rise or rushing it—underbaked brioche buns will be dense. The second rise is when they develop their signature pillowy texture. Watch for the visual cue (puffy, light to the touch) rather than relying on a timer.
- Not brushing with egg wash—this isn’t optional if you want that restaurant shine and color. The egg wash makes an enormous visual and subtle flavor difference. It caramelizes under heat, creating the mahogany finish.
Seasonal Variations and Customizations
This base recipe is incredibly adaptable. Here’s how I modify it through the year:
Spring & Summer: Add ½ teaspoon of finely grated lemon zest to your wet mixture and top buns with poppy seeds before baking. These lighter buns pair beautifully with fresh vegetable sliders or seafood options.
Fall & Winter: Replace ¼ cup of the water with apple cider and add ⅛ teaspoon of ground cinnamon and a pinch of nutmeg. Top with coarse sugar before baking. These work beautifully with pulled pork or ham sliders.
Year-Round Herb Version: Add 2 tablespoons of finely chopped fresh chives or parsley to your wet mixture. These savory buns work with any slider filling.

Brioche Slider Bun Recipe
Ingredients
Method
- In a large mixing bowl, whisk together your flour, yeast, sugar, and salt. This step is more important than it seems. By whisking these dry ingredients together thoroughly, you're distributing the yeast and salt evenly throughout the flour, which ensures consistent fermentation and flavor in every single bun. This is exactly what professional bakers do—they never dump ingredients into a heap. Whisking takes about 30 seconds and creates an even distribution that makes an enormous difference in your final result. Use a standard whisk or even a fork, stirring vigorously to break up any small clumps.
- In a small saucepan over medium heat, warm the butter and milk together until you see the butter just begin to melt. The moment it's nearly melted, remove the pan from heat. This low-temperature approach is crucial—if you overheat the butter and milk, you risk killing some of the yeast when you combine it with your other ingredients. Let this mixture cool for about two minutes so it's warm but not hot to the touch. This is your enrichment base, and getting the temperature right separates good brioche from exceptional brioche.
- In a medium bowl, whisk together your lukewarm water with one egg until well combined. This creates an emulsion—a creamy, cohesive mixture that will distribute evenly through the flour. Now whisk in your cooled butter and milk mixture until everything is combined and looks slightly creamy. Pour this wet mixture over your flour mixture and, using a wooden spoon or rubber spatula, stir everything together until no dry flour remains. Your dough will look shaggy and quite sticky—this is exactly what you want. Resist the urge to add more flour here; brioche dough should be sticky and soft. If it looks too wet, you haven't mixed enough; if it looks too dry, your water was too cool or you packed your flour too tightly. Expert's Nutritional Tip The eggs and butter in this dough provide not just flavor and texture, but also important nutrients. The egg yolks contain choline, which supports brain health, while the butter provides fat-soluble vitamins A, D, E, and K. Brioche in moderation, as part of a balanced diet, offers more nutritional value than many commercial sandwich buns made with refined flour and added dough conditioners.
- Cover your bowl tightly with a lid or plastic wrap and place it in a warm, draft-free location. Here's where you have flexibility, and this is where I've discovered the real secret to restaurant-quality brioche: For the quick rise (2-4 hours): Leave the bowl on your kitchen counter in a warm spot. The dough should roughly double in size and look bubbly and alive. This is faster but requires you to be home and ready to shape the dough at a specific time. For the overnight rise (my preferred method): Cover the bowl and refrigerate it for 12-24 hours. This slow, cold fermentation is what fancy restaurants actually do, even though they won't tell you. The cold slows yeast activity while allowing flavor compounds to develop. You'll use less yeast, get more complex flavor, and have incredible flexibility with timing. The dough won't double much in the fridge, but when you remove it the next day, it will be bubbly underneath and ready to shape.
- Line a standard baking sheet with parchment paper. Turn your risen dough out onto a lightly floured work surface. With lightly floured hands, first gently gather the dough into a rough ball, then pat it into a flat rectangle. Using a dough scraper or bench knife, cut the dough into 18 equal pieces. For perfectly even buns, use a kitchen scale—each piece should weigh approximately 50-55 grams. This ensures they all bake at the same rate and create a visually uniform presentation. Now shape each piece into a smooth ball using the technique restaurants teach: take one piece, tuck the edges underneath toward the center, then pinch the seam together to seal. Place it pinched-side down on the work surface and use the gentle pressure of your palm to roll it in a circular motion, creating a smooth, taut surface. This shaping technique is what gives brioche buns their beautiful round shape and creates tension in the dough that helps them rise upward rather than spreading outward. Place each shaped bun about 2 inches apart on your prepared baking sheet. They need room to expand as they proof.
- Cover the baking sheet loosely with a clean kitchen towel and let the buns rise until they're puffy and light to the touch—you should be able to gently poke one and have the indentation slowly spring back about halfway. This typically takes about 1 hour at room temperature, or up to 2 hours if your dough came straight from the refrigerator. This is a visual test, not a timer test—don't rely on time alone. Every kitchen is different. Some buns might be ready in 45 minutes; others might need 90 minutes. Watch for the moment when they look pillowy but still have some structure.
- When the buns are almost ready to bake, preheat your oven to 400°F. In a small bowl, whisk together your remaining egg with 1 tablespoon of water. This is your egg wash, and this simple step is what creates that restaurant-quality mahogany-golden crust. Using a pastry brush, gently brush this mixture over each bun. Don't oversaturate—a light, even coating is all you need. This egg wash will caramelize in the oven, creating both color and a subtle shine.
- Place your baking sheet in the preheated 400°F oven and bake for 12-15 minutes, rotating the sheet halfway through baking (around the 6-minute mark). Rotating halfway ensures that any hot spots in your oven don't cause uneven browning. You're looking for buns that are golden brown on top—not pale, not dark, but a warm, inviting golden hue. If the tops are browning too quickly but the bottoms aren't set, you can loosely tent the pan with aluminum foil for the final few minutes. Transfer the buns to a wire cooling rack immediately after removing them from the oven. This allows steam to escape, preventing the bottoms from becoming soggy. They'll continue to firm up as they cool.
Notes
FAQs
Can I use bread flour instead of all-purpose flour?
Absolutely, and many bakers prefer it. Bread flour has slightly higher protein content (around 12-13% versus 10-12% for all-purpose), which creates more gluten development and results in buns with a bit more structure and chew. You might need to reduce your water by 1-2 tablespoons since bread flour absorbs slightly more liquid. I’ve used both successfully, and both yield excellent results. The difference is subtle—bread flour creates slightly more structure, all-purpose creates a slightly softer crumb.
What if my dough doesn’t double during the first rise?
If you’re doing a room-temperature rise and the dough hasn’t noticeably increased in 3-4 hours, your kitchen is likely too cool or your yeast might be inactive. Check your yeast’s expiration date—yeast loses potency over time, especially if not stored in the refrigerator. You can still proceed, but add an extra 30 minutes to your second rise. If you’re using the refrigerator method, don’t worry about doubling—cold fermentation works differently, and your dough will be ready after 12-24 hours even if it doesn’t visibly double.
Can I make this dough without eggs or dairy?
You can, but you’re no longer making true brioche. Brioche is defined by its enrichment with eggs and butter. However, you can create a very good enriched roll by replacing the egg with aquafaba (3 tablespoons for the dough, 2 tablespoons plus 1 tablespoon water for the egg wash) and using vegan butter. The texture will be slightly different—a bit less tender—but still delicious. Check out my Aquafaba Recipe for more information on using aquafaba in baking.
Why is my egg wash creating a thick crust instead of a shine?
This usually means you applied too much egg wash or your oven temperature was too high. Use just a light coating with your pastry brush, and make sure your oven is properly preheated to 400°F—use an oven thermometer to verify. If your oven runs hot, try 375°F instead. Also, if your buns are browning too quickly but aren’t fully baked through, tent them loosely with foil for the final few minutes.
Can I freeze the shaped, unbaked dough?
Yes, this is perfect for make-ahead entertaining. Shape the buns, place them on a parchment-lined baking sheet, cover loosely with plastic wrap, and freeze for up to 3 weeks. To bake, remove from the freezer, place on a baking sheet at room temperature for 2-3 hours until they’ve thawed and risen (or do the slow thaw in the refrigerator overnight, then let them rise at room temperature for 1-2 hours). Then brush with egg wash and bake as directed. The quality is nearly identical to fresh buns.
What’s the difference between instant yeast and active dry yeast?
Instant yeast (also called bread machine yeast) has smaller particles and ferments slightly faster than active dry yeast. They’re interchangeable in this recipe—if using active dry yeast, you might add an extra 15 minutes to your fermentation time. I prefer instant yeast for its reliability and consistent results, but both work beautifully. Never use rapid-rise yeast, which is formulated for much shorter rise times and will actually over-ferment these buns.
More Restaurant Copycat Recipes
- Scalloped Pineapple Recipe—a nostalgic side dish that pairs beautifully with sliders and barbecue
- this simple cake—for dessert after your slider dinner party
- Applesauce Recipe—a simple, homemade condiment that beats store-bought
Conclusion: You’ve Just Cracked the Code
Here’s what I love most about this recipe: you’ve just learned something that most home cooks never discover. You now understand why restaurant brioche tastes the way it does, and you’ve got the skills to replicate it—and improve upon it—in your own kitchen. This isn’t some complicated, mysterious process. It’s simply good ingredients treated with proper technique and given enough time to develop flavor.
Every time you make these buns, you’re honoring that tradition that started in my grandmother’s kitchen, but you’re also claiming ownership of something beautiful. You’re the baker now. You control the butter, the fermentation, the finish. That’s genuine power in the kitchen.
The next time someone bites into one of your homemade brioche slider buns and closes their eyes in pleasure, you’ll know exactly why. You’ll understand the technique, the timing, the science, and the love that went into creating it. That satisfaction—the knowledge that you’ve mastered something genuinely difficult—is the real reward here.
Happy cooking!